Italian Easter Pie

March 26, 2016

IMG_4651

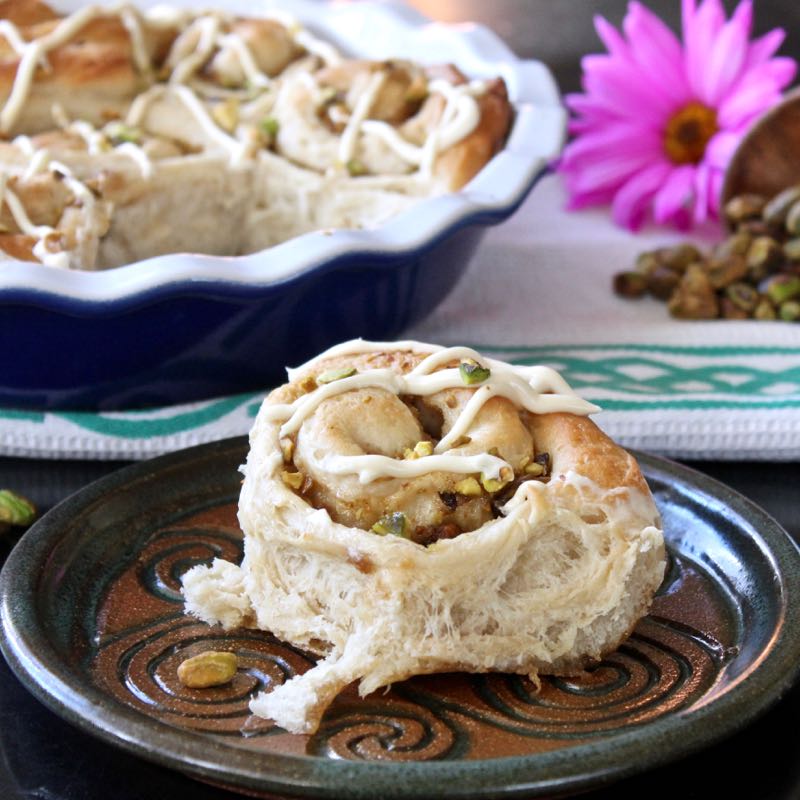
Easter preparations are in full swing in the Runcible Kitchen here. And the star of the show is this Italian Easter Pie! Yesterday I made my traditional Apple & Cinnamon Hot Cross Buns. Good Friday just wouldn’t be the same without them!

IMG_2431

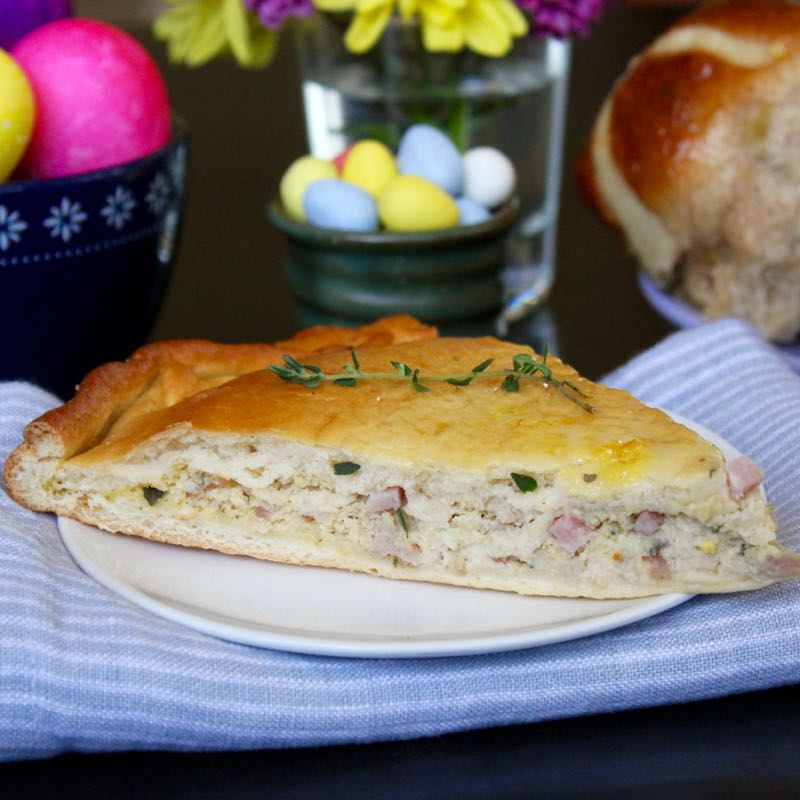
And as for today, it was time to try out a new recipe. And I think this one will be making frequent reappearances. Behold this fantastic Italian Easter Pie!

IMG_4649

What we’ve got here is basically an Easter Calzone or “stuffed pizza” filled with smoked ham, hard-boiled eggs and cheese. Traditionally it is eaten in Italian households the day before Easter, but would certainly be welcome on any Easter Brunch table and would also be a great recipe to keep on hand should you have any extra hard-boiled eggs lingering around after the holiday.

IMG_4711

I found this recipe on the King Arthur Flour blog. Rather, I should say I was looking over various Easter bread recipes, trying to pick one to make. Last year I had made Slovak Paska Bread

IMG_2710

and was very happy with the results, so I thought I’d stick with the bread theme. I had pretty much decided on the Polish Babka. But then the Husband happened along and saw the Italian Easter Pie recipe and he was smitten. He loves eggs. Loves them. Could eat them everyday. Prepared anyway. Never gets tired of them. And we had just received an order of King Arthur Italian Style Flour that we were going to try out with a new pizza dough recipe. Sooo….his choice was clear and I got busy making the Italian Easter Pie.  Now I will say, this recipe makes two 12″ Easter Pies. It will serve a whole lot of folks! Apparently there are as many variations on Italian Easter Pie recipes as there are Italian households out there. Everyone has a family favorite. Whilst this pie has fairly mild flavorings (that is why it is important that you use good quality, flavorful ham), I also ran across a recipe that uses a lot of spicier meats, like sausage, pancetta, and salami which looked great. (I’m keeping that one a secret for now to perhaps surprise the Husband with later.)

IMG_4704

I was very happy with how this Easter treat turned out. The crust is light and thin, and I will mention that the Italian Style flour was really easy to work with and roll out.

IMG_4656

The savory filling was perfect, hearty yet not heavy or dense. Italian Easter Pie is generally served warm or at room temperature. And though it is usually enjoyed for brunch or breakfast, I think it would also be great for dinner along with a side salad. Rustic, homey and delicious, this Italian Easter Pie would be perfect for all of your Easter holiday celebrations!

IMG_4680

Italian Easter Pie

  • Servings: 2 - 12
  • Difficulty: easy
  • Print

recipe slightly adapted from: King Arthur Flour

Ingredients:

For the Crust:

  • 5 cups (539 grams) King Arthur Italian Style Flour or 4 3/4 cups (566.9 grams) King Arthur Unbleached All-Purpose Flour
  • 2 teaspoons salt
  • 2 teaspoons instant yeast
  • 2 tablespoons (25 grams) sugar
  • 6 tablespoons (43 grams) nonfat dry milk
  • 1/4 cup (50 grams) olive oil
  • 1 cup + 2 tablespoons (255 grams) lukewarm water (90° F – 100°F)*
  • *If you use all-purpose flour, increase the water to 1 1/2 cups (12 ounces)

For the Filling:

  • 1 dozen large eggs
  • 1 pound good-quality, full-flavored ham
  • 2 cups (425 to 454 grams) ricotta cheese, part-skim preferred
  • 1 cup (113 grams) freshly grated Parmesan cheese, lightly packed
  • 2 Tablespoons fresh thyme (leaves only)
  • 2 teaspoons Penzey’s Pasta Sprinkle (optional – it is a blend of sweet basil, turkish oregano, thyme & garlic)
  • salt, coarsely ground black pepper, and chopped fresh parsley, to taste

For the Glaze:

  • 1 large egg
  • 2 Tablespoons (25 grams) sugar
  • Maldon Flaky Sea Salt to sprinkle on edge of crust (optional)

Directions:

Mix and knead together all of the dough ingredients — by hand, in a mixer, or in a bread machine — until you’ve made a soft, smooth dough. 

Place the dough in a lightly greased bowl, cover, and allow it to rise for 1 to 2 hours, until it’s quite puffy, nearly doubled in bulk. While the dough is rising, make the filling.

Hard-boil and peel 6 of the eggs. 

Place the hard-boiled eggs, ham (cut in chunks), and fresh thyme in the work bowl of a food processor. Process until chopped and combined. Don’t over-process; the ham and eggs should still be a bit chunky. You can also simply dice the eggs and ham, and chop the thyme, if you don’t have a food processor.

Combine the ham, boiled eggs, and thyme with the raw eggs, ricotta, and Parmesan. Season to taste with salt and about 1/2 teaspoon coarsely ground black pepper. Add the Pasta Sprinkle if you are using it.

Deflate the dough, and divide it into four pieces. 

Roll two of the dough pieces into rounds about 13″ in diameter, and place them on lightly greased or parchment-lined 12″ pizza pans. Or roll into ovals about 10″ x 14″, and place on two lightly greased or parchment-lined baking sheets. Note: If you’re using parchment, it’s easiest to roll right on the parchment, then lift the crusts, parchment and all, onto the pans. I actually baked these pies on a pizza stone which I preheated in the oven. So I simply rolled the crusts out and assembled the pies on parchment paper. Then I transferred the pies to the heated stone on a pizza peel or paddle.

Divide the filling evenly between the two crusts, covering them to within 1″ of their edges. You’ll use a generous 3 cups (about 27 ounces) for each crust.

Roll out the other two pieces of dough, and place them atop the filled crusts, gently stretching them, if necessary, to cover the filling. Seal the crust edges by rolling the bottom crust up over the top, and pinching together.

Using a sharp knife or pair of scissors, cut a 1″ hole in the very center of each top crust; this will allow steam to escape.

Make the topping by whisking together the egg and sugar until the sugar has dissolved. Paint each crust with some of the topping; this will yield a golden brown, shiny crust with mildly sweet flavor, a perfect foil for the salty ham. Sprinkle flaky sea salt on the rolled edge of the dough.

Allow the pies to rest while you preheat your oven to 350°F, about 15 minutes. They don’t need to be covered.

Bake the pies for about 25 – 35 minutes, until they’re a deep, golden brown. Remove them from the oven, and carefully slide them off the pan/parchment and onto on a rack to cool. 

Serve warm or at room temperature. Refrigerate any leftovers.

Enjoy!

Italian Easter Pie brought to you by: Runcible Eats (www.leaandjay.com)

Links to Useful Kitchen Tools & Ingredients for Italian Easter Pie:

Kitchen Aid Stand Mixer

OXO Good Grips Stainless Steel Food Scale

Thermoworks Super-Fast Thermapen Cooking Thermometer

6 Quart Dough Rising Bucket

Cuisinart Food Processor

Norpro Silicone Pastry Mat

SAF Instant Yeast

Emile Henry Flame Top Pizza Stone

14″ x 16″ Aluminum Pizza Peel

King Arthur Flour Italian Style Flour – This is a 00 Flour

Non fat Dry Milk Powder

Maldon Sea Salt Flakes (Fleur de Sel)

Penzey’s Spices Pasta Sprinkle (this is a link to the Penzey’s website)

I should also mention that King Arthur Flour has a wonderful shop full of kitchen essentials as well as their quality ingredients on their website. Definitely worth taking a peek!


Guinness Chocolate Cupcakes with Peanut Butter Swiss Meringue Buttercream Frosting

March 17, 2016

IMG_4623

It’s here, it’s here! Happy St. Patrick’s Day! I’m going to be celebrating the day with these Guinness Chocolate Cupcakes with Peanut Butter Swiss Meringue Buttercream Frosting. Oh be still my heart! I’m sure ya’ll know by now that I absolutely love cupcakes. And that chocolate and peanut butter combination? Om nom nom nom! Yup these cupcakes are right up my alley. They are even topped with a Malteser, which is another personal favorite of mine. (Maltesers are malted milk balls. The closest thing we have readily available in Virginia are Whoppers. But you better believe I keep a secret stash of emergency Maltesers squirreled away.)

IMG_4576

I’m not so sure though, upon reflection, that peanut butter is very popular in Ireland. In fact, when I was living there, which was quite a while ago now, I remember having to search high and low to find a jar of peanut butter. And when I finally found it, it wasn’t “Jif” or “Skippy” brand that I was familiar with. It was called “American Peanut Butter” and was covered with red, white and blue and stars and stripes. And Reese Cups, which I’m pretty much addicted to, were nowhere to be found either, much to my dismay. I should say though, there was an abundance of other really tasty food readily available. I certainly was not in any danger of losing weight while in Ireland. The pints alone would see to that!

IMG_4606

So, considering the whole peanut butter scarcity issue, the Irish pedigree on these cupcakes is probably a bit shaky. I did dress them up with some requisite St. Patrick’s Day shamrocks. Well…at least I did dress one up with the shamrock sprinkles. I don’t think any folks out there over the age of three like to eat those crunchy sugar crumbles really. Though they do look adorable!

IMG_4597

And they do have the whole Guinness thing going for them, which is pretty dang Irish, so there is that. Not to mention the whole delicious thing. That is certainly worth a bunch of St. Patrick’s Day points I should think. The cake is dark, rich and oh so moist. And that Peanut Butter frosting is simply to die for, light, silky and fluffy as a cloud.

IMG_4568

These cupcakes are my St. Patrick’s Day dream come true…all sweet and boozy…just like The Husband! Bake a batch before you head out to your St. Patrick’s Day parties. Folks will be so glad you did. Lá Fhéile Pádraig Sona Daiobh! (Happy St. Patrick’s Day!)

IMG_4617

Guinness Chocolate Cupcakes with Peanut Butter Swiss Meringue Buttercream Frosting

  • Servings: 18 - 21 cupcakes
  • Difficulty: easy
  • Print

recipe for cupcakes from:Life As a Strawberry

recipe for frosting from: Handle the Heat

Ingredients:

For the Cupcakes:

  • 1 cup Guinness Stout
  • ¾ cup dutch process cocoa
  • ½ cup (1 stick) butter
  • 2 cups sugar
  • 2 eggs
  • ½ tsp. salt
  • 2 ¼ cups all-purpose flour
  • 2 tsp. baking soda
  • 1 cup buttermilk
  • 1 tsp. vanilla extract

For the Frosting:

  • 5 large (150 grams) egg whites
  • 1 1/4 cups (250 grams) granulated sugar
  • 3 sticks (340 grams) unsalted butter, at room temperature
  • 2 teaspoons pure vanilla extract
  • 1/4 teaspoon fine salt
  • 3/4 cup smooth peanut butter
  • maltesers -for topping (optional, but not if you are making them for me! Mini Reese cups would also work well as a topper.)

Directions:

For the Cupcakes:

In a small saucepan, melt butter. Add Guinness and bring mixture to a simmer.

In the meantime, place sugar and eggs in the bowl of a stand mixer and beat them together until incorporated. Add salt and flour and continue to mix. The mixture will be relatively dry and resemble coarse biscuit dough.

Add baking soda to buttermilk. Careful, it will foam up and out and all over the counter if you take your eye off of it for a second. Add the baking soda when you are ready to start streaming it into the batter. 🙂

Stream buttermilk/baking soda mixture into batter and mix until combined.

Add vanilla extract to batter.

Once stout and butter mixture has come to a simmer, stir a little of the stout mixture into the cocoa and mix until it is smooth and creamy. Add the cocoa mixture into the hot liquid and whisk to combine. Remove the Guinness/cocoa mixture from heat and stream it slowly into batter while mixing. The batter will be thin – that’s okay!

Pour batter into standard sized cupcake liners. Fill about 3/4 of the way full.

Bake at 375° F for 15-20 minutes, until a toothpick comes out clean.

Set cupcakes on wire rack to cool. Remove cupcakes from baking tin after 5 minutes. Continue cooling.

For the Frosting:

Wipe the bowl of an electric mixer with paper towel and lemon juice or vinegar to remove any trace of grease. Make a double boiler by placing the mixer bowl over a saucepan of simmering water, making sure the bowl doesn’t touch the water.

Add the egg whites and sugar to the bowl, whisking constantly but gently, until temperature reaches 140°F, or until the sugar has completely dissolved and the egg whites are hot.

Attach the bowl to the mixer fitted with the whisk attachment and begin to whip until the meringue is thick, glossy, and the bottom of the bowl no longer feels warm, about 7 to 10 minutes.

Switch over to paddle attachment and, with mixer on low speed, add the butter cubes, one at a time, until incorporated. Continue beating until it has reached a silky smooth texture. If the buttercream curdles simply keep mixing and it will come back to smooth. If the buttercream is too thin and runny, refrigerate for about 15 minutes before continuing mixing with paddle attachment until it comes together. Add the vanilla and salt, continuing to beat on low speed until well combined.

Add peanut butter slowly, 1 Tablespoon at a time, and mix until well combined.

If you would like to make this frosting ahead of time, keep in airtight container in refrigerator for up to one week or in the freezer for up to 2 months. Let come to room temperature and rewhip in the mixer with the paddle attachment before using.

When you are ready to frost the cupcakes, place frosting in pastry bag fitted with whatever tip you desire and pipe frosting onto cupcakes. Top with malteser if you desire. (Oh yes! You know you do!)

Enjoy!

Guinness Chocolate Cupcakes with Peanut Butter Swiss Meringue Buttercream Frosting brought to you by: Runcible Eats (www.leaandjay.com)

Links to Useful Kitchen Tools & Ingredients for Guinness Chocolate Cupcakes with Peanut Butter Swiss Meringue Buttercream Frosting:

Kitchen Aid Stand Mixer

Malteser’s Candy– If you prefer you can substitute Whopper’s Candy for the Malteser’s


Irish Potato Bites

March 16, 2016

IMG_4036

Goodness Gracious! Tomorrow is St. Patrick’s Day! How time does fly! Here is a great little St. Patrick’s Day appetizer, Irish Potato Bites! These are little, one bite sized, twice baked potatoes stuffed with Corned Beef and Irish Cheddar and then topped with a little dollop of sour cream. They are completely addictive. And another fantastic thing about this dish is that you can make these little gems ahead of time and freeze them. Just pop them into the oven straight from the freezer to bake. Once they’re done, all that is left to do is garnish with the sour cream, chives and flaky salt just before you are ready to pass around the appetizer tray.

IMG_4027

Truth be told, while it was great that these appetizers were small enough to just pop into your mouth, it did make them a bit difficult to work with. The smallest melon baller I owned was too big to scoop out the inside potato bit, so I had to resort to a teeny tiny dessert spoon. It was totally do able, but I also bet you could go with a slightly bigger potato and serve these as a side dish rather than an appetizer if you were a bit short on time…or patience…or both.

IMG_4016

But if you don’t mind a little prep work, these appetizers are ahh…mazing! When I served them up, folks were delighted. Potatoes, Corned Beef & Irish Cheddar…you just can’t go wrong!

IMG_4049

Irish Potato Bites

  • Servings: 6 - 8
  • Difficulty: easy - but a bit fiddly
  • Print

recipe from: White Lights on Wednesday

Ingredients:

  • 20 Baby Red Potatoes, small (golf ball size)
  • 1/2 Cup leftover Corned Beef, chopped finely
  • 1/4 Cup Irish Cheddar Cheese, shredded
  • 1 Tablespoon Butter, melted
  • Salt & Maldon flaky sea salt for serving
  • Sour cream & chives for toppings

Directions:

Fill a large pot with water and bring it to a boil.

Add potatoes and boil until they are fork tender.

Preheat oven to 400°F

Once potatoes are cooked and have cooled cut each one in half and cut a small slice off of the rounded end so the potato will not roll over. Place the potato halves on a parchment lined baking tray.

Carefully scoop out the flesh of each potato half into a medium sized bowl.

Mash the potatoes with butter until it is smooth Add the shredded cheese and corned beef to the potato and mix well.

Salt and pepper mixture to taste.

Sprinkle some salt over the reserved potato skin halves.

Scoop potato/corned beef/cheese mixture into potato halves and then place them on a baking sheet.

Pop baking sheet in oven for 10 minutes.

Remove from oven. Pipe a small dollop of sour cream onto each potato bite and garnish with fresh chives and few flakes of Maldon Sea Salt.

Enjoy!

Irish Potato Bites brought to you by: Runcible Eats (www.leaandjay.com)

Helpful Links to Kitchen Tools & Ingredients for Irish Potato Bites:

Oxo Good Grips Melon Baller


Guinness Black Magic Cake

March 15, 2016

IMG_4499

Woohoo! Only two more days until St. Patrick’s Day and my oh my do I have a phenomenal sweet and boozy recipe for you today…Guinness Black Magic Cake! And magic it certainly is! The rich, dark Guinness cake layers are unbelievable moist and chocolatey and blanketed with an enchantingly delicious Ermine Buttercream frosting which is drizzled with a Salted Whiskey Caramel Sauce. I’m telling you, this cake will leave you spellbound to say the least!

IMG_4538

The most surprising thing about this cake for me was that Ermine Frosting. Ermine frosting is an old-fashioned recipe for buttercream. It is also known as Boiled Milk Frosting, Flour Buttercream or Butter Roux frosting. Apparently it was the original frosting for the Red Velvet Cake before Cream Cheese frosting became all the rage. And don’t get me wrong, cream cheese frosting is tasty, but in my humble opinion it can not hold a candle to Ermine Frosting. It was ahhhhh-mazing. So velvety and silky smooth, very light, fluffy and sweet but not toothachingly so. My favorite frosting is Swiss Meringue Buttercream, but Ermine frosting in a very close second. I can’t believe I had no idea it existed before making this cake. Now that I’m “in the know”, I’m sure it will be making appearances here frequently!

IMG_4523

This cake was pretty easy to make all in all. The most difficult step for me was the Caramel Sauce. Yup, Caramel sauce and I have a very tempestuous relationship to put it mildly. I tried to make it as Super Golden Bakes indicated in her blog, however I must admit, I failed in my first attempt. So I went back and made a slight adaptation to my Perfect Salted Caramel Sauce, by adding some Irish whiskey and achieved perfection on my first attempt. That is the caramel recipe that works for me, so that is the one I’ve included here.

IMG_4546

So go ahead and cast a spell over your St. Patrick’s Day crowd this year with this alluring Guinness Black Magic Cake. I promise you, folks will be completely entranced!

IMG_4487

Guinness Black Magic Cake

  • Servings: 8 - 10
  • Difficulty: moderate - mostly because of that tricky Salted Whiskey Caramel Sauce
  • Print

recipe slightly adapted from: Super Golden Bakes

Ingredients:

For the cake: (This recipe will make 2 – 9″ cake layers or 3 – 8″ cake layers)

  • 200 g (7 oz) plain flour
  • 350 g  (12 oz ) caster sugar
  • 75 g (3 oz )cocoa powder
  • 2 tsp baking soda
  • 1 tsp baking powder
  • 1 tsp salt
  • 2 large eggs
  • 225 ml  (8 oz) Guinness
  • 225 ml (8 oz) buttermilk or milk soured with 1 tsp lemon juice
  • 100 ml (4 fl oz) coconut oil (can substitute vegetable oil)
  • 1 tsp vanilla extract
  • 1 recipe of Ermine Frosting (to follow)
  • 1 recipe of Salted Whiskey Caramel (to follow)
 Directions:

Preheat the oven to 180°C (350°F). Prepare 3x20cm (8″) pans or 2x23cm (9″) pans – grease and line the bottoms and sides with parchment paper.

Sift the flour, sugar, cocoa powder, soda, baking powder and salt together into a large bowl.

Put the eggs, Guinness, buttermilk, oil and vanilla extract into the bowl of your stand mixer and whisk together on low speed until combined.

Gradually add the dry ingredients and beat for a couple of minutes, scraping the bottom and sides of the bowl. The batter will be fairly thin.

Pour into the cake tins filling only halfway. Bake the 20cm cake layers for about 20-25 minutes (the 23cm cakes take 30-35 minutes) or until the top of the cake is firm and a skewer inserted in the centre comes out clean. Cool on a wire rack.

Pipe or spread the frosting over the layers drizzling caramel over each layer before sandwiching together. Pipe frosting over the top layer and drizzle with caramel. Serve at room temperature (the frosting will harden in the fridge).

Ermine Frosting

Ingredients:

  • 200 g  (7 0z) unsalted butter
  • 200 g  (7 oz) caster sugar
  • 235 ml  (1 cup) milk
  • 5 Tablespoons plain flour
  • pinch salt
  • seeds from 1 vanilla pod
 Directions:

Put the milk and flour in a small saucepan and whisk over medium-low heat until the mixture thickens and the whisk leaves a trail. Transfer to a bowl and cover with cling film, pressing it on the surface to prevent a skin forming. Cool completely before using (speed up the process by putting the bowl in the fridge or freezer).

Whisk the butter and sugar together for about minutes, stopping the mixer and scraping the sides and bottom of the bowl as you go. Make sure that the sugar has completely melted before proceeding. Unmelted sugar is what leads to a grainy buttercream, and no one likes that! Once the butter/sugar mixture is smooth and fluffy, then add the vanilla and salt.

Start adding the milk roux, one tablespoon at a time, until the frosting is completely smooth and has the consistency of whipped cream.

Salted Whiskey Caramel

Ingredients:

  • 1 cup granulated sugar
  • 1/2 cup heavy cream
  • 6 tablespoons unsalted butter, cut into pieces
  • 2 Tablespoons Irish whiskey
  • 1/2 tablespoon fleur de sel
 Directions:

Add the sugar in an even layer over the bottom of a heavy saucepan, with a capacity of at least 2 or 3 quarts. Heat the sugar over medium-high heat, whisking it as it begins to melt. You’ll see that the sugar will begin to form clumps, but that’s okay. Just keep whisking and as it continues to cook, they will melt back down. Stop whisking once all of the sugar has melted, and swirl the pan occasionally while the sugar cooks.

Continue cooking until the sugar has reached a deep amber color. It should look almost a reddish-brown, and have a slight toasted aroma. This is the point where caramel can go from perfect to burnt in a matter of seconds, so keep a close eye. If you are using an instant-read thermometer, cook the sugar until it reaches 350° F.

As soon as the caramel reaches 350°F, add the butter all at once. Be careful, as the caramel will bubble up when the butter is added. Whisk the butter into the caramel until it is completely melted.

Remove the pan from the heat and slowly pour the cream into the caramel. Again, be careful because the mixture will once again bubble up ferociously. Whisk until all of the cream has been incorporated and you have a smooth sauce. Add the whiskey and fleur de sel and whisk to incorporate.

Set the sauce aside to cool for 10 to 15 minutes and then pour into your favorite glass jar and let cool to room temperature. You can refrigerate the sauce for up to 2 weeks

Enjoy!

Guinness Black Magic Cake brought to you by: Runcible Temps (www.leaandjay.com)

Links to Useful Kitchen Tools & Ingredients for Guinness Black Magic Cake:

OXO Good Grips Stainless Steel Food Scale

Kitchen Aid Stand Mixer

Thermoworks Super-Fast Thermapen Cooking Thermometer

Le Creuset Enameled Cast Iron Sauce Pan

Chicago Metallic Non-Stick 8 – inch round cake pan


Crockpot Corned Beef & Cabbage Soup

March 14, 2016

IMG_4157

St. Patrick’s Day is only three days away, and what would St. Patrick’s Day be without Corned Beef & Cabbage? It certainly wouldn’t do, especially for all the Irish Americans out there. I already let the cat out of the bag last year, that folks in Ireland do not actually eat Corned Beef & Cabbage. Nope. That dish evolved and came to be associated with St. Patrick’s Day here in America after the arrival of many Irish immigrants. (For more info on the history of corned beef, take a look at my Corned Beef Hash blog from last year.) So although Corned beef & Cabbage is not a traditional dish for the Irish in Ireland, St. Patrick’s Day just wouldn’t be the same for Irish Americans without it. So I figured this Crockpot Corned Beef & Cabbage Soup recipe would come in handy for some folks out there. Especially the ones that really want to celebrate St. Patrick’s Day, but are a wee bit too short on time to fuss over a big St. Patrick’s Day feast. This crock-pot soup is exactly what you need. You can get the whole St. Patrick’s Day corned beef, cabbage, potato vibe in one bowl and yet spend very little time in the kitchen.

IMG_4168

Seriously, you just toss all of these lovely ingredients in the crock pot, turn it on and walk away. You don’t even have to head back into the kitchen for 7 hours! And truth be told, I always prepare soups the day before I want to serve them. They taste so much better after resting in the fridge overnight. All the flavors really have a chance to blend together. And another big benefit of letting this soup sit over night is that corned beef is a very fatty cut, that’s part of what makes it so delicious. However, even though you will cut away the fat when you shred the meat, I find that a lot of fat remains in the soup. Yuck! No one wants a greasy soup! You can try to skim this off of the top while it is still hot. However, if you just stick the soup in the fridge over night, that fat rises to the top and solidifies, making it a breeze to remove. Serve with pints of beer and a hunk of crusty brown bread, slathered in butter of course! Feasting on St. Patrick’s Day has never been such a breeze!

IMG_4162

Crockpot Corned Beef & Cabbage Soup

  • Servings: 8 - 10
  • Difficulty: easy
  • Print

recipe slightly adapted from: Pipandebby.com

Ingredients:

  • 3 tablespoons extra-virgin olive oil
  • 4 cups shredded cabbage
  • 1 yellow onion, chopped
  • 3-4 cloves garlic, minced
  • 1/4 cup flat-leaf parsley, finely chopped
  • Salt and pepper, to taste
  • 3-lb. corned beef brisket (yup…just pop it into the crock pot uncooked)
  • 8 baby red potatoes, cut into small chunks
  • 4 carrots, sliced
  • 4 stalks celery, sliced
  • 1 bay leaf
  • 3-4 sprigs of fresh thyme
  • 14.9 oz. can of Guinness Stout
  • 32-oz. container chicken broth

Directions:

Heat olive oil in a large skillet over medium heat. Add cabbage, onion, garlic, parsley, salt and pepper. Cook for 5-7 minutes, or until cabbage is soft and onions are fragrant.

Add mixture to a large crockpot, along with corned beef brisket, potatoes, carrots, celery, bay leaf, thyme, Guinness & chicken broth. If the veggies are not completely covered by liquid, add water until they are.

Cook on Low heat for 7-8 hours. Remove corned beef from crockpot and place on a cutting board. Shred Corned Beef with two forks, removing and discarding fat. If any of the shredded meat is too long, cut into smaller bite-sized lengths. Return meat to the crockpot and cook for an additional 10 minutes.

You can serve the soup immediately if you wish, but I usually refrigerate it overnight. The next morning, the fat will have risen to the top and solidified. Remove the fat, reheat soup and serve with crusty brown bread.

Enjoy!

Crockpot Corned Beef & Cabbage Soup brought to you by: Runcible Eats (www.leaandjay.com)

Helpful Links to Kitchen Tools & Ingredients for Crockpot Corned Beef & Cabbage Soup:

Crock-Pot Slow Cooker


Colcannon Cheddar Skillet Cakes

March 13, 2016

IMG_4377

O.k…So you know that Colcannon I told you about yesterday? It is pretty ahhhh..mazing all on its own right? Well guess what? I don’t know if you will actually have any leftovers when you make up a big old batch of Colcannon…but if you do…you can make Colcannon Cheddar Skillet Cakes the next morning!

IMG_4486

Squeeeeee! I love leftover recipes! And boy oh boy is this a fantastic one! You take that mouthwateringly delicious Colcannon and stir in some lovely Irish Cheddar, an egg and a bit of flour. Then you simply drop it onto a hot skillet and fry it up. Good Lord above!!! These little Colcannon Skillet Cakes are crisp and crunchy on the outside and filled with all the warm, gooey, cheesey Colcannon goodness on the inside.

IMG_4363

You might just have to  double your Colcannon recipe just to make sure that you do have leftovers so that you can make these Skillet Cakes. And they’re not only great for breakfast. We’ve had them as a side dish for dinner as well. So delicious! I wouldn’t have thought you could improve on Colcannon, but here we have. Comfort food nirvana has been achieved!

IMG_4396

Colcannon Cheddar Skillet Cakes

  • Servings: 8 cakes
  • Difficulty: easy
  • Print

Ingredients:

  • 1 cup leftover Colcannon
  • 1 egg, beaten
  • 1/3 cup Kerrygold Reserve Cheddar, grated
  • 1/3 cup all purpose flour
  • oil to grease skillet
  • sour cream & chives for serving

Directions:

Place leftover Colcannon in medium mixing bowl.

Make a well in the center of the Colcannon and add beaten egg. Mix until combined.

Sprinkle grated cheese and flour over Colcannon/egg mixture and stir until thoroughly incorporated

Heat a thin layer of oil (I used bacon grease, though any vegetable oil or even butter will work just fine) over medium heat in a cast iron skillet. Drop large cookie scoops full of Colcannon mixture into the pan. You can actually make any size Colcannon cakes that your heart desires. However, I have found that smaller cakes give you more of the crisp factor than larger cakes. But proceed as you wish.

Allow cakes to cook undisturbed until the underside is golden brown. Flip the cakes and continue to cook until the second side is browned.

Remove cakes to a paper towel lined dish covered with foil until ready to serve. Serve warm with sour cream and chives if you desire.

Enjoy!

Colcannon Cheddar Skillet Cakes brought to you by: Runcible Eats (www.leaandjay.com)

Links to Useful Kitchen Tools & Ingredients for Colcannon Cheddar Skillet Cakes:

Norpro 2 Tablespoon Cookie Scoop

Le Creuset Iron Handle 10 1/4 ” Skillet

Le Creuset Silicone Cool Tool Handle Sleeve


Colcannon (Cál Ceannann)

March 12, 2016

IMG_4332

Ahhhh….Colcannon! Irish Comfort food at its finest! I can’t believe in all my years of St. Patrick’s Day blogging I haven’t shared this recipe. For those of you who might be unfamiliar with this dish, it is buttery mashed potatoes whipped up with cabbage, leeks and bacon. OMG right?!!! With that list of outstanding ingredients, you just know it is going to be to die for.

IMG_4343

Colcannon or Cál Ceannann in Irish simply means white-headed cabbage. There are many regional variations on this dish, sometimes ham is used rather than bacon, sometimes you’ll find spring onions included rather than leeks. Indeed, I was rather horrified to discover that some peculiar folks will use kale rather than cabbage. This is disturbing to me for a couple of reasons. First off, the dish’s actual name is the word for cabbage, so….

IMG_4352

And then of course, I hate kale. Yup…hate it. I know it is good for me. However, I find it bitter and evil. In fact the mere thought of kale inspires this same look I have when I find caraway seeds in my soda bread.

20141024_155012 - Version 2

I’m flexible on swapping around some of the other ingredients in my Colcannon, though I do believe that leeks, cabbage and bacon are supreme. But, please… don’t get that nasty old kale anywhere near my Colcannon! Anyhoo…In Ireland, Colcannon is traditionally served on Halloween. It is a bit like Barmbrack that I just recently told you about, in that it was used in Halloween divination rituals. Several charms or trinkets, such as a ring, thimble or coins would be stirred into the Colcannon before it was served. The item you ended up with on your plate would tell your fortune. (i.e.. if you got a ring, you would be married before the year was through.) In the 1800’s, Irish immigrants brought this recipe with them to the United States and Colcannon came to be associated more with St. Patrick’s Day, rather than Halloween. I can definitely say, for me, Colcannon is great any time of the year. Sheer Comfort Food perfection!

IMG_4337

Colcannon (Cál Ceannann)

  • Servings: 6 -8
  • Difficulty: easy
  • Print

recipe slightly adapted from: Williams Sonoma

Ingredients:

  • 2 1/2 lb. potatoes, peeled and quartered
  • Salt and freshly ground pepper, to taste
  • 8 Tablespoons (1 stick) unsalted butter
  • 3/4 cup milk (or cream if you are feeling particularly decadent)
  • 4 bacon slices, cut into 1/2-inch dice
  • 2 large leeks, white and light green portions,
    halved lengthwise, rinsed well and thinly sliced
  • 1/2 small head cabbage, about 1 lb., cored
    and coarsely chopped
  • 1/8 teaspoon freshly grated nutmeg

Directions:

Put the potatoes in a large pot, add water to cover the potatoes by 2 inches and generously salt the water. Bring to a boil over medium-high heat, reduce the heat to medium and cook until the potatoes are tender when pierced with a knife, about 15 minutes. Drain well in a colander.

Meanwhile, in a small saucepan over low heat, combine the butter and milk and heat until the butter melts and the mixture is hot, 8 to 10 minutes.

Set a potato ricer over the bowl of a stand mixer and press the potatoes through in batches. Mix in the milk mixture in two additions. Season with salt and pepper. Cover the bowl with aluminum foil and set over a large saucepan of barely simmering water to keep warm.

Heat a heavy pot or Dutch oven over medium heat until hot. Add the bacon and cook, stirring occasionally, until browned and crisp, about 5 minutes. Using a slotted spoon, transfer the bacon to a paper towel-lined plate. Set aside.

Pour off all but 3 Tablespoons of the fat from the pot. Return the pot to medium heat, add the leeks and cook, stirring occasionally, until softened, about 5 minutes. Add the cabbage and toss until tender-crisp, about 8 minutes. Sprinkle with freshly ground nutmeg and the bacon, and season with salt and pepper. Stir the potatoes into the cabbage mixture and serve warm.

Enjoy!

Colcannon brought to you by: Runcible Eats (www.leaandjay.com)

Links to Useful Kitchen Tools & Ingredients for Colcannon:

Kitchen Aid Stand Mixer

Potato Ricer


Irish Pizza with Corned Beef, Leeks, Crispy Potato & Irish Cheddar

March 11, 2016

IMG_4091

I don’t know about you, but around here, we love pizza, especially Neapolitan style thin-crust pizzas. And we have definitely gotten into making our own pies here at home. We’ve slowly collected all the gear to use on Pizza Night; the pizza stone for baking, pizza paddles for transferring it to the oven, and quite a few of the pizza specialty flours from King Arthur Flour. We love experimenting with different toppings as well as crusts. So finding myself with a bit of left over corned beef and taking some inspiration from an Irish Pizza I saw over at Lexi Bites blog, we decided to make our own version of an Irish Pizza. This Hibernian gem has a thin Guinness infused pizza crust which is topped with shredded corned beef, leeks, crispy potatoes, thyme and Irish Cheddar. Rather than a red sauce, I used leftover Horseradish Cream Sauce which I usually serve with my annual St. Patrick’s Day Corned Beef feast. What a tasty pie!

5

I will take this opportunity to give you a wee bit of advice on the making of a thin crust pizza though. The absolute most difficult thing we’ve encountered in all our pizza making endeavors is simply not overloading the crust. Man is that hard! I mean, you’ve got all these delicious toppings just sitting there right? If a little is good, more has to be better…Not true! Tons of toppings will quickly weigh down a thing crust pizza, making it nearly impossible to transfer from the pizza paddle onto the stone and will often make the crust soggy. So you must exercise restraint here! And if you really don’t think you’d be into making your own pizza dough, I get it. You can run out and get a store-bought crust and proceed with the Irish-y toppings. It’s a great way to use up some leftovers. Pour a few pints and get busy…bet you’ll have some fun and have a tasty meal to boot!

IMG_4057

Irish Pizza with Corned Beef, Leeks, Crispy Potatoes & Irish Cheddar

  • Servings: makes 2 - 10 inch pizzas
  • Difficulty: easy
  • Print

Recipes adapted from: King Arthur Flour (for the Guinness Pizza Crust), & Lexi Bites (pizza topping inspiration)

Ingredients:

For the Ultra-Thin Guinness Pizza Crust:

  • 3 Cups (372 grams) King Arthur Flour Perfect Pizza Blend flour ( or can substitute in 1 1/2 cup all-purpose flour, 1 cup semolina flour & 1/2 cup durum flour)
  • 1 1/4 teaspoon salt
  • 1 teaspoon instant yeast
  • 2 Tablespoons olive oil
  • 1 – 1 1/4 cups warm (98° – 110° F, 37°C) Guinness Stout (you can substitute water in place of the Guinness if you wish, though I’m not sure why you would…)

For the Pizza Toppings:

  • 1 – 1 1/2 cups leftover corned beef, shredded or cut into smaller pieces
  • 4 leeks, thinly sliced and sautéed in butter until softened
  • 1/3 cup Horseradish Cream Sauce (recipe to follow) if you don’t like horseradish, substitute plain sour cream
  • 1 cup hash browns, cooked until crispy
  • 3/4 cup mozzarella cheese, shredded
  • 3/4 cup Irish Cheddar, shredded
  • 1 Tablespoon fresh thyme, leaves only, chopped
  • 1 Tablespoon fresh chives, chopped

Directions:

Combine the dry ingredients, oil, and 1 cup of Guinness, mixing and kneading everything together by hand, mixer or bread machine set on the dough cycle until you’ve made a soft, smooth dough. The dough should be soft and supple; adjust with additional Guinness or flour if needed. If you’re kneading in a stand mixer, it should take 4 to 5 minutes at second speed, and the dough should barely clean the sides of the bowl, perhaps sticking a bit at the bottom.

Place the dough in a dough rising bucket, or large bowl, lightly covered with plastic wrap, and let it rise at room temperature for 60 to 90 minutes, or until it begins to look puffy. In the meantime, preheat the oven to 425°F. If you are using a baking stone to bake the pizza on, place it into the oven at this time.

While the dough is rising, prepare all of your toppings; chop the leftover corned beef, sauté the leeks and set them aside to cool, cook the hash browns until crispy and set aside to cool, grate the cheese, chop the thyme and chives, mix up the Horseradish Cream Sauce. (recipe noted below).

Once the dough has risen, divide it into two equal portions and place each on a lightly oiled 12″ pizza pan, or on parchment paper lightly spritzed with cooking spray. 

Use your fingers to press the dough outward from the center to make a very thin, flat circle about 12″ across. 

Spread the toppings over the dough, keeping in mind not to overload the thin crust. Hold the chives aside to sprinkle over the pizzas once they are out of the oven

Bake for 12 – 15 minutes, or until crust is golden brown and cheese is hot and bubbly.

Top with chives and serve immediately.

Enjoy!

Horseradish Cream Sauce

This recipe will make far more sauce than you need for your pizza’s. However, it is delicious to have on hand to eat with any leftover corned beef and/or potatoes. It is also great on the Colcannon Skillet Cakes.

Recipe adapted from: Bon Appetit

Yield: 1 1/2 cups

Ingredients:

  • 1 cup sour cream
  • 6 tablespoons prepared white horseradish (about 4 ounces)
  • 1 tablespoon chopped fresh chives or green onion tops

Directions:

Whisk all ingredients in small bowl to blend. Cover and refrigerate at least 2 hours. DO AHEAD: Can be made 2 days ahead. Keep refrigerated.

Irish Pizza brought to you by: Runcible Eats (www.leaandjay.com)

Helpful Links to Kitchen Tools & Ingredients for Irish Pizza:

Kitchen Aid Stand Mixer

Thermoworks Super-Fast Thermapen Cooking Thermometer

6 Quart Dough Rising Bucket

SAF Instant Yeast

Emile Henry Flame Top Pizza Stone

King Arthur Flour Perfect Pizza Blend Flour


Guinness Pistachio Sweet Rolls with Baileys Cream Cheese Frosting

March 10, 2016

IMG_4283

So…here we are…The Sixth Day of my St. Patrick’s Day blog-a-thon. And today, not only am I sharing a mouthwateringly amazing recipe for Guinness Pistachio Sweet Rolls with Baileys Cream Cheese Frosting, but things are really getting ready to heat up here in my kitchen. That’s right, a veritable Irish-y recipe blitz is now underway. Up until today I had posting every other day, but from now until St. Patrick’s Day, March 17th, you’ll hear from me every day. Seven more delicious recipes coming to you in rapid fire succession! I hope you’ll be checking back in. But let’s not lose sight of the deliciousness before us today in these Guinness Pistachio Sweet Rolls with Baileys Cream Cheese Frosting. What we’ve got here is a lovely sweet Guinness infused yeasted dough which has been filled with buttery brown sugar and pistachios and frosted with a Baileys Cream Cheese Frosting. They’re soft, fluffy, sticky, boozy perfection I tell you.

IMG_4299

I first saw this recipe over at the Blahnik Baker site and just knew I had to make it. I use a slightly different recipe and technique for making the dough than she does. I rely on yeast for all the rise whereas she uses a bit of baking soda and powder as well. Looks interesting, but I was pretty comfortable with the way I knew to do yeast dough, so you know that saying about old dogs and new tricks…I went with what I knew and was very happy with the results.

IMG_4315

As was the Husband. He calls these little gems “Guinness Sticky Buns” rather than their rather long-winded name. In fact, I considered changing the recipe title to that, but found out that Sticky Buns are actually different from what we have here. A true sticky bun is made by lining the baking tin with syrup, honey and nuts before the dough is placed on top. Once it has baked it is inverted so that the lining becomes a sticky topping. Sounds delicious as well, but that isn’t what we have here, so Guinness Pistachio Sweet Rolls it remains (except in this house where Guinness Sticky Buns stubbornly persists).

IMG_4306

It really doesn’t matter what you call them, just make sure you bake up a batch for an extra special St. Patrick’s Day breakfast treat. After all, there’s nothing like a little Guinness & Baileys to get your busy day of celebrations off to a great start!

IMG_4325

Guinness Pistachio Sweet Rolls with Baileys Cream Cheese Frosting

  • Servings: 16 rolls
  • Difficulty: easy
  • Print

recipe inspired by: Blahnik Baker

Ingredients:

For the Rolls:

  • 1 ½ cups whole milk
  • ½ cup Guinness draft beer
  • ½ cup coconut oil
  • ½ cup granulated sugar
  • 4 teaspoons instant yeast
  • 5 cups all-purpose flour (+ a bit more as needed)
  • 1 1/2 teaspoon salt

For the filling:

  • ½ cup butter
  • ¾ cup brown sugar
  • ¾ cup shelled pistachios, chopped

For the Frosting:

  • 4 ounces cream cheese, room temperature
  • ¼ cup milk
  • 2 tablespoon Baileys Irish Cream, or more to taste
  • ½ to 1 cup confectioner’s sugar

Directions:

For the Rolls:

In a large saucepan, heat the milk, Guinness, oil and granulated sugar over medium heat to just below a boil.

Remove the pan from heat. Transfer the mixture to the bowl of a stand mixer and allow it to cool to warm (98° – 105° F). Once the milk/Guinness mixture has cooled, sprinkle the yeast over the top and let it sit for 5 minutes. It should look foamy once time is up.

With the mixer running on its lowest speed, start to add the flour 1 cup at a time until the dough starts to pull away from the side of the bowl.

Scrape the dough down and allow it to rest for 5 minutes to fully hydrate the flour. Switch to the dough hook attachment and knead for 6 minutes.

Turn the dough out onto a lightly floured counter. Shape it into a ball and place it into a lightly oiled dough rising bucket (or large bowl). Cover with plastic wrap and set in a warm spot to rise until it is doubled, approximately 1 hour (could be more or less depending on how warm your kitchen is.) At this point you can proceed with baking or place the dough in the refrigerator over night.

Once you are ready to bake, preheat the oven to 375° F. Lightly oil two 9″ pie plates, or cake pans. I had 3 buns which did not fit into my pie pans, so I also used a small 6″ cast iron skillet. You could actually also bake 1/2 of the rolls in a large 9 -10″ cast iron skillet if you prefer.

Assembly:

Remove the dough from bucket and gently deflate. Weigh the dough and divide it in half.

Place the first half dough ball on a silicone pastry mat or lightly floured kitchen counter. Roll it out to a rectangle, measuring about 12 x 8 inches. Paint the melted butter over the dough using a pastry brush. Leave a 1/2″ margin on all sides unbuttered. Sprinkle half of the brown sugar and then half of the pistachios over the melted butter. To roll, start at the end farthest away from you and roll the rectangle towards you. Use both hands and roll tightly. Finish with the seam side down, pinching together any loose ends and rolling back and forth several times on the counter.

Using a sharp knife (or long strand of unflavored dental floss) gently cut the dough into 1 1/4 – 1 1/2″ slices and arrange them in the prepared baking tins.

Repeat this process for the second half of the dough.

Cover the baking tins with plastic wrap and allow the rolls to rise until they look puffy – approximately 30 minutes – 1 hour.

Remove the plastic wrap and place the buns in the preheated oven. Bake for 20 -22 minutes or until golden and bubbling.

Remove from oven to cooling rack and let cool for 10 -15 minutes.

For the frosting:

Prepare the Baileys frosting while the rolls are baking. Place the room temperature cream cheese in the bowl of a stand mixer fitted with the paddle attachment. Add the milk and the Baileys and mixing until smooth. Slowly (like 1 tablespoon at a time) add the confectioner’s sugar. Wait until the first tablespoon has thoroughly mixed in before adding the second. Continue to add confectioner’s sugar until the frosting reaches the desired consistency.

Load frosting into a pastry bag fitted with round tip. Pipe over warm rolls. (You can also just use a spatula to spread the frosting over the top of all of the rolls, as you wish.)

Serve warm.

Enjoy!

Guinness Pistachio Sweet Rolls with Baileys Cream Cheese Frosting brought to you by: Runcible Eats (www.leaandjay.com)

Links to Useful Kitchen Tools & Ingredients for Guinness Pistachio Sweet Rolls:

Le Creuset Enameled Cast Iron Sauce Pan

Thermoworks Super-Fast Thermapen Cooking Thermometer

Kitchen Aid Artisan Stand Mixer

6 Quart Dough Rising Bucket

Norpro Silicone Pastry Mat

SAF Instant Yeast

Le Creuset 9″ Stoneware Pie Dish

Le Creuset 6 1/3″ Cast Iron Frying Pan


Two loaves of Barmbrack (Báirín Breac) Bread – A Yeasted Barmbrack & A Tea Loaf with Whiskey Honey Butter Glaze

March 9, 2016


IMG_3482

Here we are, March 9th and I’ve already shared 4 Irish-y recipes here in this lead up to St. Patrick’s Day. Today I’ve got a twofer for you. I’m actually going to remind you of two recipes I posted back in October for Barmbrack. Barmbrack is a traditional Halloween treat in Ireland, so I told you all about it back then. But it would certainly be very welcome on any St. Patrick’s Day table as well. Not to mention, I needed a bit of a breather before my blog-a-thon starts to pick up speed. Yup….starting tomorrow I am going to share one new recipe a day all the way to March 17th! A veritable blitz of dishes I tell you. But for now, back to that Barmbrack I just mentioned.

IMG_3499

Barmbrack is also known as Báirín Breac in Irish. Breac means “speckled” which this bread definitely is, being shot through with a variety of fruit. Báirín can either be the word for “loaf” which would make sense since that would make its name be “speckled loaf” in English. However, I’ve also come across the theory that Barm is derived from the word “beorma”, which refers to a fermented liquor which would have been used back in the day to rise the cake. Barmbrack loaves were traditionally baked up on Halloween as part of an ancient fortune-telling ritual. Yup. Several different trinkets or charms (perhaps the origin of that “lucky charm” bit…) were wrapped in parchment paper and baked  into the bread. When the bread was sliced and handed out, your future was foretold by whatever bit you found in your portion. A wedding ring meant you’d be married within the year, a pea meant that you would not, a coin signified wealth, whereas a piece of rag meant a lean year, a thimble predicted a spinster and button meant bachelorhood was in your future. Back in October, when I first set out to make Barmbrack, I quickly discovered that there were two different types of the bread to be found, a yeasted version and a non-yeasted version which was more like a tea bread. I couldn’t decide which one to make, so I did a loaf of each. I found the yeasted version to be light, airy, slightly sweet and spicy (in a nutmeg/cinnamon/clove kind of way – not my usual set your tongue alight kind of way.) It was chock full of whiskey & tea soaked raisins, sultanas and cranberries. Lovely still warm from the oven, it was even better I think when toasted and slathered in butter!

IMG_3487

The second Brack I made was a Tea Barmbrack, which is a rich, dense loaf similar to a fruitcake. But not one of those yucky things some great Aunt sends you at Christmas. No sir-ee, this crave worthy loaf will completely erase all of your pre-conceived fruitcake notions with just one delectable bite. This Tea Barmbrack is full of boozy soaked raisins, sultanas, currants and dates. And it has that Whiskey Honey Butter Glaze. Pure ambrosia I tell you! One taste and you will be hooked!

IMG_3500

So which one should you choose? That’s a hard one. I thought they both were pretty scrumptious. The yeasted one takes a little longer to make when you factor in all of the rise times, but if you love yeast bread, that might be your winner. The Tea Barmbrack is a one bowl wonder and doesn’t require any rise times. Hmmm…decisions, decisions. Rest assured there is no wrong choice. They are both winners and will be a great complement to your St. Patrick’s Day table.

Get the Recipe for Barmbrack Bread (Yeasted Version)

IMG_3456

Get the Recipe for Tea Barmbrack with a Whiskey Honey Butter Glaze

IMG_3521

Enjoy!

Stay tuned tomorrow for a brand spanking new recipe for Guinness Pistachio Sweet Rolls with Baileys Cream Cheese Frosting. Bet that’s got you drooling!