Have ya’ll put enough distance between yourselves and the Christmas Cookie explosion that I am sure you experienced back in December? Do you think you could lay eyes on another cookie yet? Hopefully it is not too soon because you are not going to want to miss out on these scrumptious Chocolate Nutella Cookies. These little gems not only have a chewy brownie like base with a crisp edge but are also filled with a creamy luscious Nutella topping. A sprinkling of hazelnuts give them an irresistible little crunch. Reminiscent of a chocolate lava cake, these little devils will shoot to the top of your favorite cookie rankings!
So I gotta ask….are there any Nutella fans out there? Cause let me tell you I love me some Nutella! I actually didn’t even know it existed until I was living in Ireland and my friend Theresa had a jar. I watched with amazement as she spread it over her toast. I was like “What! You can eat chocolate on toast!” I had no idea it was a thing. Yup, love at first bite.
It is not by chance that I’m blogging a recipe which features Nutella today. Today February 5th is World Nutella Day. This celebration of all things Nutella was started in 2007 by Sara at Ms. Adventures in Italy and Michelle at Bleeding Espresso as a day to celebrate, get creative with and most importantly, to EAT Nutella.
A couple of years ago, the founders have transferred Nutella Day to Ferrero the company who owns that most beloved spread. Take a peek at their Facebook page and see how folks are celebrating the day! I love Nutella so I usually try to participate with a Nutella laden recipe every year. One of my favorite Nutella creations was this Nutella, Double Chocolate & Banana Tart which was quite stunning if I do say so myself.
But let me get back to today’s tasty treat – these Chocolate Nutella Cookies! Decadent, crispy, chewy, chocolaty, sweet and salty bliss!
Not only are they delicious, but they are sooo easy. I used a stand mixer, to whip these up, but you could get away with doing it by hand. They come together quickly, so you could be serving ’em up in no time flat! So what are you waiting for, bake up a batch today!
4 ounces/113 grams bittersweet chocolate, broken into pieces
1 tablespoon unsalted butter
¼ teaspoon fine salt
1 large egg, room temperature
⅓ cup/78 grams granulated sugar
½ teaspoon vanilla extract
¼ cup/34 grams all-purpose flour
⅓ cup/110 grams Nutella or your favorite chocolate hazelnut spread
¼ cup/35 grams roasted and skinned hazelnuts, chopped
flaky sea salt for sprinkling over the top (optional-yeah, maybe not…I do love salty sweet)
Directions:
Melt the chocolate and butter in a bowl set over a saucepan of gently simmering water, stirring until smooth. Stir in the salt, remove from the heat.
Whisk the egg and sugar in a large bowl by hand or using a stand or an electric mixer until pale yellow and foamy, 3 to 5 minutes. Whisk in the vanilla. Add the chocolate mixture and stir gently with a spatula until all the streaks are shades of brown
Add the flour and stir gently until no traces of flour remain. Drop tablespoons of dough onto a parchment paper-lined cookie sheet in rounds, spacing 2 inches apart. I used a small cookie scoop. If the tops are rounded, gently press them flat. ( I actually waited until the cookie dough was chilled to flatten the top. It was much easier.) Refrigerate until stiffened, at least 15 minutes and up to overnight.
Heat oven to 375 degrees F.
Sprinkle flaky sea salt over the top of each cookie.
Using a pastry bag or resealable plastic bag with a ½-inch hole cut in a corner, or a teaspoon measuring spoon, pipe or drop dollops of chocolate-hazelnut spread on top of the dough, leaving a border of dough uncovered. Sprinkle the tops with hazelnuts.
Bake until the cookie dough looks crackled and just dry, 8 to 10 minutes. Cool on the sheets and enjoy warm or at room temperature. These cookies taste best on the day they’re baked, but will keep for up to 2 days in an airtight container at room temperature.
Enjoy!
Useful links for Kitchen Tools & Ingredients for Chocolate Nutella Cookies:
*Some of the links below are affiliate links. This means that, at zero cost to you, I will earn an affiliate commission if you click through the link and finalize a purchase*
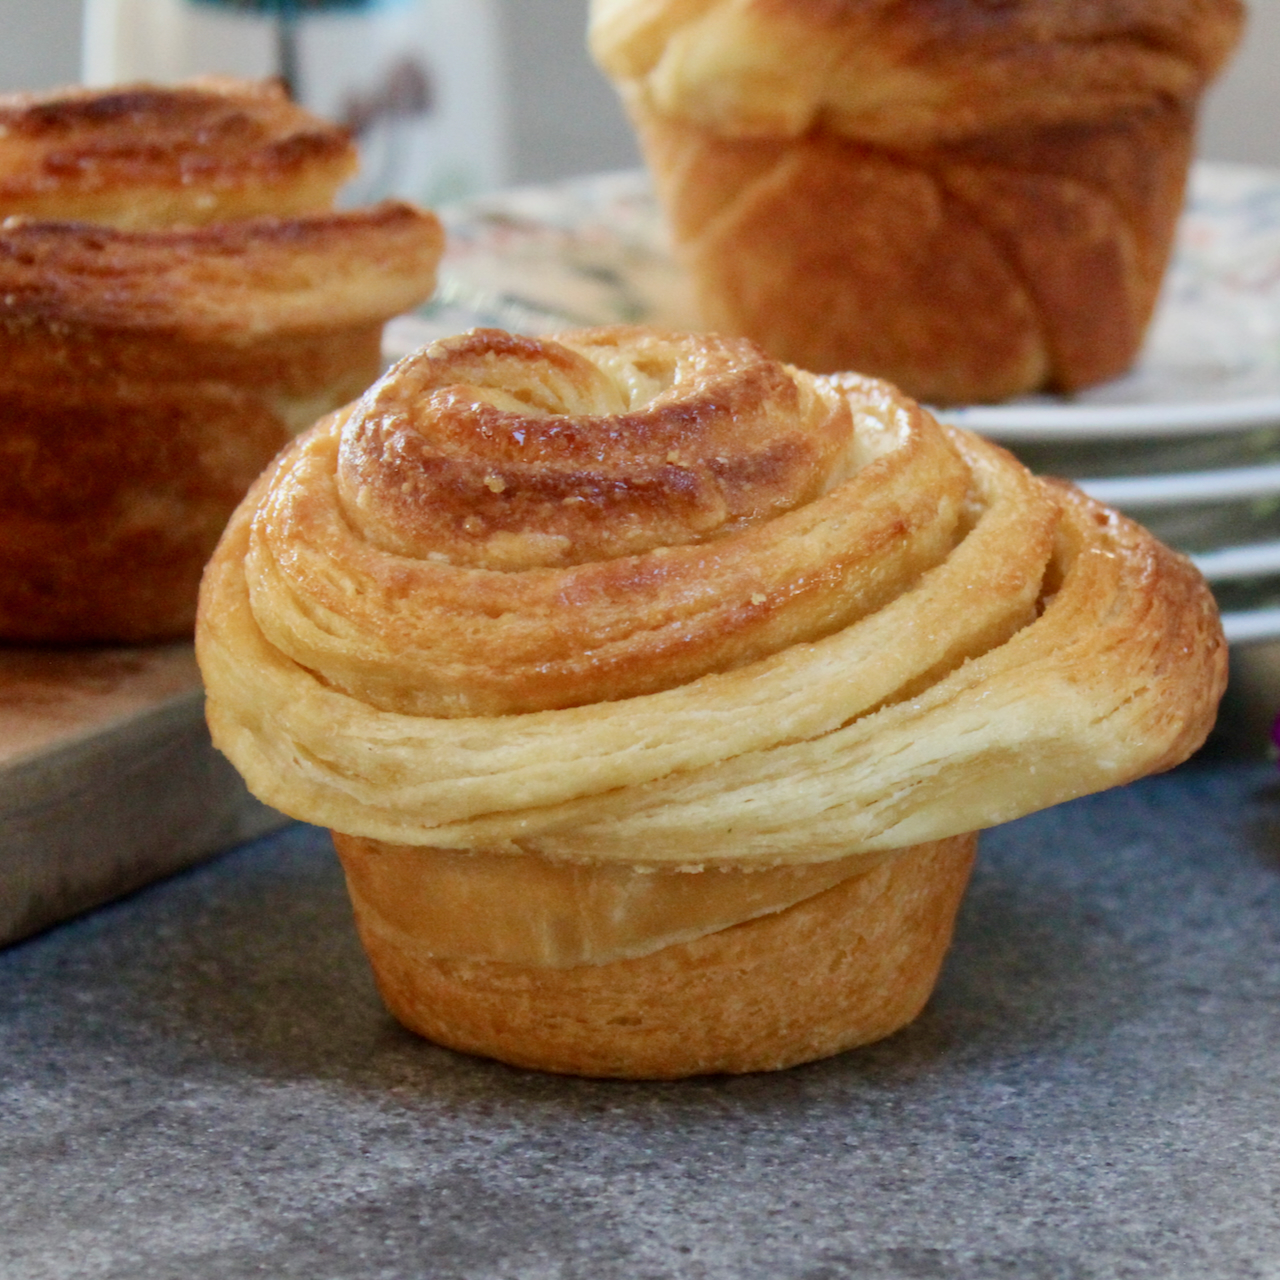
Will you just look at these decadent little spirals of ultra-buttery, maple kissed goodness! These Maple Brioche Buns are show stopper without a doubt. The faux laminating technique gives this brioche lovely, flaky, pillowy soft layers without having to go through all that it usually takes to laminate dough. Easier to make, but big on taste and texture. Count me in!
Today is February 1st. This particular day lies half way between Winter Solstice and the Spring Equinox. It is St. Brigid’s Day. Brigid is one of Ireland’s three patron saints along with St. Colmcille and St. Patrick. Ireland marks her Feast Day with a permanent Bank Holiday on the first Monday in February, which is February 5th this year. Hooray! Who doesn’t like more holidays?!! According to Irish hagiography, Brigid was an early Christian nun & abbess who preformed many miracles. She also shares the name with an important Celtic goddess who is associated with the festival of Imbolc which was celebrated at this time as well, which suggests that the early church might have adopted the legends of the goddess and transformed them into the Christian persona. Interesting huh? I don’t know how many of you folks out there remembered to put a scarf out last night. You see on St. Brigid’s Eve you should always place a scarf or other piece of fabric outside.
When Brigid passes over the land that night she will bless it. You then can fetch it back inside the next day and thanks to Brigid, it has the power to protect and heal headaches, sore throats and fevers throughout the coming year! What with all the Covid still lurking around, I wasn’t going to take any chances. My little scarf was frozen solid this morning, but is happily thawing away now, freshly imbued with healing powers. As I mentioned, today marks the festival of Imbolc as well as Candlemas, both of which are associated with fertility, fire, purification and weather divination. And speaking of weather divination, tomorrow my favourite varmint, Punxsutawney Phil, will be stepping out of his burrow at Gobbler’s Knob and letting everyone know if there will be 6 more weeks of winter or if instead Spring is on the way.
One extraordinary rodent!
I don’t know if good ole Phil will see his shadow tomorrow or not. I must admit, I’m kind of hoping he predicts more winter. I love winter. In fact, I might have some plans to head out to an even colder destination here soon, so even if Spring is on its way here, I’ll get my snow fix regardless! So this is quite an auspicious time of year! I’m very happy to be marking another event today as well. February 1st just happens to be the 12th year anniversary of the my cooking blog! Yup… Twelve years ago today I posted my first recipe. It was for Cream Tea Scones with Currants.
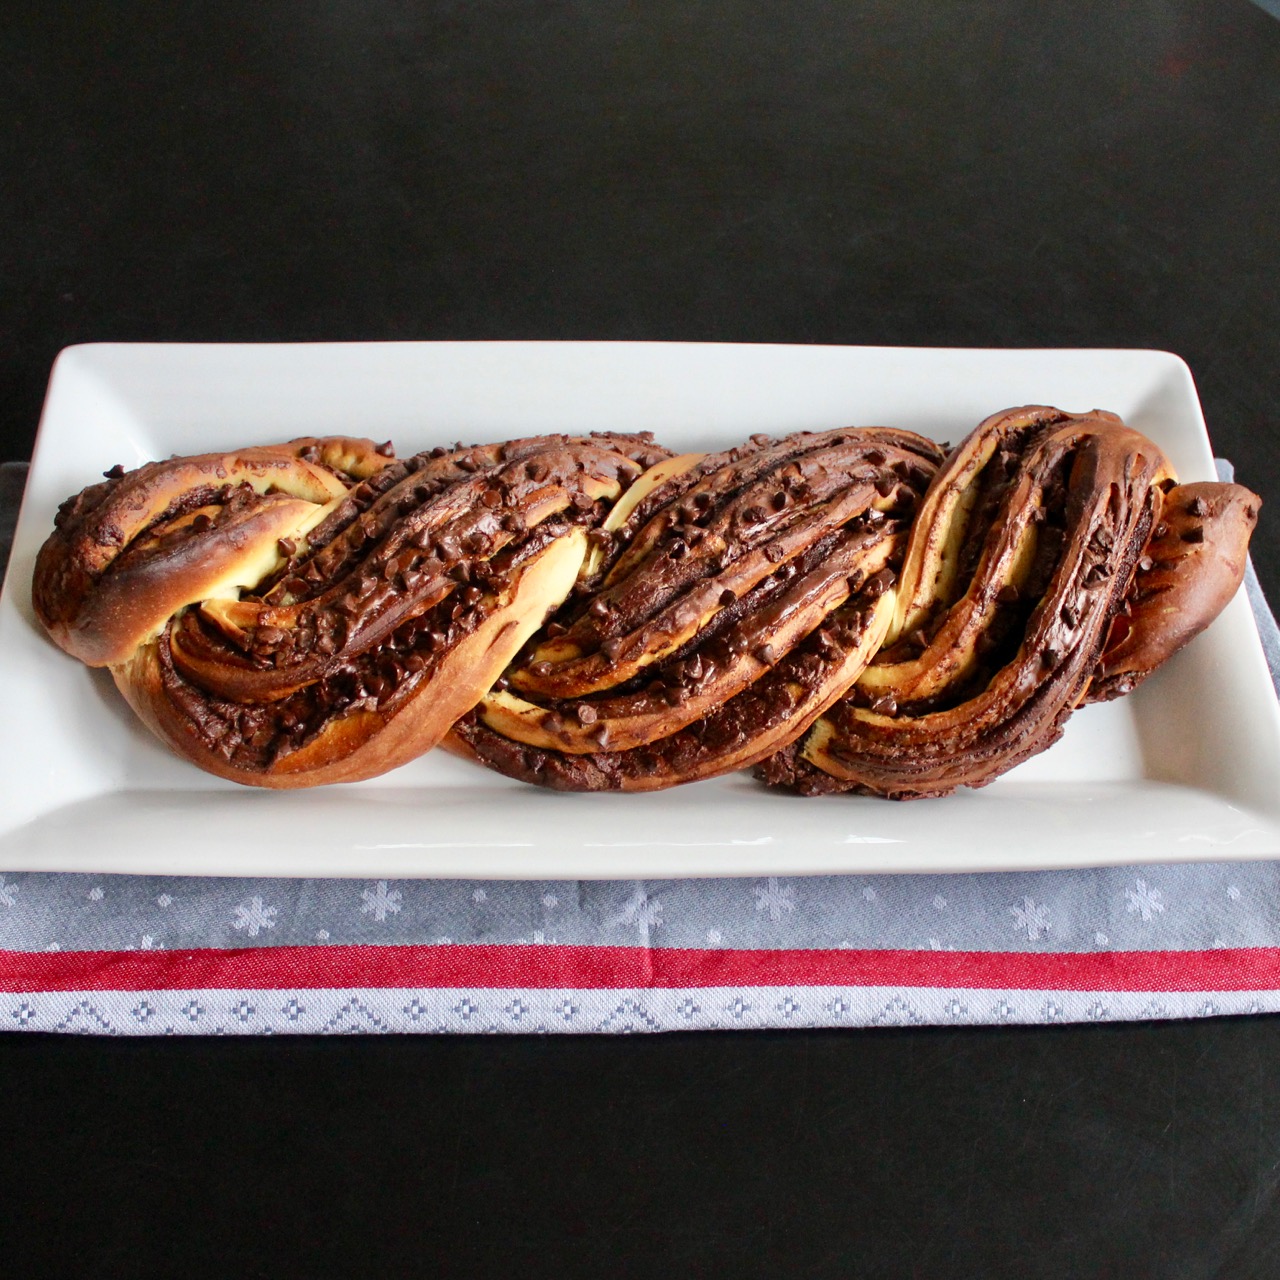
I’ve managed to do an anniversary post nearly every year since. Pretty impressive considering how slack I can be! Last year I shared this amazing Cranberry Orange Filled Wool Roll Bread.
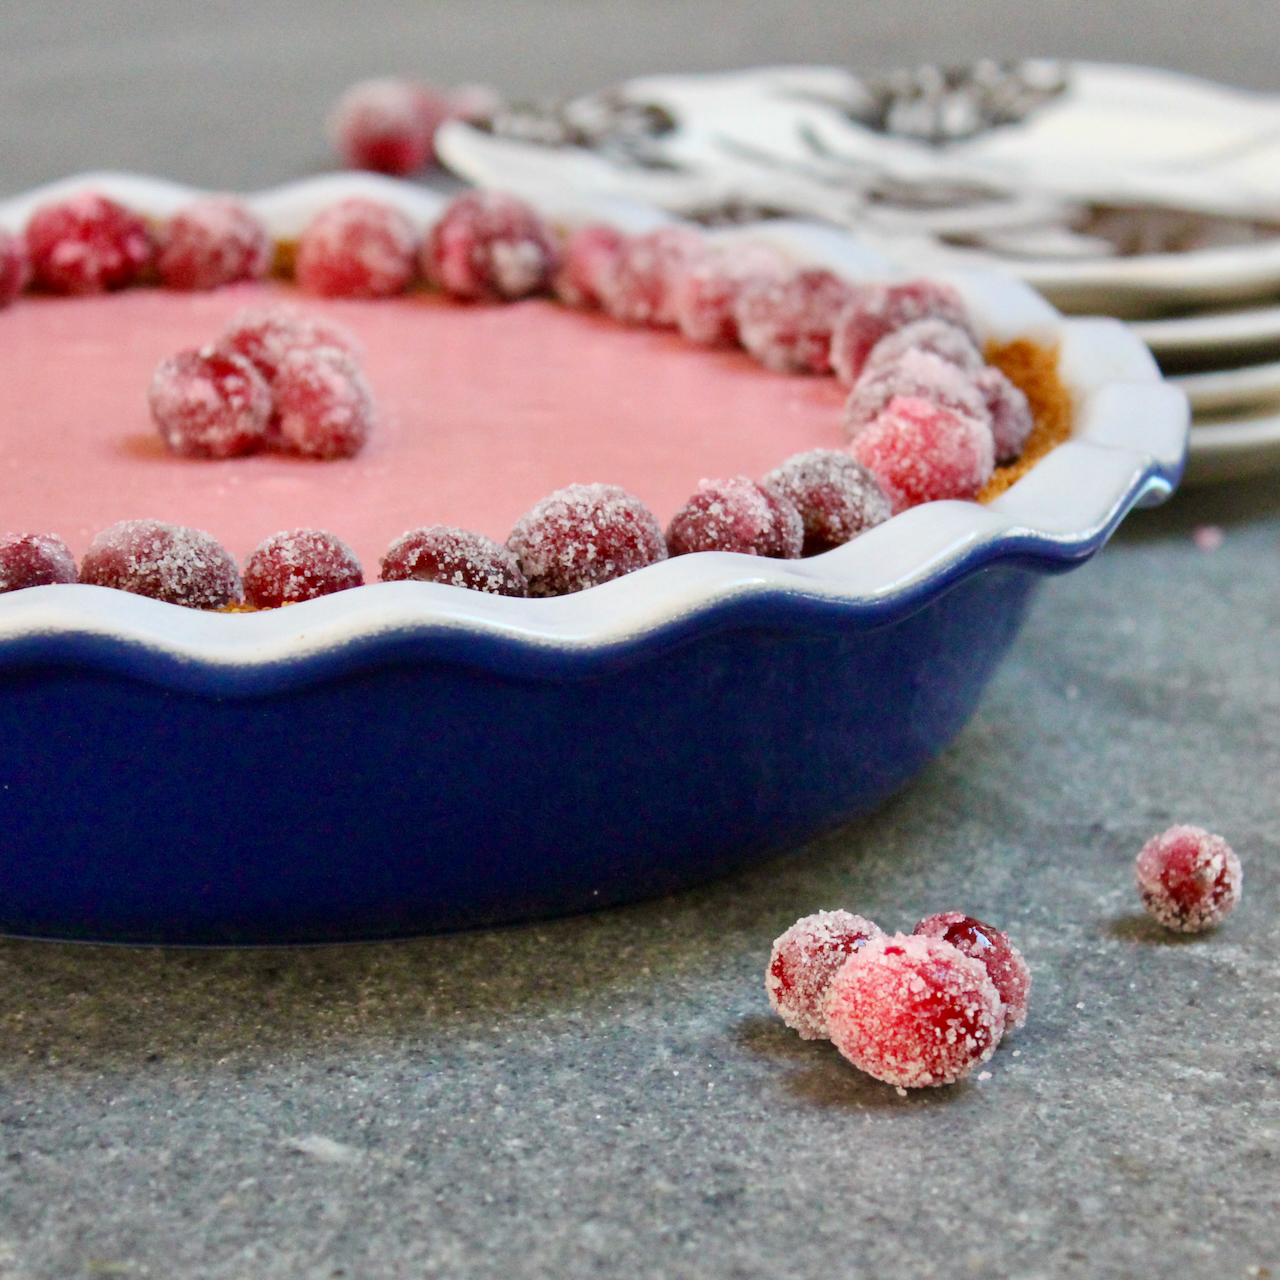
And the year before, I featured this Cranberry focused dish – exquisite Cranberry Chiffon Pie!
And who can forget that magical “caviar of the South” – Pasture’s Pimento Cheese. Keep this one in mind for the Super Bowl!
But let me get back to today’s recipe – Faux Laminated Maple Brioche Buns!
Now I’m not going to lie to you. Although making this faux laminated dough is easier than making authentic laminated dough, this recipe still does take a bit of time. You make the brioche dough the night before and after it has rested in the fridge, the next day you get to rolling it out, painting it with melted butter, sprinkling it with maple sugar, folding it and then putting it back in the fridge. You have to do this process 4 times before you can shape the buns. I would advise you to watch Erin McDowell do it in this video before you give it a whirl:
But let me assure you, although this recipe is a bit fiddly, you will absolutely swoon over these ultra-buttery, maple-y brioche delights! As you devour them, you won’t be able to resist unraveling each bun into scrumptious little ribbons.
Bake up a batch as soon as you can! You won’t regret it.
Faux Laminated Maple Brioche Buns
Servings: 16
Difficulty: moderate - need to start dough one day before baking, involves multiple rounds of rolling, folding & chilling dough. allow time
28 tablespoons (396 grams) unsalted butter, at room temperature (seriously! make sure it is room temperature or it will take much longer than 10 minutes to incorporate.)
*Be sure to use large (not extra-large) eggs; the weight should be no more than 250g, otherwise, the dough will be too soft.
3/4 cup (117 grams) maple sugar, plus more for sprinkling
1/4 cup maple syrup, to brush over buns once out of the oven
Directions:
The day before baking, make the brioche dough: Start by weighing your flour or measuring it by gently spooning it into a cup, then sweeping off any excess. In the bowl of a stand mixer fitted with the dough hook, mix the flour, sugar, and salt on low speed to combine. Add the yeast and mix to combine, 10 to 15 seconds more. Add the eggs and milk and mix for about 4 minutes on low speed. The dough should form a sticky, shaggy ball around the hook.
Increase the speed to medium and slowly add the butter 1 tablespoon at a time, being careful to incorporate each addition before adding the next; the entire process should take 8 to 10 minutes. As you go, scrape the bowl down once or twice to make sure everything is homogenous. Once all the butter is incorporated, continue to mix the dough until it’s smooth and uniform, 1 minute more. The dough will be quite soft.
Grease a large bowl with nonstick spray. Scoop the soft dough into the bowl, cover tightly, and refrigerate for at least 12 hours and up to 18 hours. (The dough will not rise much, if at all, during this time.)
The next day, assemble the buns: On a generously floured surface, gently pat then roll out the dough into a rectangle about 1/2″-thick and 20″ x 12″ in size (no need to be precise). The dough will still be quite soft at this point and may crack as you roll; it won’t have the strength of typical brioche dough; that’s OK. Melt butter and then 1/8 teaspoon of natural maple flavor to it. Mix to combine. Brush the surface of the dough with about 3 tablespoons (roughly 42g) of the melted butter mixture and sprinkle about 2 tablespoons (roughly 20g) of the maple sugar evenly over the top.
To do a 4-fold (book fold): Position the dough so that one of the long sides is facing you. Using a bowl scraper or bench knife to help lift the fragile dough, fold the left edge over toward the center, about 3/4 of the way over the dough. Then repeat on the right side, folding the other edge 1/4 of the way over the dough so that it meets the other section. The dough will now look like an open book with an off-center spine. Use your tool to help fold the dough in half, with the larger side covering the smaller side. Wrap the dough tightly and refrigerate it for 10 to 15 minutes, which will help the butter solidify. The dough will become smoother and stronger with each additional fold.
To do a 3-fold (letter fold): Roll out the dough again to a rectangle about 1/2″-thick and 20″ x 12″ in size. (It’s OK if the dough cracks or still feels sticky at this point; use additional flour and a bit of patience to continue with the folding process.) Brush the surface of the dough with another 3 tablespoons (42g) of the melted butter and sprinkle another 2 tablespoons (20g) of the maple sugar on top. Position the dough so that one of the long sides is facing you. Use the bowl scraper or bench knife to fold the left edge of the dough 1/3 of the way over the dough. Do the same with the right edge, resting it on top of the piece you just folded over, as if you were folding a business letter. You will now have 3 layers of dough. Wrap the dough tightly and refrigerate it for 10 to 15 minutes.
Repeat steps 4 and 5 to complete another 4-fold, chilling the dough and using additional flour as necessary if it feels soft or sticky.
Repeat step 6 to complete another 3-fold.
Lightly grease 16 muffin cups with nonstick spray.
To shape the rolls: On a lightly floured surface, roll out the dough into a 1/2″-thick rectangle about 12″ x 20″ in size. Cut the dough lengthwise into 16 strips that are 20″ long and 1/2″ to 3/4″ wide. (The dough can also be cut widthwise into 16 strips that are 12″ long and about 1 1/4″ wide.) Tightly roll each strip up into a spiral and place it, spiral side up, in the prepared muffin pan. The spiral will be squished tightly into the prepared pan.
Cover the pan with greased plastic wrap or your favorite reusable wrap, and let the buns rise until they appear puffy, 30 to 45 minutes. While they proof, preheat the oven to 375°F with racks in the upper and lower thirds.
Sprinkle the brioche buns with the remaining maple sugar. Bake for 25 to 33 minutes, rotating the pans from front to back and top to bottom at the halfway mark, until the buns are evenly golden brown all over and the internal temperature reads 190°F on a digital thermometer. Cool for 15 minutes in the pan before unmolding. Paint a slick of maple syrup over the top of each bun and then leave to cool entirely on wire rack.
Enjoy!
Storage information: Store brioche buns, covered at room temperature, for up to 2 days. Reheat on a parchment- or foil-lined baking sheet at 350°F, uncovered, for 10 to 15 minutes.
Useful links for Kitchen Tools & Ingredients for Faux Laminated Maple Brioche Buns:
*The links below are affiliate links. This means that, at zero cost to you, I will earn an affiliate commission if you click through the link and finalize a purchase*


 Posted by liadh1