Boozy Birthday Bourbon Layer Cake

August 29, 2014

IMG_9195

Boozy Birthday Bourbon Layer Cake. Say that three times fast! I would try but I’m afraid my mouth is stuffed full of cake at the moment. Hey…sometimes one – meaning yours truly – needs inspiration to write these blogs. I mean occasionally I’m at a loss what to say. If you were here I would just hand you a big old plate full of whatever it was I was trying to artfully describe. Let the food do the talking if you get my drift.

IMG_9215

Other times I just stuff my face full of whatever it is and start writing. Luckily for me, it was the last piece of the Boozy Birthday Bourbon Layer Cake I made for my friends recent birthday. I’m a big believer that there is nothing like a big old fancy homemade cake to properly convey an enthusiastic Happy Birthday.

IMG_9199

I mean store-bought cakes are ok and I guess I could see if you have a favourite bakery ( mine is Baked & Wired – if anyone was wondering…) and a favourite cake from said favourite bakery (uhhhh… do you know me at all?…cupcakes from Baked & Wired – any flavour will do but please no fruit filling. Get those for my husband.), folks could do just fine stopping by there and simply picking up a big old bakery box of love. However, if you have a bit of baking skill, I think you’ll get quite a few points (there I go with those supposed points again…) by making someone a cake, with as many layers as you can manage (the more layers, the more points) from scratch.

IMG_9229


My Grandmother, of the Jewish Apple Cake fame, always made me a Hot Milk Cake with Old Fashioned Chocolate Fudge Frosting for my birthdays. I can remember one above all of the others. I think I was about five years old. It had the usual chocolate frosting and shaky script handwriting spelling out Happy Birthday.  But this one was decorated with tiny plastic cake decorations. In this case they were ballerinas wearing pink tutus. I thought it was awesome!  I can still picture it perfectly in my mind’s eye.

Scan

Here is the only picture we could find with the remembered cake. Perhaps also showing my early tendency towards cupcake obsession.

When I got to be about 14 -15 years old and was the standard clueless teenager, I asked my Mom for a store-bought sheet- style birthday cake. I got it into my head that they were pretty cool with all of their fancy colours and big frosting flowers. Not to mention, that is the type of cake most of my friends had on their birthdays. Mom got me the cake, but it just wasn’t all I hoped it would be. It tasted ok, if not a bit plasticy and sickeningly sweet as those cakes often do. The bakery misspelled my name, which was a bit of a bummer. But luckily, Grandma, either through force of habit or some greater knowledge (mom-mom worldly wisdom) had still made me my old standard Hot Milk Birthday Cake. From then on, I knew which cake I’d be requesting when asked. Yup…although Grandma is not around to bake it for me anymore, my Mom has picked up the torch and has been known to whip up one mean Hot Milk Cake with Old Fashioned Fudge Frosting in no time flat! So when my friend’s birthday rolled around, I wanted to make him something special. A cake he would really like. I was pretty sure that vintage plastic ballerinas wouldn’t do a thing for him, so I turned my thoughts to something which seems to get most folks pretty excited…booze! In his case Bourbon. He has been known to take an occasional sip or two of that Knob Creek elixir from time to time. And there is quite a lot of bourbon to be found in this cake. Yup…it is in the cake, in the ganache and in the icing. A veritable Bourbon bonanza!

IMG_9231

This cake was a huge hit. The buttermilk, yeah that’s right….even more “B” words, made the cake layers wonderfully light and moist. The frosting was rich, yet fluffy and fantastically boozy.

IMG_9298

Made for quite the happy birthday, not only for the birthday boy, but also for all his well wishers to boot! Got a special occasion coming up and some bourbon lovers in the house? Look no further, this Boozy Birthday Bourbon Layer Cake will get the job done!

IMG_9252

Boozy Birthday Bourbon Layer Cake

  • Servings: 16
  • Difficulty: easy but a lot of steps!
  • Print

recipe from: Love & Olive Oil

Ingredients:

For Cake:

  • 1 vanilla bean split and scraped, seeds reserved
  • 1/2 cup (4 ounces) bourbon (pick your poison…I used Knob Creek)
  • 2 cups (13.5 ounces) all purpose flour, sifted
  • 1 tablespoon baking powder
  • 3/4 teaspoon baking soda
  • 1 teaspoon salt
  • 1 3/4 cup granulated sugar
  • 1/2 teaspoon freshly grated nutmeg
  • 1 cup (2 sticks) unsalted butter, room temperature
  • 5 eggs, room temperature
  • 2 egg yolks
  • 1 1/2 cups buttermilk

For the Buttercream:

  • 4 ounces dark chocolate
  • 6 ounces milk chocolate
  • 2 cups (4 sticks) unsalted butter, room temperature
  • 2-3 cups powdered sugar, or more as needed
  • 1/4 cup heavy cream
  • 1 Tablespoon Bourbon

For the Ganache:

  • 4 ounces dark or semisweet chocolate, finely chopped
  • 1/2 cup heavy cream
  • 1 tablespoon bourbon

Directions:

Combine the bourbon and vanilla bean together in a small bowl. Steep overnight, or as long as you can before proceeding.

Preheat the oven to 350ºF. Butter and line 3 8-inch round cake pans with parchment paper. Butter parchment.

Sift together the flour, baking powder, baking soda, salt, and nutmeg. Set aside.

Combine the sugar, butter, and reserved vanilla bean seeds in the bowl of a stand mixer. Beat on medium speed for 10 minutes, until very light and fluffy, scraping down the sides of the bowl periodically as needed.

Reduce the speed to medium low and add the eggs and egg yolk, one at a time, mixing thoroughly after each addition.

Add the flour mixture, one cup at a time, alternating with buttermilk, mixing on low speed until incorporated. Immediately add the bourbon (discard the vanilla pod) and mix until combined.

Divide the batter among prepared pans. You can just eyeball it, or weigh the pans like I do, with my handy dandy OXO Food Scale. Bake for 30 to 35 minutes, until tops are lightly browned and springy. Remove from oven and place on a wire rack until cool enough to handle. Run a small knife around the edges of each pan, then gently invert onto wire racks. Cakes should come out cleanly. Allow to cool completely.

For the ganache:  Place chopped chocolate in a heatproof bowl. Bring cream to a bare simmer over low heat. Pout hot cream over chocolate, and stir until smooth. Add bourbon. Set aside and allow to cool until thickened slightly (the room temperature ganache should be about the consistency of peanut butter). If it’s too thick, you can add a little bit more hot cream and stir until smooth.

For the buttercream: Melt chocolates in a microwave or double boiler over low heat until smooth. Remove from heat and let cool to room temperature.

In a large mixing bowl, beat butter until fluffy, 1 to 2 minutes. Add powdered sugar, 2 Tablespoons at a time, mixing well after each addition. If you don’t add the sugar slowly and mix thoroughly after each addition, you run the risk of ending up with gritty icing, which no one will be pleased with! Add cooled chocolate and beat until smooth. Add heavy cream and bourbon and beat until light and fluffy. Add more powdered sugar or heavy cream as necessary to achieve desired consistency.

To assemble:  Level each cake layer by cutting of the domed top with a long serrated knife. Or use a handy cake leveler like I did. Place one layer, flat side down, on a cake stand or serving platter. To keep the platter clean while frosting, place 4 small strips of parchment or waxed paper just under the edges of the cake. This will allow you to frost the cake and then remove these strips cleanly later.

Spread half of the ganache evenly over top of layer, followed approximately 1/2 cup of buttercream. Position second layer on top and press to adhere. Repeat with remaining ganache, another 1/2 cup of buttercream, and final cake layer, flat side up.

Cover the entire cake with a thin layer of buttercream. This “crumb coat” will make frosting the cake easier. Refrigerate for about 15 minutes to allow this crumb coat to set.

Remove cake from refrigerator and frost with remaining buttercream, reserving some if you’d like to add any decorative details or borders.

Enjoy!

Bourbon Birthday Cake brought to you by: Runcible Eats (http://www.leaandjay.com )


Southwestern Quinoa Stuffed Peppers

August 26, 2014

IMG_8726

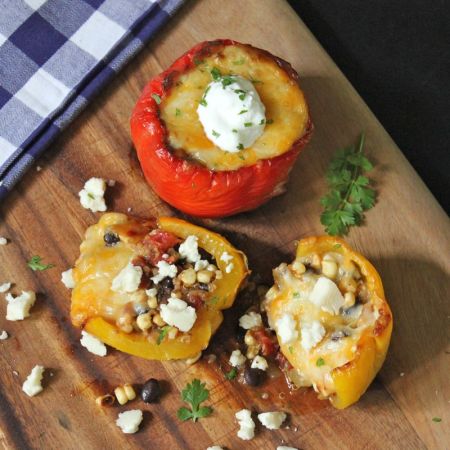
Wow! I am on a roll this summer with the Meatless Monday recipes! Yup…you guessed it…here’s another one. Southwestern Quinoa Stuffed Peppers. Fresh bell peppers (I used red, yellow and orange peppers, being horribly prejudiced against the green ones. I swear they taste different -and not in a good way- from their orange, red and yellow cousins) stuffed with a mixture of quinoa, black beans, spicy grilled corn, green chilis, tomatoes, fresh cilantro and lots of ooey-gooey mexican blend cheeses. No meat in sight, but plenty of spicy fresh flavour!

IMG_8723

This recipe has got all of the things I’ve been obsessed with this summer, quinoa, grilled corn, and fresh veggies. I’m still completely smitten with quinoa. If you’ve been following along with me, you’ve already seen me blog a couple of truly tasty quinoa recipes here in the recent past, like the Caprese Quinoa Bake and the Thyme Mushroom Quinoa Risotto, and I’m sure there will be more to come. It’s not often that you can find something that tastes great and is also really good for you, being protein packed, high in fiber, phosphorus and magnesium, a good source of calcium and having high levels of antioxidants and omega 3’s. Not to mention, it’s gluten-free for all of you gluten intolerants out there.What a fantastic meal! And with no meat, it fits the vegetarian bill as well. But you hard-core carnivores shouldn’t despair, you could just add a bit of ground turkey/ground beef or if you really wanted to keep that Mexican vibe and add even more of a kicked up spicy flavour you could add in some chorizo sausage.

IMG_8599

As good as that chorizo sounds, I think I’m going to stick to the meat free version. I’ve told you about the points I think I am somehow awarded (surely someone is keeping score…) for every meatless meal and these little pepper gems are so yummy, the meat is just not necessary. I tell you, the husband and I love these Southwestern Quinoa Stuffed Peppers just the way they are… Zesty, spicy, hearty AND healthy! You just can’t go wrong!

IMG_8727

Southwestern Quinoa Stuffed Peppers

  • Servings: 3 - 6
  • Difficulty: easy
  • Print

recipe adapted from: Barbells & Bellinis

Ingredients:

  • 6 bell peppers (I used assorted)
  • 1 14.5 ounce can diced tomatoes 
  • 1 14 ounce can black beans, drained 
  • 1 cup of quinoa, cooked per directions
  • 1 – 1 1/2 cups fresh spicy grilled corn, recipe below (can use frozen or canned corn if you must)
  • 1/2 red onion, diced
  • 4 oz. diced green chilis
  • 2 teaspoons of cumin 
  • 1 1/2 teaspoons of chili powder
  • 2 garlic cloves, minced (or 1 1/2 teaspoons of garlic powder)
  • 3 teaspoons of cilantro
  • 1 teaspoons of salt 
  • 1/4 -1/2 teaspoon of red pepper flakes (depending on how spicy you like your food)
  • 1 tablespoon of olive oil 
  • 1/2 to 1 pound of  mexican blend, or pepper jack cheese (whatever ‘ya got around) shredded
  • Even move Cilantro for garnish
  • Crumbled Cotija Cheese,  fresh sliced avocado and sour cream for serving

Directions:

Cut tops off of the bell peppers and remove seeds and membranes.  Heat a large skillet or dutch oven over medium heat.  Add olive oil and onions.  After onions cook for about 5 minutes or until they soften.  Add cumin, chili powder, garlic, cilantro, salt and red pepper and cook until beef is browned, about 5 minutes.  Stir in quinoa, diced tomatoes, diced green chilis, grilled corn and black beans, cooking for another 3 minutes.   Turn stove off.  Stuff peppers with the quinoa mixture and place in a casserole dish or dutch oven (I used one of my favourite Le Creuset pans).  Top with shredded cheese.  Cover with foil and bake at 375º F for 40 minutes.  Remove foil in last 10 minutes of cooking.  Top with cilantro and crumbled Cotija cheese. Serve along with fresh slices of avocado and sour cream.

******Carnivore Alert: If you just can’t bear the thought of a meatless meal, (hey…no judgement here…) add 1 lb. of ground turkey or beef into the pan after you cook the onions and proceed with the directions as written above.

Spicy Grilled Corn

Ingredients:

  • 3-4 ears of fresh corn in husk
  • 2 tablespoons olive oil
  • 2 tablespoons fresh lime juice
  • 2 cloves of garlic, finely chopped
  • 3/4 tsp Kosher salt
  • 1 tsp light brown sugar
  • ¼ tsp chili powder

Directions:

Combine olive oil, lime juice, garlic, salt, brown sugar and chili powder in small bowl and whisk together.
Preheat grill.
Peel back the corn husks, discarding all but a couple inner layers. Remove corn silk, then baste with dressing, and recover corn with remaining husk.
Grill on med-high for 20-25 minutes, turning 3-4 times during cooking time.
Remove the corn from grill and allow to cool a few minutes. Once it has cooled enough to handle, cut off stem end, place the flat cut end on bottom of large bowl, and use a corn zipper to strip the kernels from the cob. Or if you don’t have a zipper, run a small sharp knife down the length of the cob, slicing off kernels.

Enjoy!

Southwestern Quinoa Stuffed Peppers brought to you by: Runcible Eats (http://www.leaandjay.com )


Sesame-Spiced Turkey Meatballs & Smashed Chickpea Salad

August 22, 2014

IMG_8795

Hold everything! Stop what you are doing and lookie here!!! I think this might be my favourite new recipe that I’ve made this summer. Sesame-Spiced Turkey Meatballs & Smashed Chickpea Salad. It is just perfection on a hot and steamy summer’s evening, though we loved this so much I think it will continue to appear on our dinner table well into the Fall and Winter. This meal is fresh and light yet also hearty and filling at the same time. The meatballs are spicy and tender and that chickpea salad is amazing. So flavorful, zesty and served refreshingly chilled.

IMG_8798

I found this recipe in Deb Perlman’s Smitten Kitchen Cookbook. It was just brilliant. As usual, she knocked it out of the park. If you don’t have this cookbook yet, you simply must go out and get it tonight. I’m serious. It is without a doubt a kitchen essential! And while you’re shopping for the cookbook, make sure you pick up some new spices as well. I love to go spice shopping and can’t seem to make it out of a Penzey’s store without laying down some serious bucks. That place should have some sort of flashing cautionary lights. I totally lose control there. But back to the recipe at hand…The two spices that are used in this recipe, but might not be hanging out in your spice rack at home are Aleppo Pepper and Ground Sumac. Both are often used in Mediterranean and Middle Eastern cuisine. Aleppo pepper is rated moderately hot on the pepper scale and imparts a tart, ancho chile like flavour. Ground Sumac is made from the ground berries of the sumac bush and adds a tangy, lemony zing to foods.

IMG_8771

The husband loves meatballs! He loves the cocktail variety, the ones on top of spaghetti, and the ones stuffed into subs. I mentioned this before when I shared a recipe with you for Konigsberger Klopse (German Meatballs). So I’m always on the lookout for a good meatball recipe. He was completely over the moon with this one. As I’m sure you will be when you taste it. So what are you waiting for, get cooking!

IMG_8782

Sesame-Spiced Turkey Meatballs & Smashed Chickpea Salad

  • Servings: 4
  • Difficulty: easy
  • Print

recipe from: Smitten Kitchen Cookbook by Deb Perlman

Ingredients:

For the meatballs:

  • 1 lb (455 grams) ground turkey
  • 2/3 cup (40 grams) fresh bread crumbs
  • 1/4 cup (60 ml) water
  • 1 teaspoon table salt
  • 1 large egg
  • 2 garlic cloves, minced
  • 1/2 teaspoon ground cumin
  • 1/2 teaspoon ground coriander
  • 1/2 teaspoon Aleppo pepper
  • Pinch of cayenne pepper
  • 2 Tablespoons (15 grams) sesame seeds, toasted
  • olive oil to coat pan

For the Chickpea Salad:

  • 1 3/4 cups (440 grams) cooked chickpeas, drained and rinsed
  • Handful of pitted, halved, and very thinly sliced green olives
  • 1/2 teaspoon ground sumac, plus more for garnish
  • 1/2 teaspoon smoked paprika (we do like our spice!)
  • Chopped fresh cilantro (Deb uses parsley, but we love cilantro, so…)
  • 2 Tablespoon (30 ml) freshly squeezed lemon juice
  • 1 small garlic clove, minced
  • Pinch of cayenne pepper
  • 1/4 teaspoon table salt
  • Olive oil

Directions:

Preheat oven to 400 ° F. Combine all of the meatball ingredients in a medium bowl with a fork, breaking up the clumps of meat until ingredients are well combined. Form the turkey mixture into golf-ball sized meatballs. Arrange them on a parchment paper lined baking tray.

Heat oil in a large ovenproof sautè pan. Brown the meatballs in batches, taking care not to crowd the pan. Transfer the meatballs to a paper-towel lined tray and continue cooking until all of the meatballs have been browned.

Discard the oil and wipe all but a thin layer from the pan. Return all of the meatballs to the pan and transfer to the preheated oven. Bake until a thermometer reads and internal temperature of 160 to 165°, or about 10 to 15 minutes.

Meanwhile, prepare chickpea salad. Mix all of the ingredients with the exception of the olive oil in a medium-sized bowl. Very lightly smash the chickpea mixture with the back of a fork or a potato masher. Continue to smash the chickpeas until you reach a consistency somewhere between hummus and a coarse chop. Dress the chickpeas with a drizzle of olive oil and stir to combine. Salt and pepper to taste.

Serve meatballs with the chickpea salad.

Enjoy!

Sesame-Spiced Turkey Meatballs & Smashed Chickpea Salad brought to you by: Runcible Eats (http://www.leaandjay.com )


Polenta Tart with Asiago Spinach, Grilled Corn, Balsamic Mushrooms and Cherry Tomatoes

August 18, 2014

IMG_8974

So this Meatless Monday thing is actually pretty fun! The husband and I have been trying our best to eat no meat on Mondays for quite some time now and have really loved all of the dishes I’ve prepared for it. With all of the fresh veggies and wonderful spices, we have not missed the meat at all.

IMG_9021

Now, don’t get me wrong…we do not think we could go completely vegetarian and we know we couldn’t be vegans, but we do feel that our diet in the past has relied too heavily on meat. We’d like to get back to a time when eating meat was more of a special occasion thing and not an everyday meat lovers smorgasbord thing. Some meatless days would be healthier for us as well as our planet. This Polenta Tart with Asiago Spinach, Grilled Corn, Balsamic Mushrooms and Cherry Tomatoes was one of my most recent Meatless Monday dishes and it was so delicious, just chock full of fresh veggies, right out of the garden. I’m sure it will be in permanent meal rotation around here from now on.

IMG_9026

As I’m certain you’ve noticed from the recipe title, this tart has a polenta crust. I love polenta and was shocked to find out that even though my husband is a cornbread fanatic, he had never tried polenta. Polenta is basically coarse ground yellow cornmeal which is cooked up like porridge or for those from the southern states, grits. It can be served as a creamy porridge, or once cooked can be cut into slices and baked, fried or grilled. Or as you can see here, formed into a tart crust. Very versatile indeed.

IMG_8975

It was once considered to be peasant food, but now has been known to make an appearance on the menus of truly fancy-dancy dining establishments. It is mostly associated with Northern Italy. When corn was introduced in Europe in the 16th Century, that northeast part of Italy was found to have the perfect growing conditions for corn crops. Corn became the staple dish of the farm families there, much like the potato did in Ireland and Germany. Somehow polenta got a reputation for being difficult to prepare. There were rumours that involved one standing in front of a hot stove, constantly stirring that pot of polenta for  2 -3 hours and what you would get after all that was a clumpy burned mess. I don’t know how this came about. Polenta is not difficult to prepare. It takes about 40 – 45 minutes and while there is a lot of whisking as you initially sprinkle the cornmeal over the boiling liquid, after that an occasional stir will suffice. It makes for a rustic and hearty tart shell, which is able to hold up to the mountains of fresh veggies I heaped on top. Comfort food that’s also good for you. Now that’s a winner in my book!

IMG_8991

Polenta Tart with Asiago Spinach, Grilled Corn, Balsamic Mushrooms and Cherry Tomatoes

  • Servings: 4
  • Difficulty: easy
  • Print

recipe inspired by: Yeah…Immaeatthat

Ingredients:

For the Polenta Crust:

  • 1 cup chicken or vegetable broth
  • 1 3/4 cup water
  • 1 cup coarse ground cornmeal (or polenta)
  • 1/4 teaspoon sea salt
  • 1/4 cup Asiago cheese, grated
  • 1 Tablespoon unsalted butter

For the Topping:

  • 2 Tablespoons butter, divided
  • 8 ounces cremini mushrooms, sliced
  • 1 Tablespoon balsamic vinegar
  • pinch of salt
  • 1/2 cup yellow onion, diced
  • 1 garlic clove, minced
  • 5 ounces fresh spinach
  • 2 Tablespoons heavy cream
  • pinch of nutmeg, freshly ground
  • salt and pepper to taste
  • 12-14 cherry tomatoes
  • 1/2 cup spicy grilled corn* (recipe noted below- or you can use fresh corn from the cob or if you must -frozen or canned corn)
  • 1/4 cup Asiago cheese, grated

Directions:

Preheat oven to 400°F. Butter a 9″ tart pan or you could use a 9″ springform pan as well. Set aside.

In a heavy bottom saucepan, ( I used my Le Creuset which I just adore! ) combine the broth and water and bring them to a boil. Stream in polenta while whisking the entire time. Add salt and continue to whisk, taking care to scrape the bottom and sides of the pan to prevent polenta from sticking or burning. You should notice that it is beginning to thicken after about 15 minutes, but continue to cook for about 15 more minutes (total of 30 minutes cooking time).

A few minutes before you have finished cooking the polenta, stir in 1/4 cup of the Asiago cheese. Whisk until melted and finally add 1 tablespoon of the butter. Whisk until the butter has melted and is incorporated. Remove from heat and allow polenta to cool for 5-10 minutes.

Scrape polenta into prepared pan. Press it into the bottom and up the sides of the pan to form the crust. Bake for 10 minutes. Remove from oven and set aside.

While crust is baking, prepare the topping. Melt 2 tablespoons of butter in a large saute pan and add the mushrooms. Season with a pinch or so of salt and cook until softened, about 8 – 10 minutes. Add 1 Tablespoon of balsamic vinegar and cook until liquid is mostly gone for another 5 minutes or so. Remove from pan and set aside.

Add remaining tablespoon of butter to pan and melt over medium high heat. Add onion and saute for 6 – 7 minutes until softened. Add garlic and cook for about 1 minutes more. Place the spinach in the pan and stir until wilted. Add pinch of nutmeg and 2 tablespoons of heavy cream. Gently stir mixture until it begins to thicken. Remove from heat.

Cover polenta crust with spinach mixture. Scatter balsamic mushrooms, grilled corn and halved cherry tomatoes over the spinach. Sprinkle Asiago cheese over the top. Return tart to the oven and bake for 15 – 20 minutes.

Remove from oven and cool on wire rack for 5 minutes. Remove sides of pan. Serve warm.

Enjoy!

Spicy Grilled Corn

Ingredients:

  • 3-4 ears of fresh corn in husk
  • 2 tablespoons olive oil
  • 2 tablespoons fresh lime juice
  • 2 cloves of garlic, finely chopped
  • 3/4 tsp Kosher salt
  • 1 tsp light brown sugar
  • ¼ tsp chili powder

Directions:

Combine olive oil, lime juice, garlic, salt, brown sugar and chili powder in small bowl and whisk together.
Preheat grill.
Peel back the corn husks, discarding all but a couple inner layers. Remove corn silk, then baste with dressing, and recover corn with remaining husk.
Grill on med-high for 20-25 minutes, turning 3-4 times during cooking time.
Remove the corn from grill and allow to cool a few minutes. Once it has cooled enough to handle, cut off stem end, place the flat cut end on bottom of large bowl, and use a corn zipper to strip the kernels from the cob. Or if you don’t have a zipper, run a small sharp knife down the length of the cob, slicing off kernels.

Garden Fresh Asiago Polenta Tart brought to you by: Runcible Eats (http://www.leaandjay.com )


Banana Buttermilk Pistachio Muffins

August 15, 2014

IMG_7826

I had a couple bananas get a little too ripe the other day. That hasn’t happened in a while and I must say I was pretty pleased, because that meant I just had to make some sort of yummy banana treat. So I decided to surprize the husband with a batch of freshly baked Banana Buttermilk Pistachio Muffins. I love to use buttermilk when I bake. It adds a slight tang to everything and gives baked goods a wonderfully tender and light texture.

IMG_7803

These muffins were indeed light, despite the fact that they had a bit of whole-wheat flour in them, which can make a muffin somewhat heavy or dense. And they weren’t too sweet, which I prefer in a breakfast muffin. If you like a really sweet, almost dessert type of muffin you may wish to up the sugar, add some chocolate chips into the mix or perhaps sprinkle some Demerara sugar over the top when you bake them. I did modify the original recipe a bit as well. It called for canola oil but I used coconut oil which tastes absolutely divine in pastries.

IMG_7836

And although I know that folks mostly use walnuts or peanuts in banana muffins, I decided to go with pistachios and was very pleased with the combination. These Banana Buttermilk Pistachio Muffins were quick and easy to prepare. And made for a delightful start to the day!

IMG_7795

Banana Buttermilk Pistachio Muffins

  • Servings: 12 muffins
  • Difficulty: easy
  • Print

recipe slightly adapted from Williams Sonoma

Ingredients:

  • 1 cup unbleached all-purpose flour
  • 3/4 cup whole-wheat flour
  • 1/2 cup sugar
  • 2 teaspoons baking powder
  • 1 teaspoon baking soda
  • 1 teaspoon cinnamon
  • 1 cup low-fat buttermilk
  • 1 cup well-mashed ripe banana
  • 2 Tablespoons coconut oil, melted ( or you can substitute in canola oil)
  • 1 egg
  • 1 teaspoon vanilla extract
  • 1/2 cup chopped pistachios

Directions:

Preheat an oven to 375°F. Spray 12 standard muffin cups with canola-oil cooking spray, or use paper liners.

In a large bowl, stir together the all-purpose and whole-wheat flours, sugar, baking powder,baking soda and cinnamon.

In another bowl or a large, glass measuring pitcher, whisk together the buttermilk, banana, egg and vanilla. If you are using coconut oil, warm the buttermilk mixture in the microwave ( do this in 5 -10 second bursts, you just want it warmed not cooked and microwaves can get a bit out of control if you are not careful 🙂 ), until it comes to room temperature.  Once it is warmed up, add the coconut oil. If you put coconut oil into a cold mixture it will congeal to solid clumps (yuck!). If you are using canola oil, you can simply add it to the buttermilk mixture. No warming required. Pour the wet ingredients over the dry ingredients and stir just until blended. Do not overmix. Spoon the batter into the prepared muffin cups, filling each about three-fourths full. Sprinkle the tops evenly with the pistachios (or nut of your choosing).

Bake the muffins until they are lightly browned and a toothpick inserted in the center of a muffin comes out clean, 15 to 20 minutes. Let cool in the pan on a wire rack for 15 minutes, then turn out onto the rack and let cool completely. The muffins will keep in a zippered plastic bag at room temperature for 2 or 3 days, or in the freezer for up to 2 months.

Enjoy!

Banana Buttermilk Pistachio Muffins brought to you by: Runcible Eats (http://www.leaandjay.com )


Thyme Mushroom Quinoa Risotto

August 12, 2014

IMG_8178

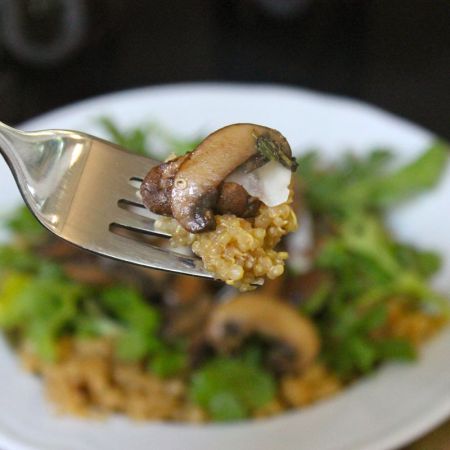
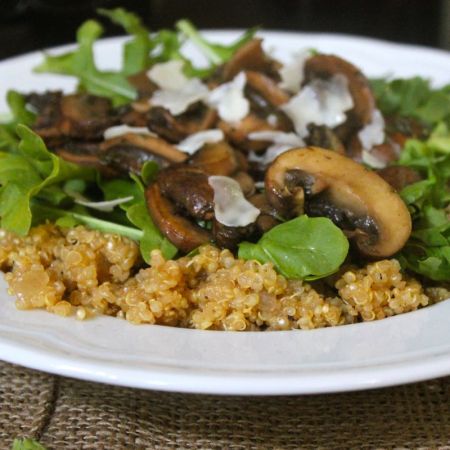
I believe that this Thyme Mushroom Quinoa Risotto is somewhat magical. Why? Well for starters you’ve got those wonderful earthy thyme sauteed mushrooms. Mushrooms are known to be magical right? What is that you say…I’m thinking of a different varietal of mushroom perhaps? Ooops! Well the magic of these mushroom is in their savoury taste, not so much in their pharmacological effect. I love mushrooms and am happy to report that the husband now shares my love for them.

IMG_8194

You know he didn’t when we first got married. He announced that mushrooms were slimy and he hated them. I was horrified. Turns out he had only come into contact with mushrooms right out of a tin, which were, in all honesty, a bit slimy. Once he got a taste of fresh mushrooms, he started singing a different tune. But mushrooms aren’t the only bewitching thing about this dish. There is the fresh, peppery crunch of the arugula (rocket) leaves which provides great contrast to the creamy parmesan-y quinoa base. And the risotto? Well, it has done a bit of a disappearing act here. The truth is that there isn’t any risotto, quinoa, prepared as if you were making risotto has taken its place. And as much as I love a big old creamy comforting bowl of risotto, I didn’t miss it one bit. The quinoa was a great alternative and really served to lighten the dish up to make it a superb summer salad.

IMG_8164

I did warn you back when I blogged about that delicious Caprese Quinoa Bake that you might be seeing some more recipes from me that use quinoa. I tell you I’m still smitten with the stuff! Not only does it have a light and nutty taste as well as a great toothsome texture, but it is also really good for you. Chock full of protein, fiber, antioxidants and omega 3’s. And it is gluten-free for your folks out there who are gluten adverse. (me , not so much. I am way into glutens and luckily my body seems to be just fine with that path…) Knowing all of that, who could resist it?! I whipped this dish up for a Meatless Monday meal (for other wonderful vegetarian dishes make sure to check out the Delicious Everyday Blog – all vegetarian all the time) and couldn’t have been happier with it. Easy to prepare, tasty and vegetarian. (The husband and I feel that we get extra points for every meatless dish we’re able to work into the weekly menus. Who is keeping track of these points and what they’ll actually get us hasn’t quite been revealed yet…) Comfort food which is good for you. Now that truly is magical. Enchant your family with a big helping of Thyme Mushroom Quinoa Risotto tonight.

IMG_8174

Thyme Mushroom Quinoa Risotto

  • Servings: 4-6
  • Difficulty: easy
  • Print

recipe from: Delicious Everyday

Ingredients:

  • 2 Tablespoons olive oil
  • 4 – 5 cups of vegetable stock
  • 1 Tablespoon olive oil
  • ½ yellow onion, diced
  • 2 garlic cloves, peeled and minced
  • 1½ cups white quinoa, rinsed under running water for 2 minutes
  • ⅓ cup white wine (optional…perhaps thought so by some…me? thinking it essential!)
  • ¼ cup freshly grated parmesan
  • salt and pepper, to taste
  • 350g (12 oz) mushrooms, sliced
  • 1 Tablespoon olive oil, extra
  • 1 Tablespoon fresh thyme leaves
  • ¾ cup Arugula leaves (rocket)

Directions:

Place a medium saucepan over a high heat and add the vegetable stock. Bring to a boil, cover and reduce the heat to low.

Place a large saucepan over a medium heat and add the olive oil and add the onion and cook until translucent, about 5 minutes. Add the garlic and cook until fragrant. Add the quinoa and coat in the oil, onion and garlic mixture and cook for a couple of minutes or until the quinoa starts to turn translucent. Add the wine (if using – come on…you know you want to…) and cook until it’s absorbed. Add the stock, a ladle at a time, and cook until absorbed before adding another ladleful, stirring as you go. Once the quinoa is tender remove the saucepan from the heat. Taste and adjust the seasoning as necessary. Keep warm while you saute the mushrooms.

Place a large frying pan over a high heat. Once the pan has come to heat add half the oil and half the mushrooms in a single layer in the pan. Cook for 1 to 2 minutes before turning the mushrooms over and cooking for a further minute. Remove the mushrooms and place on a plate and repeat with the remaining oil and mushrooms. Finally add the first batch of mushrooms to the pan and add the thyme leaves and cook for 1 minute.

Divide the risotto between 4 bowls or plates and top with the rocket (arugula) and mushrooms and serve immediately.

Enjoy!

Recipe brought to you by: Runcible Eats (http://www.leaandjay.com )


Peach Dumplings With Bourbon Hard Sauce

August 8, 2014

IMG_8474

Peach Dumplings! And as if that didn’t sound delightful enough, the following words, Bourbon Hard Sauce, just might just zombify you.  What do I mean by zombify? You know how zombies are just shuffling forward, driven by a burning desire to eat something, in their case brains, in your case these Peach Dumplings with Bourbon Hard Sauce. Zombified…you get what I’m saying right? And I have to tell you that when I served these Peach Dumplings I didn’t just stop after dolloping out a generous amount of that Bourbon Hard sauce which promptly began to melt and trickle down over the sides. Nope. I added a big old scoop of ice cream. Oh yes. I did. Sheer summer-time dessert bliss!

IMG_8427


I don’t usually make a lot of peach desserts. It’s not because I don’t like them, cause believe me I do. I just have really bad luck with them. I mean often I will go to the store and see a big, glorious mountain of peaches. They look great and smell phenomenal. Sometimes there will even be a little plate of cut up sample peach pieces, which I try and find they taste great as well. Alright! I’m in business. These are perfect peaches, I think and then I pick out a bunch out and take them home, already drooling over the spectacular desserts I will be making. Alas, when I actually get into the kitchen, I find out that they are either not ripe enough, way too ripe or have some weird mealy consistency. Bleh! But somehow the peach gods were with me when I picked these bad boys out. I guess persistence pays off. I mean certainly the odds must dictate I will eventually pick out the delicious peaches rather than the duds if I try often enough right? These peaches were just sweet juicy perfection!

IMG_8459

I found this recipe in Deb Perlman’s Smitten Kitchen cookbook, which if you don’t already have it, you absolutely need to buy it today! I kid you not, every single thing I have made from it has been just incredible! For these dumplings, Deb gives the recipe for what I’m sure is a fantastic pie crust. I however already had a batch of the pie crust which I usually use all made up and ready to go, so I substituted in my crust for simplicity sake. (If you buy her book, you could get her recipe and try it out as well…hint, hint.)

IMG_8442


Without a doubt, these Peach Dumplings were impressive, though pretty dang easy to make. And when I say impressive, I mean in a down homey kind of a way, not a fancy pants French restaurant kind of a way. You know just delicious, kind of old-fashioned goodness. Your Granny would have served this dessert. The buttery pastry bakes up golden and flaky, the peach halves are sweet and glazed in caramalized brown sugar with overall hints of sweet buttery bourbon. And when you add that scoop of ice cream…you will be in a zombie trance indeed. Need. More. Peach. Dumplings!

IMG_8485

Peach Dumplings With Bourbon Hard Sauce

  • Servings: 6
  • Difficulty: easy
  • Print

recipe from: Smitten Kitchen Cookbook by Deb Perlman with the substitution of my favourite pie crust

Ingredients:

For the crust: 

  • 2 1/2 cups (360 grams) all-purpose flour
  • 1 teaspoon kosher salt
  • 1 cup (227 grams) very cold unsalted butter, cut into 1/2-inch cubes (2 sticks)
  • 6 tablespoons vodka (chilled)
  • 2 Tablespoons ice water

For the filling:

  • 3 large peaches
  • 1/3 cup (65 grams) light or dark brown sugar
  • Pinch of salt
  • 1/4 teaspoon ground cinnamon
  • Few fresh gratings of nutmeg, or a pinch of ground
  • 1 Tablespoon butter, cut into 6 pieces, kept cold
  • 1 large egg, for glaze

For the hard sauce:

  • 4 tablespoons (55 grams or 1/2 stick) butter, at room temperature
  • 3/4 cup (95 grams) confectioner’s sugar
  • 1 Tablespoon bourbon ( your choice – but let me just say Knob Creek is delicious!)

For Serving:

  • Ice Cream! ( not necessary, but really yummy)

Directions:


Mix 6 tablespoons of vodka and 2 tablespoons of water. Put in fridge or freezer (don’t forget it) to chill.


Add 1 1/2 cups flour, salt to a food processor. Pulse 2 to 3 times until combined.


Scatter butter cubes over flour and process until a dough or paste begins to form, about 15 seconds. (There should be no uncoated flour).


Scrape bowl, redistribute the flour-butter mixture then add remaining 1 cup of flour. Pulse 4 to 5 times until flour is evenly distributed. (Dough should look broken up and a little crumbly).


Transfer to a medium bowl then sprinkle 6 tablespoons of ice water/vodka over mixture. Using a rubber spatula, press the dough into itself. The crumbs should begin to form larger clusters. If you pinch some of the dough and it holds together, it’s ready. If the dough falls apart, add 1 to 2 tablespoons of extra water/vodka and continue to press until dough comes together.


Remove dough from bowl and place in a mound on a clean surface. Work the dough just enough to form a ball. Flatten it into a disc. Wrap the disc with plastic wrap and refrigerate at least 1 hour, and up to 2 days. You can also freeze it for up to 3 months (just thaw it overnight in the fridge before using).


Roll Crust out to a 12 X 18″ rectangle, and divide into six 6″ squares. If dough gets too soft or warm while you’re rolling it, continue to the square stage, but then transfer the squares to a parchment-lined baking sheet and chill them in the freezer for a couple minutes until they firm up again.


Halve the peaches and remove the pits. Using a melon baller or a knife, scoop out a tiny extra bit where the pit was so that there will be more room for the filling.


Mix the brown sugar, salt, cinnamon and nutmeg together in a little dish. Spoon 1 lightly packed tablespoon on top of each peach, packing as much of the sugar mixture as you can into the center indentation. Dot the tip of each with a piece of cold butter. Center a peach half, cut side up, in your first pastry square. Bring the corners up to meet each other over the center and seal the seams together, pinching with you fingertips.


Arrange the peach dumplings in a buttered 9 X13″ baking dish and chill for 30 minutes. Meanwhile, preheat your oven to 375°F.


Whisk egg together with 1 teaspoon water to form a glaze. Brush glaze over the tops and exposed sides of dumplings. Bake for 30 to 40 minutes, until pastries are puffed up and golden on top.


While baking, make the hard sauce. Beat softened butter, confectioners’ sugar and bourbon until smooth. Scrape into a serving dish. When pastries come out of the oven, dollop each with a heaping spoonful of the hard sauce. And don’t forget that ice cream!


Enjoy!

Peach Dumplings with Bourbon Hard Sauce brought to you by: Runcible Eats (http://www.leaandjay.com )


Creamed Zucchini with Garlic & Basil

August 5, 2014

IMG_8987

It’s getting to be that time of year where the folks with gardens are looking around and trying to figure out what in the world they are going to do with all the zucchini they have on hand. That’s right, we’re getting well into zucchini overload time. And if you’re one of those folks searching for fabulous zucchini recipes, some tasty options include zucchini bread, stuffed zucchini, zucchini fritters, Zucchini Parmesan and Cheesy Bacon Zucchini Casserole (the last two being particular favourites of mine). But I’ve got to tell you, I’ve got the one zucchini recipe you simply must make tonight!  The husband and I have found a new obsession with this Creamed Zucchini with Garlic & Basil.

IMG_8697

Oh my stars! I mean I like zucchini. I am a fan. But it is a vegetable. And although veggies can be quite tasty, especially fresh right out of the garden like they are now, they are still vegetables. They aren’t say…cookies or cupcakes. I don’t really get obsessed with vegetables. That was until I took one bite of this spectacular summer side dish. Stopped me right in my tracks. It is just so savoury, so rich and creamy. The zucchini practically melts in your mouth – but don’t take that to mean it is mushy. I hate mushy vegetables. The grated zucchini here is almost like a puree. I am addicted!

IMG_8696

I’ve made this dish using all zucchini and I have made it using 1/2 zucchini and 1/2 yellow squash – because that just happened to be what I had on hand. Unbelievably tasty every time (and there have been quite a few). I’ve served it with all sorts of grilled meats at this point and without fail it stole the show. It is very easy to prepare. You can even whip it up ahead of time and just reheat when supper time rolls around. So, if you find yourself with a few zucchini on hand…no wait….what I mean to say is – go get yourself a bunch of zucchini. Now! The backyard gardener around the corner from you will be relieved to find a good home for their excess. Treat yourself to this Creamed Zucchini with Garlic & Basil tonight!

IMG_8979

Creamed Zucchini with Garlic & Basil

  • Servings: 4
  • Difficulty: easy
  • Print

recipe from: Once Upon a Chef

Ingredients:

  •  1-3/4 pounds zucchini (preferably smaller zucchini, as they are less watery)
  • 3 tablespoons unsalted butter
  • 3 cloves garlic, minced
  • 5 tablespoons heavy cream
  • 3/4 teaspoon salt
  • 1/8 teaspoon freshly ground black pepper
  • 2 tablespoons fresh chopped basil

Directions:

Grate the zucchini by hand with a box grater or in a food processor fitted with the shredding disk ( the food processor choice is certainly my lazy self’s preference). Wrap the shredded zucchini in a clean kitchen towel and wring out as much excess water as possible. Repeat a few times, replacing the towel if necessary.

Melt the butter in a large skillet over medium-high heat. Add the shredded zucchini and garlic and cook, stirring frequently, until the zucchini is tender, about 6 minutes. Turn the heat down to low; add the heavy cream, salt, pepper and basil and simmer until the cream is absorbed. Taste and adjust seasoning if necessary. Serve warm.

Enjoy!

Creamed Zucchini with Garlic & Basil brought to you by: Runcible Eats (http://www.leaandjay.com )


Malted & Salted Buttered Popcorn Cookies

August 1, 2014

IMG_8303

Malted & Salted Buttered Popcorn Cookies! Were so many delicious words ever strung together? I mean you just know these cookies have got it all going on. I love anything malted, salted tells me I’ll get my sweet/salty fix, and buttered popcorn? I can barely contain myself! And my reaction to the words “buttered popcorn” doesn’t even register next to the husband’s. Oh my Lordy in heaven! He loves him some popcorn. I am not kidding you that our popcorn popper is in high use nearly every night. In all honesty, he wants popcorn about 4 -5 times a week. Well, let me re-phrase that…he eats popcorn 4-5 nights a week. I think he wants popcorn every single day of the year! So you can just imagine the fabulous wife points I got when I sashayed on out of the kitchen and sidled up next to him with a plate full of these stunners in my hands! And it’s not just the idea of them that is good. You know how sometimes you get an idea of a flavour combination that you think will be killer but when you actually make it, it kind of falls short? Not happening here. These cookies are really quite remarkable and unique. Each bite delivers a crispy crunch as well as a malted chewy chocolatey blast. And when you a get a bite that just happens to have that little extra buttery surprize popcorn piece, well it’s nothing short of sheer bliss!

IMG_8246

I initially came across this recipe in one of my all time favourite cookbooks, The Smitten Kitchen Cookbook, by Deb Perelman. I had taken note and was planning on baking up a batch of those cookies. But Deb hadn’t added malted milk balls to her version. Then I saw that enhancement to the Smitten recipe over at Sift and Whisk. I really love malted milk balls so their addition certainly made it a winner for me. The only problem I had with the Sift and Whisk version was that it called for using microwave popcorn. Uh-ohh! That was a deal breaker. I really do not like microwave popcorn and as much as the husband loves popcorn, even he would turn his nose up at the microwave variety. Call us crazy. Whatever…There really is a big taste difference between microwave and stove top corn, so much so that we sort of consider it a different animal altogether. I know microwave popcorn is supposedly easy. But really…how hard is it to pop up some corn with a glug of good old oil right on top of your stove? We actually have a Whirley-pop stove top popcorn popper that has a hand-crank on top to allow you to stir the corn kernels while they pop. Yup, if you stop by and wander into my kitchen, I’m pretty sure you’ll see it in permanent residency on my stove top. (remember…the husband is popping corn about 5x a week). But if you don’t have that level of specialty popping equipment, don’t despair. Just grab any old big pot with a lid, and shake it a bit while the kernels are popping. It is so much tastier than that old microwave stuff. And don’t even think to ask my husband about the differences in popping oil, you know olive oil vs. coconut oil vs. peanut oil, unless you’ve got awhile because he can go on and on about it. Consider yourself warned…But anyway, back to these Malted & Salted Buttered Popcorn Cookies.

IMG_8270

Bottom line is that you’ve just got to make them. I can honestly say, it is one of the few cookies I’ve ever seen my husband eat more than two of at a sitting. Remember, he likes those fruit desserts and couldn’t really care less about chocolate (shock, horror). But he came back to the cookie jar several times the evening these babies showed up. Actions speak louder than words so that should tell you something!

IMG_8291

Malted & Salted Buttered Popcorn Cookies

  • Servings: 24 cookies
  • Difficulty: easy
  • Print

recipe from: sift and whisk &  The Smitten Kitchen Cookbook

Ingredients:

  • 2 tablespoons (30 ml) vegetable oil
  • 1/4 cup (45 grams) popcorn kernels
  • 1/4 teaspoon table salt
  • 1 tablespoon (14 grams) butter, melted
  • 1¼ cup (155 grams) all-purpose flour
  • ½ teaspoon baking soda
  • ½ cup (115 grams) unsalted butter, softened to room temperature
  • ½ cup (109 grams) light brown sugar, packed
  • ⅓ cup (65 grams) granulated sugar
  • 1 large egg
  • 1 teaspoon vanilla extract
  • 1 cup (100 grams) roughly chopped malted milk balls
  • coarse sea salt, for sprinkling

Directions:

Preheat oven to 350°F.

Make popcorn. Pour the oil over the bottom of a large dutch oven that has a lid or a Whirley-pop stove top popcorn popper. Add the popcorn kernels. Cover the pot and heat it over medium- high heat. Once you hear the kernels beginning to pop, keep agitating or stirring the pan until you no longer hear the popping noise. Pour the melted butter over the popped corn and then sprinkle with the salt. Transfer the popcorn to a large bowl and separate out any unpopped or partially popped kernels. You should have about 4 -4 1/2 cups of popped corn.

In a medium mixing bowl, whisk together flour, baking soda, and salt. Set aside. In the bowl of a standing mixer, combine butter, brown sugar, and granulated sugar. Beat on medium-high speed for 2 minutes. Scrape down the sides of the bowl and add egg and vanilla. Beat for another 30 seconds to 1 minute, until egg is totally mixed in. With the mixer on the lowest speed, gradually add flour mixture, and stop mixing when there is still a little flour visible.

Remove the bowl from the stand mixer. Fold the buttered popcorn into the dough taking care not to crush the popcorn completely. When popcorn is almost evenly distributed, add chopped malted milk balls (even the dust!), and fold into the dough.

Using a medium-sized cookie scoop, scoop heaping tablespoons of dough onto a parchment lined baking sheet, spacing each dough ball at least 2 inches apart. Sprinkle the tops of each dough ball with coarse sea salt. Bake for 10-12 minutes or until the edges turn light brown.

Allow to cool on baking sheets for 5 minutes, then transfer to a wire rack to cool completely. The cookies will deflate a little once they come out of the oven, and will end up thin, with crispy edges and chewy centers.

Enjoy!

Malted & Salted Buttered Popcorn Cookies brought to you by: Runcible Eats (http://www.leaandjay.com )