Bourbon Bacon Jam

March 30, 2012

You heard me right….BACON JAM! Lord in Heaven above, Have Mercy! I’d seen various blogs about this mythic food. I heard there was a food truck somewhere on the other side of the country that was serving this stuff up on its burgers. I was seriously fantasizing about it, but I had yet to experience it firsthand and was dying to give it a whirl. I mean, really?!! Bacon. Jam. I finally decided that it was time to take action. The Lord helps those who help themselves, so I’ve heard. So I got busy with a recipe for this ambrosia that I found on Spoon Fork Bacon. (Fabulous blog, you should check it out!) With a name like that, I knew that they would know how to make a killer Bacon Jam. As an added bonus, their recipe made a Boozy Bacon Jam. Well I was very excited now. I hadn’t even dreamed that Bourbon would be on the all-star list of ingredients for this recipe. And be warned, quite a lot of ingredients go into this blessed concoction, but nevertheless it is still quite easy to prepare. There is of course, one pound of applewood smoked bacon, and bourbon – don’t forget the bourbon. (Knob Creek Kentucky Bourbon to be exact) Then there are the onions and the coffee, the ancho chili powder, smoky paprika, pure maple syrup, Sriracha Chili sauce, shallot, spices….Good Lands! And when you get all of these items combined just so, you let them sit a simmer for 1 1/2 hours, so that all that goodness can meld together. After one whirl in the good ole food processor, I swear the clouds parted and the light did shineth down. I had created it!  Bacon Jam! (insert maniacal laughter) I can tell you, I could hardly contain myself while it was bubbling away on the stove. But once it was finished and I got that first spicy, smoky, bacon-y taste I was doing a veritable bacon jig, which we really should have gotten film footage of, but I’ll just have to leave it up to your imagination. My husband started to laugh at me, but when a dollop of this magnificent creation landed square on his unsuspecting taste buds, his feet started to move on their own as well. Once you make your batch of this jam, you’ll know all the steps to the dance for sure! It’s instinctive. Involuntary. No instruction necessary. You’ll see….

What will I do with my Bourbon Bacon Jam now that I have it? Well, first of all I think I need to put it under guard, because the few folks that know it’s here are planning a heist to relieve me of my treasure. (By the way, a really big watch dog is in residence here…just saying in case you get any ideas…) So lets see, besides eating it right out of the jar…we’ve put it on our tender and tasty Cheddar Scallion Scones that I just posted about, we topped some deviled eggs with a dollop of that bacon-y goodness, we put it on burgers, we put it on egg breakfast biscuits. I tell you the possibilities are endless! Make up a batch for yourself and let your imagination run wild. You will not be disappointed!

Bourbon Bacon Jam

yield: Two 8 ounce jars

recipe from: Spoon Fork Bacon

Ingredients:

  • 1 lb applewood smoked bacon
  • 1 Tablespoon unsalted butter
  • 1 large onion, thinly sliced
  • 3 Tablespoons light brown sugar
  • 1 shallot, thinly sliced
  • 2 garlic cloves, thinly sliced
  • 2 teaspoons smoked paprika
  • 1 teaspoon ancho chile powder
  • ½ teaspoon ground mustard
  • ½ teaspoon ground ginger
  • ½ teaspoon ground cinnamon
  • ¾ cup sweet bourbon or brandy
  • 2/3 cup strong brewed coffee
  • 2 Tablespoons apple cider vinegar
  • 2 Tablespoons tarragon vinegar (I didn’t have this, so just used 4 Tablespoons apple cider vinegar)
  • 3 Tablespoons maple syrup
  • 1 ½ Tablespoons Sriracha
  • salt and pepper to taste

Directions:

Fry bacon on medium-high heat for 6 to 8 minutes. Remove with slotted spoon and set aside.

Drain all but 1 tablespoon bacon fat from the pot, add butter and melt.

Add onion, brown sugar and a pinch of salt and cook for 10 to 15 minutes.

Add shallot, garlic and spices and sauté for an additional 3 to 5 minutes. Season with pepper.

Return the bacon to the pot and stir until well combined.

Pour the bourbon/brandy into the bacon mixture and cook the liquid down for about 3 to 4 minutes.

Add the remaining ingredients, reduce the heat to medium-low and simmer for 1 ½ hours, stirring occasionally.

Remove the mixture from the heat and allow to cool for 15 to 20 minutes.

Skim off any fat/grease that has formed at the top and discard.

Pour the mixture into a food processor and process until desired consistency is achieved.

Serve warm or store in an airtight container, in the refrigerator, until ready to use. Will last for up to one month (as if any of that bacon jam will be left around for 1 month. Ha!)

Enjoy!


Scallion Cheddar Scones

March 27, 2012

The other day, I had a craving for a savory scone and these little fellows really hit the spot! They are wonderfully moist and tender. The cheddar, scallion and Dijon mustard are just brilliant together. These scones are great for breakfast but equally as good for lunch when served with a bowl of soup, chili or stew.

You can make these in the traditional triangular scone shape, but I wanted these to be in a mini sized portion. A 2″ biscuit cutter worked quite easily here. Come to think of it, they would be great for appetizers, given their perfect little bite-size as well. Just imagine them topped with a little slice of ham. I must admit, I did make them to go along with a particular spread, which I will be blogging about next time. Like a hint? It involves bacon and is unbelievably tasty! Perhaps even life changing…But until then, make up a batch of these little gems, which are fantastic all on their own, especially when slathered with butter! YUM!

Scallion Cheddar Scones

recipe from: The King Arthur Flour Baker’s Companion

yield: 20 mini scones

Ingredients:

  • 2 Cups (8 1/2 ounces) unbleached all-purpose flour
  • 1/2 teaspoon salt
  • 1 Tablespoon baking powder
  • 1 Tablespoon sugar
  • 6 Tablespoons (3/4 stick, 3 ounces) cold butter, cut into pieces
  • 2 large eggs, beaten
  • 1/3 Cup (2 3/4 ounces) cream or sour cream
  • 1 Tablespoon Dijon mustard
  • 1 Cup (4 ounces) grated sharp cheddar cheese
  • 3-5 scallions (1 Cup, 2 ounces) chopped

Directions:

Preheat oven to 375° F

Sift together the flour, salt, sugar, and baking powder. Rub in the butter with your fingers.

Mix together the eggs, cream, and mustard. Add this to the dry ingredients. Stir in the grated cheese and the scallions. Mix just until combined. This is the consistency of drop-cookie dough.

Liberally flour the counter and your hands. Pat the dough to 1″ thickness. Cut dough with 2″ biscuit cutter. (You can also shape these into traditional scone triangular shapes. If you wish to do this pat the dough into a 6×9″ rectangle, about 1″ thick. Cut the rectangle into 6 smaller rectangles, and cut each smaller rectangle into two triangles, forming 12 triangular scones.)Place on well-greased or parchment covered cookie sheet.

Bake for 12 minutes, or until nicely browned and a toothpick inserted into a scone comes out dry.

Enjoy!


Tennessee White Chili

March 22, 2012

Good Lands! What has gotten into me?! Spring has been here for a couple of days now. Though truth be told, here in Virginia it has seemed like “Spring” has been here for quite some time. We’ve been having really warm temperatures for March, after an exceptionally warm winter. I mean today the old mercury is going to be pushing around 79° F (26° C)! I just gotta say, that is as hot as I would like Summer to get, much less Spring! I am absolutely terrified what it will be like here come say July?!! My husband, myself and even our pup just hate the hot, humid Virginia summer and I bet this one, judging from all recent indications, will be a doozy! I think my family will definitely be fleeing north, most likely to Newfoundland

Cuckold's Cove Newfoundland

and probably to Ireland as well.

Slea Head Drive, Dingle Peninsula, Ireland

So I have no idea why I am giving you a recipe for Chili today. Other than this Chili is absolutely delicious and hopefully some of you are enjoying more reasonable early Spring temperatures than we are here. We love chili and have already given you a mouth-watering recipe for Texas Beef Chili, which was chock full of steak and not a bean in sight! Today’s chili recipe comes from the great State of Tennessee. A State which my husband, pup and I will be visiting later this year I very happy to say. (Nashville here we come! WooHoo!) In Tennessee, they apparently go for chicken over beef and add plenty of beans to the mix. This recipe called for 3 – 15 oz. cans of cannellini beans. I used two cans and thought the bean ratio was correct. I also added a 4 oz. can of chopped green chilis, because I have mentioned before, we really enjoy spicy, hot food. Though I wouldn’t say this chili was super hot and spicy with the additions of the green chilis, they just added a little kick to it.

The chili was really delicious and very easy to make. You use chicken breast from a rotisserie chicken and there is no need to cook this chili for hours on end, it comes together rather quickly. This hearty, yet light chili is made even better by the addition of some shredded cheese, sour cream and crushed up tortilla chips, not to mention a nice cold beer! I’m very pleased to have added this White Chili to our chili repertoire. Give it a whirl if you’re still enjoying nice, brisk chili weather in your neck of the woods!

Tennessee White Chili

recipe from: Food Republic and The Lodge Cast Iron Cookbook

Ingredients:

  • 1 tablespoon canola oil
  • 1 cup onion, chopped
  • 1 teaspoon garlic, minced
  • 1 1/2 pounds cooked chicken breast, cut into small cubes
  • 3 15-ounce cans Great Northern or cannellini beans
  • 2 tablespoons cilantro, chopped
  • 1 4 oz. can of diced green chilis
  • 2 teaspoons ground cumin
  • 1/4 teaspoon salt
  • 1/4 teaspoon cayenne pepper
  • chicken broth, to desired consistency
  • shredded monterey jack, to garnish
Directions:
Heat the oil in a 5-quart cast iron Dutch oven over medium heat. Add the onion and garlic and cook, stirring occasionally, until tender.
Stir in the chicken, beans, cilantro, green chilis, cumin, salt, and cayenne and simmer 30 minutes. If you like, you can add chicken broth as you prefer.
Ladle the chili into bowls and garnish each serving with cheese, sour cream and crushed tortilla chips, if desired.
Enjoy!

Guinness Chocolate Cupcakes with a Swiss Vanilla Baileys Buttercream Frosting

March 17, 2012

Lá Fhéile Pádraig Sona Daiobh! (Happy St. Patrick’s Day!) Woohoo! It’s finally here! Everyone is Irish today! These Guinness Chocolate Cupcakes with a Swiss Vanilla Baileys Buttercream Frosting will definitely help get you into the proper celebratory mood!

These gorgeous little gems have everything you require in a St. Patrick’s Day food. To begin with, the cupcake base is full of rich, moist Guinness-y chocolate-y goodness. It is topped with a dreamy, creamy and fluffy Swiss Vanilla Baileys Buttercream frosting and then dusted with chopped chocolate covered pretzels. Oh, Have Mercy!

One bite will certainly make you feel like you’re celebrating the day in an awesome pub, even if you’re home in your pajamas. (perhaps not so bad of an alternative, considering some of the St. Patrick’s Day scenes I’ve been present for…just a thought!)

The original recipe which inspired my cupcake creations called for a Guinness Stout simple buttercream frosting, which I’m sure is delicious. However, as you likely already know, I just made some Baileys filled Chocolate Whoopie Pies and absolutely fell head over heels in love with the Swiss Vanilla Baileys Buttercream. So I altered the recipe to have the Baileys frosting. I must say, I am quite pleased with the results. These cupcakes are easy to make, so it’s not too late! Get to baking right away and you can still enjoy these on St. Patrick’s Day. But if you already have plans today, don’t worry. These little gems will be appreciated on whatever day they turn up! Hope everyone has fun today!

Guinness Chocolate Cupcakes with a Swiss Vanilla Baileys Buttercream Frosting

recipe adapted from: The Butch Bakery Cookbook by David Arrick and Allison Eats

yield: 34 cupcakes

Ingredients:

For the Chocolate Stout Cupcakes:

  • 2 1/2 cups all-purpose flour
  • 2 1/2 cups granulated sugar
  • 2 teaspoons baking soda
  • 1/2 teaspoon salt
  • 1 1/2 cup (  3 sticks) unsalted butter, room temperature and cubed
  • 1 cup unsweetened cocoa powder
  • 1 1/2 cup Guinness, poured and settled before you measure it out
  • 4 large eggs, room temperature
  • 1 cup sour cream

For the Swiss Vanilla Baileys Buttercream Frosting:

  • 5 Large Egg Whites
  • 1 1/2 Cups Sugar
  • 2 Cups (4 sticks) Butter, cut into 1/2 inch cubes, cool but not cold
  • 1/4 tsp Salt
  • 3 Tablespoons Baileys Irish Cream

For the topping:

3/4 Cup roughly chopped chocolate covered pretzels

Directions:

First, bake your cupcakes. Preheat oven to 350°F. Line two 12-cup muffin tins with muffin liners and spray lightly with non-stick spray. In a small saucepan over medium-low heat, melt your butter and set aside to cool slightly, then add in the cocoa powder and whisk until smooth. Whisk in the stout, then set aside to cool completely for another 10 minutes.

In a large mixing bowl, whisk together the eggs and sour cream, then whisk in the cooled chocolate and butter mixture. Whisk in the flour, sugar, baking soda, and salt, combining until just moistened. Fill each muffin cup with 1/4 cup of batter, so that the cups are 2/3 full. Bake for 20-25 minutes, until the cupcakes are set and a toothpick comes out clean (mine took about 24 minutes). When ready, allow to cool completely before frosting.

Now for the frosting. In a medium bowl, whisk the egg whites and sugar together. Set the bowl over a pan of simmering water but do not let the water touch the bottom of the bowl. Heat the mixture until the sugar is completely dissolved and the color is milky white, about 2-3 minutes.

Transfer the egg mixture to the bowl of an electric mixer fitted with the whisk attachment, and beat on medium-high speed (start slowly at first) until smooth and fluffy, about 5 minutes. Remove the whisk attachment and replace with the paddle attachment. Add the cubed butter and beat on medium-high speed (start slowly at first) until smooth and fluffy, about 5 minutes. If the buttercream looks like it is breaking, don’t worry, it will eventually come together.

Add the salt and Baileys Irish Cream and beat for 5 seconds to combine.

Place frosting in piping bag and pipe onto cupcakes. Top with roughly chopped chocolate covered pretzels.

Enjoy!


Baileys Irish Cream filled Chocolate Whoopie Pies

March 16, 2012

Tomorrow is St. Patrick’s Day! On this St. Patrick’s Day eve I thought I’d post this recipe for Baileys Irish Cream Filled Chocolate Whoopie Pies. And I’ve got to tell you, these are possibly the best whoopie pies I’ve ever tasted.

The chocolate pie part is wonderfully moist with hints of the coffee and espresso flavours in the rich chocolate. But I think it’s the Baileys Irish Cream filling that has truly won my heart.

This filling is not your simple buttercream frosting, it is a Swiss Vanilla Buttercream, which I had never tasted before, much less made. It is to die for! Amazingly creamy and yet still light and fluffy. And when you add that Baileys Irish Cream into the mix…it is totally over the top!

I’m a huge fan and urge you to give it a try. I think you will be a convert too!

Baileys Irish Cream filled Chocolate Whoopie Pies

recipe from: Allison Eats

yield: 30 whoopie pies

Ingredients:

for the pies:

  • 3 1/2 Cups All-Purpose Flour
  • 1/4 tsp Salt
  • 1 1/4 tsp Baking Powder
  • 1 1/4 tsp Baking Soda
  • 3/4 Cup Dark Unsweetened Cocoa Powder
  • 2 tsp Instant Espresso Powder
  • 1/2 Cup Hot Coffee
  • 2 Cups firmly packed Light Brown Sugar
  • 3/4 Cup Canola Oil
  • 1 Large Egg
  • 1 tsp Vanilla Extract
  • 1/2 Cup Buttermilk, shaken

for the filling:

  • 5 Large Egg Whites
  • 1 1/2 Cups Sugar
  • 2 Cups (4 sticks) Butter, cut into 1/2 inch cubes, cool but not cold
  • 1/4 tsp Salt
  • 3 Tablespoons Baileys Irish Cream

Directions:

for the pies:

Preheat the oven to 350 degrees. Line 2 baking sheets with parchment paper (or grease them with oil).

In a large bowl, whisk together the flour, salt, baking powder, and baking soda, and set aside. In another large bowl, whisk together the cocoa powder and espresso powder. Add the hot coffee and 1/2 cup hot water, and whisk until both powders are completely dissolved.

In a medium bowl, stir the brown sugar and oil together. Add this to the cocoa mixture and whisk until combined. Add the egg, vanilla, and buttermilk and whisk until smooth.

Use a rubber spatula to gently fold the dry ingredients into the wet ingredients. Make sure to scrape down the sides and bottom of the bowl as you fold. Fill a piping bag with batter and pipe quarter-sized dollops 1-inch apart onto greased baking sheets. Bake for 10 minutes, until a toothpick inserted into the center of one whoopie comes out clean. Place whoopie’s onto wax paper to cool while you bake the remaining batches.

for the filling:

In a medium bowl, whisk the egg whites and sugar together. Set the bowl over a pan of simmering water but do not let the water touch the bottom of the bowl. Heat the mixture until the sugar is completely dissolved and the color is milky white, about 2-3 minutes.

Transfer the egg mixture to the bowl of an electric mixer fitted with the whisk attachment, and beat on medium-high speed (start slowly at first) until smooth and fluffy, about 5 minutes. Remove the whisk attachment and replace with the paddle attachment. Add the cubed butter and beat on medium-high speed (start slowly at first) until smooth and fluffy, about 5 minutes. If the buttercream looks like it is breaking, don’t worry, it will eventually come together.

Add the salt and Irish Cream and beat for 5 seconds to combine.

Pipe filling onto the flat sides of half of the whoopies and top with remaining half.


Irish Beer & Cheese Chicken Pot Pies

March 15, 2012

Two more days til St. Patrick’s Day ya’ll! Today I have a fabulous recipe for you that will definitely make it into a higher rotation on your menu playlist than just a St. Patrick’s Day hit. So here you have it, one of the great comfort food staples made even more scrumptious with the addition of Smithwick’s Irish Ale and Kerrygold Cheddar cheese. That’s right, Irish Beer & Cheese Chicken Pot Pies! Yum, yum and triple yum!

These pot pies have all the most tasty ingredients in them. I’ve already mentioned the beer and cheese, so I imagine I have quite a few of you there. However, these pies also have bacon, leeks, mushrooms and did I mention there was some Vodka thrown into the crust for good measure. Hooo-wee! That is a whole lot of yumminess in one little ole dish!

I baked a few of mine in individual mini pie tins, which I found at Crate & Barrel,

and a few in ramekins topped with that delicious buttery and flaky pie crust.

The ramekins version are easier to pull off and my husband like these best because they held a larger amount of that savoury filling. Being a sucker for all things bread and crust, I loved the individual mini pie version, which I think looks absolutely adorable.  Of course both versions were equally delicious. My husband loves a good pot pie, so I’ve tried quite a few recipes. This one is at the top of his list! Give your St. Patrick’s Day revellers one of these Irish Beer & Cheese Chicken Pot Pies so that they can keep up their strength for all of the celebrations they have planned!

Irish Beer & Cheese Chicken Pot Pies

recipe slightly adapted from: The Beeroness

Ingredients:

For the crust:

  • 1 1/2 cups all-purpose flour
  • 1/2 tsp salt
  • 1 Tablespoons sugar
  • 5 Tablespoons butter cold, cut into cubes
  • 1/4 cup shortening
  • 2 Tablespoons vodka
  • 2 Tablespoons cold water

For the filling:

  • 1 Tablespoon olive oil
  • ½ cup sliced leeks (white and very light green portion only)
  • 3 large cloves garlic, minced
  • 5 strips of bacon, chopped
  • 3 cups mushrooms, chopped
  • 3 cups raw chicken, cut into cubes (or the breast of one rotisserie chicken)
  • 2/3 cup chicken broth
  •  1 1/3 cup Smithwick’s Irish Ale
  • ¼ cup flour
  • ½ cup corn kernels
  • ½ cup peas
  • 2 cups shredded Kerrygold cheddar cheese
  • 1 tsp salt
  • 1 tsp pepper
  • ¼ cup melted butter

Directions:

Combine 1 cups of flour, salt, and sugar in a food processor, pulse a few times until its combined. Add the butter and the shortening and process until it forms a ball around the blade, about 2 minutes.

Add the remaining flour and process until well incorporated, about 1 minute.

Move to a bowl and add the water and the vodka, combine with a spatula or wooden spoon or merely knead it with your hands.

Form the dough into a disk. Wrap the disks in plastic wrap and chill until very firm, about two hours.

Preheat oven to 400° F.

In a pan over medium, high heat, add the olive oil. Once the oil is hot, add the leeks and the garlic, sauté until leeks are soft.

Add the bacon and cook for 2 minutes.

Add the mushrooms and cook until soft and darkened.

Add the chicken and sauté until cooked through, about 5 minutes. I have also used the breast of a rotisserie chicken instead of raw chicken. If you would rather do this, add the shredded rotisserie chicken in after you have added the beer.

In a separate bowl, add 2/3 cup of broth and the flour, stir until combined. Pour mixture into the pan through a small mesh strainer to remove any lumps.

Add the beer to the pan and stir to combine. (if using rotisserie chicken, add it in at this point) Add the peas, corn, cheese, salt and pepper. Stir until the cheese has melted and is well combined with the broth.

At this point you must decide whether you are using the mini pie tins or ramekins.

If you are using the mini pie tins:

 Roll out your crust dough. Cut the bottom crusts and line the pie tin with them. Fill with chicken filling. Cut your pie lid out, slightly smaller than the bottom crust. Lay it over top of the filled crust and crimp the edges of the bottom and top crusts together. Cut a couple vent holes in the top crust.

If you are using ramekins:

Roll out your crust dough. Cut out the lids for your pies, slightly larger (about 1″) than the ramekins you are using. Pour chicken mixture into small, portion sized, oven safe ceramic dishes. Grease around the top edge of the dish with butter. Drape the crust lid over the top of the ramekins. Cut a couple of vent holes in the top crust.

Brush the top of the pot pies with an egg wash or melted butter. Bake at 400°F for  20-25 minutes until golden brown. Let sit for 5-10 minutes before serving.

Enjoy!


Guinness Chocolate Chip Cookies

March 14, 2012

Boozy Chocolate Chip Cookies?! Now we’re cooking with gas! These little gems are the perfect nibbler for a St. Patrick’s Day celebration. The cookies are really delicious, bursting with the flavour of three, that’s right I said three, types of chocolate chips, white chocolate, semi-sweet chocolate and milk chocolate.

And you don’t stop there, Oh no! Then you add in some Guinness.  And Yup, you really can taste the Guinness in them. To get that intense Guinness flavour, you cook Guinness and brown sugar down until you get a thick Guinness syrup which you then add to the cookie dough. That reduction does take a fair chunk of time, about 45 minutes, so make sure you allow for it. But you will be rewarded threefold for your patience. I can tell you with complete confidence that St. Patrick’s Day will not be the only time of the year you will find these little devils lurking around my pantry! Cookies and beer…who woulda thunk it?!

Guinness Chocolate Chip Cookies

recipe from: Sweet Twist of Blogging

ingredients:

for the syrup:

  • 2 cans (12 oz)  of Guinness
  • 1/2 cup brown sugar

for the cookies:

  • 2 3/4 cup of unbleached all purpose flour
  • 1/3 cup of unsweetened cocoa
  • 1 tsp espresso powder
  • 3/4 tsp baking soda
  • 1/2 tsp salt
  • 1/2 cup unsalted butter
  • 1/2 cup shortening
  • 3/4 cup granulated sugar
  • 1/2 cup brown sugar
  • 2 large eggs
  • 1 tsp vanilla extract
  • 1 1/2 cup white chocolate chips
  • 1/2 cup semi sweet chocolate chunks
  • 1/2 cup milk chocolate chips

Directions:

Add beer and brown sugar to a medium sauce pan.  Reduce liquid over medium high heat until liquid thickens to a syrup and measure approximately 1/3 cup.  This will take 30-45 minutes.  Remove from heat and set aside to cool slightly.

Preheat oven to 350F.  Line two baking sheets with silpat/parchment.  In a medium bowl combine flour, cocoa, espresso powder, baking soda and salt.

In a large bowl or mixer bowl, cream together butter, shortening and sugars until smooth and fluffy, about 3 minutes.

Add eggs, syrup and vanilla, beat to combine.

Add flour mixture to the wet mixture, cream together until flour is just combined.

Fold in all chocolate chunks.

Using a cookie scoop drop dough on to prepared baking sheets. Bake 12-14 minutes.  Let cookies cool on sheet for a few minutes, then transfer to a wire rack to cool.

Enjoy!


Guinness Beef Stew

March 13, 2012

Yum! Guinness Beef Stew. Is there a more hearty, delicious comfort food to be had? Probably not for me. This stew is absolutely wonderful and is guaranteed to warm you heart and soul. I adapted this recipe from a slow cooker recipe found on Blissfully Delicious. I don’t have an actual slow cooker, but am not opposed to letting things simmer away for several hours on the stove or in the oven. With this stew, you start out cooking it on the stove, but then tuck it away in the oven for a couple of hours to let all of the flavours come together. The results are magnificent! I served this up with some freshly baked Irish Brown Bread. (see my sure-fire delicious recipe from last St. Patrick’s Day). Pure Bliss and perfect for a St. Patrick’s Day feast!

Guinness Beef Stew

Recipe adapted from: Blissfully Delicious

Ingredients:

  • 4 lbs boneless beef chuck roast, trimmed and cut into 1-1/2-inch chunks
  • 1/2 Cup unbleached all-purpose flour
  • Salt and pepper
  • 2 Tablespoons vegetable oil
  • 2 onions, chopped
  • 4 cups low-sodium beef broth
  • 2 -14.9 oz cans of Guinness Draught
  • 1 Tablespoon light brown sugar
  • 1 Tablespoon fresh chopped thyme
  • 1 Tablespoon Worcestershire Sauce
  • 1 ounce bittersweet chocolate, chopped
  • 2 bay leaves
  • 5 carrots, peeled and cut into 1-inch chunks
  • 1-1/2 lbs baby red potatoes (about 24), scrubbed and peeled or not as you prefer
  • 2 Tablespoons minced fresh parsley

Directions:

Preheat oven to 325°F.

Place flour in plastic bag. Season beef with salt and pepper and then place in bag with flour. Shake bag well to coat the beef with the flour. Save any remaining flour in the bag to add to stew later.

Heat 2 tsp. of oil to large dutch oven over medium high heat. Cook the beef in batches until browned on all sides. Add more oil as necessary. Transfer browned beef to bowl and set aside.

Add the remaining 2 tsp oil to pan and heat. Once oil is hot, add onions to pan and cook until softened. Add the broth, 2 cans of Guinness, brown sugar, fresh thyme, Worcestershire Sauce, chocolate, carrots, potatoes and bay leaves to pan. Add the browned beef as well as any remaining flour you had from coating the beef earlier. Stir well. Bring stew to a boil.

Place covered pan in preheated oven for 2 to 2 1/2 hours.

Ladle into bowls. Top with shredded Kerry Gold Cheddar Cheese if you wish.

Enjoy!


Boxty in the Pan

March 12, 2012

Boxty on the Griddle,

Boxty in the Pan,

If you can’t make Boxty

Sure you’ll never get a man!

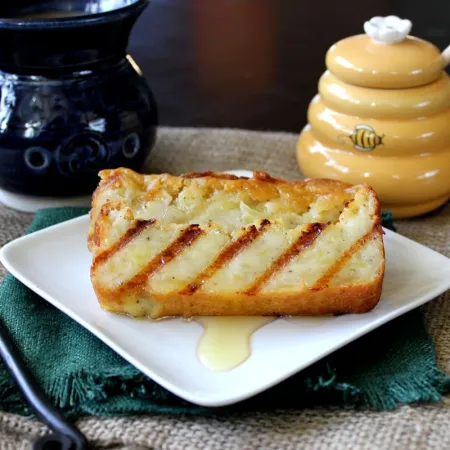
 So goes an old Irish folk rhyme. Boxty or arán bocht tí in Irish-meaning poor house bread, is a traditional potato bread which can be made into pancakes (on the griddle), dumplings or baked into a loaf (in the pan). Last year I made the boxty on the griddle, or the pancake variety. This year I decided to serve up some Boxty in the Pan. For this version, you prepare the batter and then place it in a loaf pan and bake it. Once it has cooled, you slice it and then fry it in butter on the griddle. It can be served with breakfast, slathered with more butter (of course….you know this is going to taste great!) and topped with bacon or honey/preserves if you have a hankerin for something sweet along with your savoury. Boxty is quite versatile so it can also be served with dinner or with various toppings like smoked salmon. Yum, yum, yum!

Boxty is very easy to make. You get to use up any left over mashed potatoes you might have lingering about, like you were able to in my Potato Farls recipe. Grating the raw potato by hand can be a bit tiresome, but luckily I have a food processor and put it to good use. One other thing you want to make sure you do is squeeze all of the excess liquid out of the grated raw potatoes. To do this, I wrap the grated potato in a cotton tea towel and give it a good squeeze. Then you just mix everything together to make the batter and pour it into a loaf tin and pop it into the oven. About one hour later it’s ready! You can keep the Boxty in the fridge for 4-5 days and cut slices off to fry whenever the craving hits you…which could potentially be quite often once you get a taste of this dish. Just a warning…. My husband was quite pleased with the Gaelic Boxty from last year and happily was just as enthusiastic about my Boxty in the Pan. Have a loaf ready for St. Patrick’s Day morning!

Boxty in the Pan

recipe adapted from The Daily Spud & Gallagher’s Boxty House

Ingredients:

  • 250 gram raw grated potato
  • 250 gram mashed potatoes
  • 160 gram All-purpose flour
  • 1/4 teaspoon baking soda
  • pinch of sugar
  • 1 teaspoon salt
  • 250 ml buttermilk
  • 1 Tablespoon butter, melted

Directions:

Preheat oven to 375° F. Butter a 4×8″ loaf baking tin.

In medium-sized bowl sift together flour, baking soda, salt and sugar. Set aside.

Peel and grate raw potato. (I used a food processor to grate mine) Place grated potato in cotton or linen dish towel and squeeze to remove as much liquid as possible.

In large bowl, place mashed potatoes and raw grated potatoes. Add flour mixture and knead to form dough.

Add buttermilk and stir to combine. Batter will be thick.

Pour batter into prepared baking tin. Drizzle melted butter over the top of the boxty. Bake for 60 minutes until top is golden brown.

Allow boxty to cool.

On the day you wish to serve, slice thick cut of the boxty. Butter slice and place on griddle to fry.

Serve warm with more butter and toppings of your choice.

Enjoy!


Chip Butty on Waterford Blaa

March 11, 2012

I’m sure the title of this post has quite a few folks scratching their heads. What is a “chip butty” and what in the world is “Waterford Blaa”?! So, I’ll start with the first unknown. A chip butty is a sandwich made with a white, buttered bread roll and filled with hot chips or french fries, as they are known in the States and often served with ketchup or brown sauce. Butty is likely a contraction of “bread and butter”. But let me rewind a bit…you got me right, I did indeed describe a French Fry sandwich! French fries are one of my favourite foods, right up there with cupcakes. And when I say french fries, I really mean proper thick-cut chips, not those skinny little shoestring fries. Why didn’t I ever think of making a sandwich out of them before? Yum, yum, YUM! I can’t tell you how happy I was to encounter this creation when I was in college in Ireland. It was definitely a tasty and cheap staple for poor students! Probally not so good for you, but, Oh…let me tell you, Chip Buttys are so awesome I’m willing to accept the bad along with that kind of good. Fantastic comfort food you just have to try. I would cover my chips with salt and lashings of malt vinegar before I stuffed them into my waiting buttered bread roll and then I would add just a wee bit of ketchup.

I just had to share this recipe with you for St. Patrick’s Day. Who wouldn’t love to see a french fry sandwich at any St. Patrick’s Day gathering? But I wanted to be specific about the type of bread you could use. In school, we would just buy “baps” which were soft white flour rolls. However, there is a type of bread which is specific to County Waterford know as “Blaa” (pronounced Blah…you know like blah, blah, blah…) which is just perfect for a Chip Butty. A Blaa is not a Bap. Although both are doughy soft white buns or rolls, Blaa is covered with white flour. Apparently in the 17th Century, Waterford experienced an influx of French Huguenots who taught the local population to bake these rolls. Originally they were called “blaad”, which was later corrupted to “blaa” and were made from leftover pieces of dough. The baking of Blaa, using the traditional recipe, has continued  for generations in Waterford. It is so popular there that about 12,000 Blaas are consumed there daily! They are so proud of this bread in the county that they have recently applied to have Blaa registered in the EU with a Protected Geographical Indication which would designate Blaa as unique to Waterford and would  dictate that only those rolls baked in Waterford can indeed be marketed and sold using the “Blaa” name. Only four other Irish food products have this designation: Clare Island Salmon, Connemara Hill Lamb, Imokilly Regato cheese and Timoleague Brown Pudding.

So, all there you have it. You now know more about Blaa than you probably ever wanted to know. Blaa really is delicious. It is a yeast bread, so you have to allow for some rising times, but it is very easy to make. We gobbled a bunch up with our chip buttys and then used our few remaining Blaas as hamburger buns. I can see why Waterford loves them so much.

A Blaa with two a’s is made with fresh dough

About the size of a saucer, that’s the right size you know:

But where did they come from, did they happen by chance

No, the Huguenots brought them from France

-Eddie Wymberry

Waterford Blaa

Recipe from: I Married an Irish Farmer

Yield: 8 rolls

Ingredients:

  • 10 gram active dry yeast (about 1 tablespoons & 3/4 teaspoon)
  • 10 grams caster (superfine) sugar ( about 2 1/8 teaspoon)
  • 500 grams Bread Flour, plus more for dusting (A little shy of 4 cups)
  • 10 grams sea salt ( about 1 3/4 teaspoons)
  • 10 grams Unsalted butter ( about 3/4 tablespoon)

Directions:

Dissolve the yeast and sugar in 275ml lukewarm (98° F) water. Leave for 10 minutes. It should get nice and frothy, indicating that the yeast is alive and well.

Pulse flour and salt a couple of times in food processor to combine. Add the butter, cut into small bits and pulse 2-3 times.

Transfer flour/butter combination to the bowl of a stand mixer. Add the wet to the dry ingredients and mix until combined. Change to dough hook and knead for about 10 minutes, until the dough is smooth and elastic. It will go from rough to shiny.

Place in a bowl, cover with cling film, and leave in a warm place for 45 minutes. Remove from the bowl and knock back , pushing the air out the dough. Rest for 15 minutes, to give the gluten time to relax; this will make shaping easier.

Divide the dough into eight pieces. Roll each piece into a ball. Rest for five minutes more, covered.

Dust a baking dish with flour and place the dough balls, side by side. Dust with flour. Leave in a warm place for 50 minutes.

Preheat oven to  410° F (210° C, gas mark 6.5). Liberally dust the blaas with flour from a sifter for a final time and bake for 15-20 minutes.

Proper Chips

Ingredients:

  • 4 Baking Potatoes (I usually use Russett)
  • Oil for Deep Frying ( I like peanut oil, but you could use Canola)
  • Sea Salt

Directions:

Peel potatoes and cut into wedges about 1/2″ thick. Place the wedges into a large bowl and cover with ice water. Leave wedges to soak for at least 30 minutes. Drain the potatoes well and spread out on kitchen towels to dry.

Heat oil in deep-fryer or heavy saucepan to 340°F. Cover a baking sheet with paper towels and set aside.

Add the potato wedges to the hot oil and deep-fry for about 4 minutes. Take care not to over-crowd the fryer. You will likely have to do this in batches. After 4 minutes, remove from deep-fryer. The wedges should have a pale golden hue. Set on paper towel covered baking sheet and allow to cool completely, about 30 minutes or so.

Turn the heat up on your deep-fryer to 375°F. Add the semi-cooked potato wedges to the hot oil and deep-fry until a golden brown colour is reached. It should take only 2-3 minutes. Transfer to a paper towel lined baking sheet and sprinkle liberally with sea salt. Serve while hot. (Though truth be told, I’ve been known to eat chips stone cold right out of the fridge :p )

Assemble your Chip Butty’s on your freshly baked Waterford Blaa.

Directions: (I’m sure you’ve got it from here, but just to be consistent…)

Cut one of the Blaa in half. Butter both halves of the bread.

Fill it with your freshly fried Chips.

Add salt, malt vinegar, ketchup or whatever you desire.

Enjoy!