Ástarpungar ( Love Balls) & Our Icelandic Holidays in July and December

February 27, 2016

IMG_3942

So I’m not sure if you know it or not, but I am pretty much obsessed with Iceland. I absolutely love it there. I just can’t seem to get enough of it! The husband and I originally visited in December of 2012 and we have been back three more times since then. In fact we went twice last year and I must confess, I’m in the midst of planning our next visit! But it wasn’t until our third trip around the country that I discovered Ástarpungar aka Love Balls. A Love Ball is the Icelandic version of a doughnut, though they are completely round (ball shaped in fact) and do not have a hole in the center. I’ve read that they get their quirky name from an odd legend. Seems once upon a time there was a very beautiful, but rather unfaithful woman who was married to a very jealous and vengeful husband. And, oh yeah, there is also a very unfortunate lover involved who soon found himself to be missing bits of his anatomy! Yeah, I’ve also heard these little delicacies referred to as “Lover Balls”. Hmmm…So there you go!  I’m not sure how I missed out on them in previous visits, but now I’m in the know. So, being a fan of all things Icelandic, and these pastries are no exception, I thought I might share the recipe with you as well as some pictures from both of last year’s trips. (At this point, if you hate looking a vacation photos, you can scroll down to the end and just get the recipe. I’ll get over it, I’m sure. But if you think you might want to visit Iceland someday, and I highly recommend it, I hope that I can give you some useful tips and inspiration for your upcoming trip!)

IMG_3919

It was on our July 2015 visit that I first encountered Ástarpungar. We were on our way up to the Westfjords and stopped at the Geirabakarí in Borgarnes. (I’ve just gotta say here, if you are visiting Iceland and are in the Borgarnes neighborhood, this bakery & cafe should be a must for you. Everything I have tried there is out of this world. The husband and I were able to stop by twice in July, once on the way north and we made a point to stop again of the way back to Reykjavik. Really top notch pastries, bread, sandwiches, coffee…etc. And if you are at all interested in movie trivia, the Geirabakari is disguised as the Papa Johns in the Secret Life of Walter Mitty). I already knew that I loved Kanilsnúðar and had read that Geirabakeri did snúðar that could not be beaten. So of course, I ordered up one of those, but rather than the cinnamon variety, I had one with chocolate topping. It was superb! As I was trying to decide what other of the delicious looking pastries I was going to sample, one of the helpful folks working in the bakery suggested the Ástarpungar (Love Balls) and I am so glad they did.

Geirabakari Astarpungar

Geirabakari Astarpungar

Basically it is a slightly sweet, deep-fried ball of dough shot through with plump juicy raisins and a hint of cardamom. It was crispy on the outside with a light fluffy center. Yum! We found ourselves wishing we had gotten a bunch to go as we continued our journey up to the Westfjords.

Gerðuberg Basalt Columns

Gerðuberg Basalt Columns

IMG_2547

IMG_2563

Stykkishólmur harbor

Stykkishólmur harbor

Stykkishólmur harbour

P1050232

And the Westfjords? The husband and I were completely smitten. Absolutely stunning no matter which way we turned!

Crazy Icelandic fog!

Dynjandi Waterfall

Dynjandi Waterfall

Dyandi heights

Westfjords Church

One of the highlights of the visit was The Under the Cliffs tour that we took with Wild Westfjords. This tour took us way off the beaten track along the rugged Svalvogar Peninsula trail. This road is inaccessible for most of the year and we certainly would not want to have attempted it on our own, even though we had rented a 4×4.

Skinny trail!

Skinny trail!

So we were very happy to have our experienced tour guide, Magnus, take over the driving. Friendly and entertaining, he imparted a local’s knowledge of the area to us and told us all about the history of the road, the local wildlife, legends and tales of the area, while we sat back and enjoyed all of the inspiring beauty surrounding us. Quite an unforgettable day! (O.k. – time for another endorsement. If you are planning to visit this area of Iceland, I can not recommend the folks at Wild Westfjords travel agency (especially Halldor) highly enough. Not only was their Under the Cliffs tour breathtaking, but Halldor helped arrange most of the details of our Westfjords visit, from the hotels, to ferry bookings, to the daytours. He gave us advice on driving times between areas and the sights to see along the way. His attention to detail was amazing, all of his recommendations were right on target. I found him simply indispensable!)

On the Svalvogur Trail

On the Svalvogur Trail

P1050198

P1050227

P1050213 (1)

DCIM100GOPRO

Another fun stop for us in the Wesfjords was the town of Hólmavík. Talk about quirky! This town’s claim to fame is that it is the home of the Museum of Icelandic Sorcery & Witchcraft. Fascinating!

The Husband casting spells

The Husband casting spells

We stayed just outside of the town in Hotel Laugarholl. The hotel is a converted school and that school-house vibe is still charmingly present. There is a Sorcerer’s Cottage on the grounds of the hotel which is part of the afore-mentioned museum. But hands down, the highlight of our stay here was the dip we took in the geothermal swimming pool as well as the time we spent soaking in the natural geothermal spring.

Hótel Laugarhóll hot pot

Hótel Laugarhóll hot pot

But our adventures in July were not over yet. We headed back to Reykjavik and on the Inside the Volcano tour were able to actually able to descend into the magma chamber of a dormant volcano! Iceland’s Thríhnúkagígur volcano is the only place in the world that you will find this unique natural phenomenon. After a short, relatively easy hike across a lava field, we arrived at base camp, where we were served a delicious and welcome traditional Icelandic lamb soup while we waited our turn to descend 120 meters (395 feet) down into the volcano.

Geared up & ready to go!

Geared up & ready to go!

Long way back up to the surface!

Long way back up to the surface!

volcano colors

The experience was awesome and I mean that in the truest sense of the word. There was a dazzling array of colors on the walls of the chamber from the mineral deposits which formed when the lava was present. We were lucky enough to actually meet Árni B. Stefánsson, the man who originally discovered Thríhnúkagígur, in the lava field on our hike out that day. He told us that he wanted everyone to have the opportunity to “feel small”. And standing there in such epic grandeur, we certainly did!

Jay & Lea inside volcano 2

The husband and I certainly enjoy heading off into the Icelandic countryside, but we also actually love the city of Reykjavik.

Reykjavik Street view - bike – Version 2

In July I was able to book a walking tour of the city with I Heart Reykjavik. I have been following Auður who writes the I Heart Reykjavik blog for a couple of years now. Not only is she witty and entertaining, but her blog provides a wealth of information to anyone planning a visit to Iceland. When she started offering tours, I couldn’t wait to sign up for one! So, even though this was our third visit to Reykjavik, we took the tour and learned quite a bit from our fantastic tour guide, Ásta. Not only did she tell us about the history of the city but she also imparted a local’s insight on the best bars, restaurants and shopping that Reykjavik has to offer. She took us off the beaten tourist routes and back into the neighborhood streets to get a glimpse of a local’s life and to reveal some of the wonderful hidden street art.

IMG_2770

IMG_2459

We loved the tour so much that when we returned in December, we took the Christmas Version of the I Heart Reykjavik walking tour and were actually able to meet Auður who was guiding the tour that evening. This special edition Christmas tour was full of valuable tidbits for the holiday season. Not only did we hear about the Yule Lads and my favorite – the Jólakötturinn (the yule cat who eats children who do not receive new clothes for Christmas),

Version 2

but we also got great insight into how average Icelandic families celebrate the holidays. We also received a wealth of information on all of the Christmas events happening around the city such as concerts, where to taste Christmas beers (For those of you not familiar with Christmas Beers, the breweries in Iceland produce a limited edition Christmas Beer every holiday season. The beers are generally a little darker, a bit spicier and somewhat higher in alcohol content.

pint

They are available in liquor stores starting November 15th, but are usually for sale in bars a bit earlier. Once January 6th rolls around, the Christmas beers are no longer sold and any beers left in the liquor store are shipped back to their manufacturer, at which point they are usually destroyed. Seems like definite alcohol abuse to me….just saying!) and the best restaurants for feasting on traditional Icelandic Christmas Dinners.

IMG_3630


Version 2

And for those of you thinking….hmmmm…Iceland in December?! We actually love visiting in December. Folks in Iceland definitely get into the holiday spirit. Everything is decorated beautifully and if you don’t find yourself in the Christmas mood after a few days there, I must say, there is no hope for you. You’re a certified Scrooge!  Although we had visited twice before in December, the weather on this particular trip was remarkable. Reykjavik had just received a record amount of snow in the days just preceding our arrival and the snow just kept on coming!

IMG_3596

We even had a Winter hurricane show up while we were there with winds topping 65 mph in the city (30 mps)!

Sorry for the blurry pic, but I think it captures the moment & wind speed perfectly!

Sorry for the blurry pic, but I think it captures the moment & wind speed perfectly!

And I can’t forget to mention that most elusive of natural phenomena – the Northern Lights. We were actually lucky enough to get a glimpse of them one evening. It was a bit cloudy and the lights were not as strong as the first time we saw them back in 2012, but it was still an amazing experience.

lights – Version 2

lights – Version 2

So there you have it! A recap of our 2015 Iceland adventures! And it is true, I am in the midst of planning the first of our 2016 visits. So I hope you will stay tuned to see what we’ll get up to in Iceland this year. For those of you interested in experiencing Iceland for yourselves, at the bottom of this post, I have listed some other links to our favorite Icelandic businesses which may be useful in planning your trip. In the meantime, perhaps you can whip up a batch of these tasty little Love Balls to inspire you!

IMG_3933

P.S. On Tuesday March 1st, I will begin my annual St. Patrick’s Day blog-a-thon of Irish-y recipes. I hope you’ll check back in to join in on all the fun!

Ástarpungar aka Love Balls or Icelandic Doughnuts

  • Servings: 15
  • Difficulty: easy
  • Print

Recipe adapted from: Tasty Trix

Ingredients:

  • 2 cups pastry flour
  • 2 teaspoons baking powder
  • 1 teaspoon cardamom
  • 1/2 cup caster sugar
  • pinch of salt
  • 3/4 cup buttermilk
  • 1 egg
  • 1/2 teaspoon vanilla extract
  • 1/2 cup raisins, plumped with Brennivín (Having no Brennivín on hand, I actually used Rum)
  • zest of one lemon
  • canola oil for frying

Directions:

Place raisins in a small bowl. Cover with boiling water or if you’d like to add a bit more flavour to the fruit, you can add some liquor to the water, or replace the water for liquor all together, depending on the day you are having. If you want to be very Icelandic, you can use Brennivín (Icelandic Schnapps, also known as “Black Death”). I went with good old dark Rum. Let the raisins soak for 15 minutes. Drain liquid away and gently pat raisins dry with paper towels.

Combine the pastry flour, baking powder, cardamom, caster sugar and salt in medium mixing bowl.

In another small bowl, whisk the buttermilk, egg and vanilla extract together.

Add the wet ingredients to the dry ingredients and mix until they just come together. Gently fold in the plumped raisins and the lemon zest.

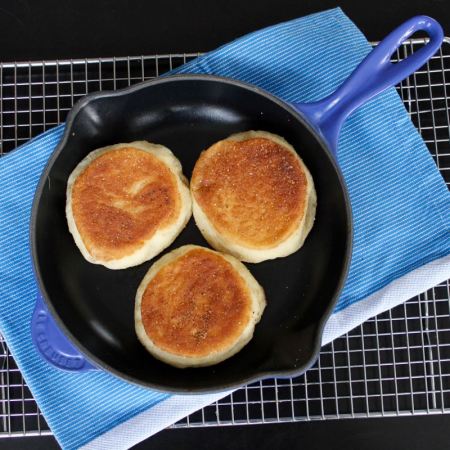
Heat 2″ of oil in a deep pan to 350°F. Drop large cookie scoop (size #30, approximately 2 tablespoons) full of Ástarpungar batter into the oil. Fry, occasionally turning the balls so that all sides cook, for about 5 – 6 minutes.

Remove Ástarpungar from oil with slotted spoon. Drain on paper towels. Serve warm.

Enjoy!

Ástarpungar brought to you by: Runcible Eats (www.leaandjay.com)

Links to Useful Kitchen Tools & Ingredients for Ástarpungar:

Le Creuset Enameled Cast Iron Sauce Pan

Thermoworks Super-Fast Thermapen Cooking Thermometer

Norpro 2 Tablespoon Cookie Scoop

Additional Links for Planning your vacation in Iceland:

Blue Car Rental: The husband and I have rented our car from Blue on three different trips now and wouldn’t consider renting from any other company at this point. Every single time, their service has been fantastic from the first email until we drop the car back off to them. The cars have always been very clean, low mileage, newer models. We also love that the quote you get from them on their website includes everything: unlimited mileage, taxes and all of those pesky insurances like CDW, TP, GP etc.

The Black Pearl Reykjavik – Reykjavik’s Finest Apartments – We have stayed in their luxurious apartments twice and love them! The apartments are fantastic, location perfect and the service is absolutely top-notch.

I Heart Reykjavik: I know I have already linked to this blog above, but I can’t emphasize enough how helpful this travel blog is in planning your Icelandic vacation. Such a wealth of information it is an essential!

Grillmarkaðurinn – (The Grill Market) Our favourite special occasion restaurant in Reykjavik!

Baejarins Beztu Pylsur – Legendary Icelandic Hot Dog stand in Reykjavik. A one a day must for the husband while we are visiting the city!

Sandholt Bakery – If you are not headed out of Reykjavik – get your Ástarpungar here! Along with a plethora of other tasty treats!

SuperJeep – These folks will whisk you away from Reykjavik’s city lights into the darkness of the countryside to chase down the elusive Aurora Borealis. We have been on two of their Northern Lights Tours and were very pleased!

Kraum & Foa – Great shops in Reykjavik for quality, unique handmade Icelandic souvenirs.

Laundromat Cafe (yup…there really is a laundromat here in addition to all the great food and drink),

Kaldi Bar (Fun & hip Bar featuring beers from the Kaldi Brewery)

Ölstofa Kormáks og Skjaldar (Kormakur’s and Skjöldur’s alehouse) – Or just plain Ölstofan (house brew Brío is not to be missed!)

The Reykjavik Grapevine: A witty English language Icelandic magazine. Great read whether or not you’re planning a visit!

Our December 2012 visit blog – Full of useful links, pretty pics & a recipe for Kanilsnúðar

Our December 2013 visit blog – Full of useful links, pretty pics & a recipe for White Chocolate Skyramisu


Slow Cooker Chicken Tortilla Soup

February 23, 2016

IMG_3960

I thought Spring had sprung over the weekend! Yup…the mercury shot on up to 61°F! Balmy I tell you. But alas, I understand that it was just a tease and the cold/wet Wintry weather is headed back in our direction. Good thing I have this spicy, oh so flavorful Chicken Tortilla Soup on hand to warm me up. The zesty broth is simply chock full of tender chicken as well as a  savory veggie and black bean blend. It imparts all those “feel good” vibes that the old classic Chicken Noodle Soup does, yet it does it with a kick! And this soup is not only delicious, but it is also really easy to make. I’m telling you, all you do is put all of the ingredients into your slow cooker, turn it on and then just walk away. No fuss, no worries. And when you return (7 hours later for my part, though you can cook this soup on the high setting and it will be done in 3 -4 hours) you just shred the chicken breasts and stir the meat back into the soup. At that point, while that shredded meat is settling in, you just do a little prep to get all of your toppings ready to go. And I must say, do not skimp on your toppings. I mean this soup is indeed tasty served “au naturale” but I can assure you, there is no way that I will pass up an opportunity to add gooey cheese, chunks of avocado, sour cream and fresh cilantro to pretty much any meal! Yeah, toppings are not really “optional” for me, but to each his own.

IMG_3968

As for the tortillas, the Husband and I just came across Tostitos Rolls, which are the Tostitos tortilla chips, rolled into little cylinders. Crumble them over the top or simply enjoy them as a side, they are fantastic with this soup! So if Winter has got you down and you’re a bit short on time (and/ or kitchen motivation), make up a big batch of this Slow Cooker Chicken Tortilla Soup. Folks will be glad you did!

IMG_3958

Slow Cooker Chicken Tortilla Soup

  • Servings: 6 -8
  • Difficulty: easy
  • Print

Recipe slightly adapted from: Gimme Some Oven

Ingredients:

  • 2 boneless skinless chicken breasts (about 1 pound)
  • 4 cups good-quality chicken stock
  • 2 (14-ounce) cans black beans, rinsed and drained
  • 2 (10-ounce) cans Rotel Diced tomatoes, with juice (we used the Hot variety diced with Habanero)
  • 1 (15-ounce) can whole-kernel corn, drained
  • 1 (4-ounce) can diced green chiles
  • 4 cloves garlic, minced
  • 1 teaspoon smoked paprika
  • 2 teaspoons chili powder
  • 1-2 dried arbol chilis
  • 1 white onion, peeled and diced
  • 2 teaspoons ground cumin
  • 1 teaspoon salt, or more/less to taste
  • fresh lime wedges
  • optional toppings: chopped fresh cilantro, diced avocado, fresh chives, diced red onion, shredded cheese, sour cream, tortilla strips/chips/rolls

Directions:

Add all of the above listed ingredients to a slow cooker, and stir to combine. Cook for 3-4 hours on high heat or 6-8 hours on low heat, until the chicken is cooked through and shreds easily. Remove chicken breasts from soup. Use two forks to shred the chicken and then add back to the soup. Remove the chilis, and discard.

Serve warm with a squeeze of fresh lime juice, and topped with optional toppings if desired (Don’t be silly….of course you want the toppings!).

You can refrigerate this soup in a sealed container for up to 4 days. Or freeze it for up to 3 months.

Enjoy!

Slow Cooker Chicken Tortilla Soup brought to you by: Runcible Eats (www.leaandjay.com)

Links to Useful Kitchen Tools & Ingredients for Slow Cooker Chicken Tortilla Soup:

Crock-Pot Slow Cooker

Kuhn Rikon Avocado Knife

Rotel Diced Tomatoes – This link is for 4 cans, enough for two batches of this soup

Chile de Arbol

Tostitos Rolls – We thought these rolled tortilla chips were great with this soup!


Creamy Spinach & Mushroom Lentils

February 17, 2016

IMG_3361

Well…..Spring has definitely not arrived yet! It is COLD. You know, single digit cold which is saying something when you are dealing with the old Fahrenheit temperature scale as we still do. I guess I shouldn’t be surprised. I mean, it is February for goodness sake. What was I expecting? That dear old groundhog seems to have inspired me to jump the gun a bit on thoughts of Spring. Thank goodness I have this great Winter warmer of a recipe in these Creamy Spinach & Mushroom Lentils. Comforting and tasty, this is just what you want to see on your dinner table. And, since there isn’t any meat to be found in  the mix, it is just perfect on a Meatless Monday.

IMG_3389

Not only is this dish yummy, but it is so easy to make. You only need one pot, which is a huge mark in its favor. And as it turns out, lentils are actually very good for you. These little legumes are chock full of B vitamins, are low in fat and high in fiber and protein. Indeed, lentil have the second highest ratio of protein to calorie of any of the legumes. They keep you feeling full for longer and can also lower your cholesterol and possibly reduce your risk of heart disease. Good stuff there! All these benefits and they actually taste great! Thick & hearty, this creamy lentil stew will give you the strength to hang in there until these last days of Winter blow themselves out!

IMG_3381

Creamy Spinach & Mushroom Lentils

  • Servings: 4 - 6 servings
  • Difficulty: easy
  • Print

Recipe slightly adapted from: Pinch of Yum

Ingredients:

  • 2 tablespoons butter or olive oil
  • half a yellow onion, diced
  • 2 carrots, peeled and chopped
  • 2 sticks celery, chopped
  • 8 ounces cremini mushrooms, washed and sliced
  • 1 teaspoon smoked paprika
  • ½ cup dry white wine
  • 2 cups uncooked lentils, rinsed
  • 2 medium Yukon potatoes, chopped (about 1 cup total)
  • 4 cups chicken broth (plan to add a few more cups as needed while cooking)
  • 1 bay leaf
  • a few sprigs fresh parsley
  • a few springs fresh thyme
  • ½ cup half and half
  • 5 ounces packed fresh baby spinach
  • salt and pepper to taste (be generous with the salt! – but remember not to add it until the lentils have finished cooking)
  • olive oil, red wine vinegar and freshly grated parmesan cheese for topping

Directions:

Heat the oil over medium heat. Add the onions, carrots, celery and mushrooms. Saute for 10 minutes until the vegetables are softened and fragrant. Add the paprika and stir to coat. Next, add in the wine to deglaze the pan – a fancy term for scraping up all the brown bits on the bottom of the pan.

Add the lentils, potatoes, broth, bay leaf, parsley, and thyme. Simmer for 30-45 minutes, stirring occasionally, adding more broth as necessary so the lentils are just barely covered in liquid. When the lentils and potatoes are soft, gently mash the potatoes against the side of the pot with the back of the wooden spoon to thicken the mixture.

Remove the bay leaf and thyme stems, add the half and half and spinach. Stir to incorporate. At this point you can season with salt and pepper (season, taste, adjust, repeat). If you add the salt prior to the lentils being done, it actually makes them take longer to cook. So you’ll be glad that you waited! Top each bowl with a drizzle of good olive oil, a splash of red wine vinegar and a dusting of freshly grated parmesan cheese. Serve with a big hunk of cornbread or crusty rustic bread.

Enjoy!

Creamy Spinach & Mushroom Lentils brought to you by: Runcible Eats (www.leaandjay.com)


Banana Cream Pie

February 13, 2016


IMG_3833

Today is Valentine’s Eve. Does everyone know just what decadent dish they are going to make for their sweetie tomorrow? You know, that culinary creation that will totally sweep your beloved right off of their feet! I’ve got mine all done and dusted. A classic Banana Cream Pie!

IMG_3801

Yes sir-ree. And this is no ordinary Banana Cream Pie. Nope….this one is special and totally home-made. Now don’t get me wrong, I’ve had plenty of tasty Banana Cream Pies that were done with graham cracker crusts, instant Jello banana pudding filling and Cool Whip topping. But I got to tell you, this pie, made totally “from scratch” just leaves them all in the dust! Let me tell you why. I’ll start with the crust. It is light, flaky and wonderfully buttery.

IMG_3808

And as if, this pie crust weren’t good enough on its own…which it definitely is, for this Valentine’s creation, I gilded the lily a bit and brushed a silky dark chocolate all over the top of it. Then I filled that chocolate covered crust with a lovingly simmered, velvety banana infused custard and topped it with swirls of fluffy whipped cream. Oh mercy!

IMG_3858

So homey yet so utterly indulgent! Actually, to tell you true, this dessert is totally not my thing. I like chocolate and peanut butter and am somewhat obsessed with cupcakes. Fruit desserts? Not so much. But I didn’t make this for me. I made it for my Valentine.

IMG_3791

And the Husband can pass by a table of chocolatey sweets without a second glance. But show him any type of crumble, fruit crisp or pie and he goes weak in the knees. So you see, my path was clear. And I’m very happy to say, he did indeed find this Banana Cream Pie “swoon worthy”!

IMG_3846

So if you know someone who you think you might want to get to know a little better, whip them up this classic comforting and oh so dreamy Banana Cream Pie. After the very first bite, I bet they’ll be your Valentine before you can even ask.

IMG_3821

Banana Cream Pie

  • Servings: 8-10
  • Difficulty: easy
  • Print

Recipe from: Bon Appetit, Flaky Pie Crust slightly adapted from Inspired Taste

Ingredients:

For the flaky pie crust: (Or, if pressed for time, purchase a 9″ pie crust)

  • 2 1/2 cups (360 grams) all-purpose flour
  • 1 teaspoon kosher salt
  • 1 cup (227 grams) very cold unsalted butter, cut into 1/2-inch cubes (2 sticks)
  • 6 tablespoons vodka (chilled)
  • 2 Tablespoons ice water

For the Chocolate lining:

  • 2 ounces bittersweet chocolate
  • 2 teaspoons vegetable oil

For the Pie:

  • 3 large egg yolks
  • 1/2 cup sugar
  • 3 Tablespoons cornstarch
  • pinch of salt
  • 2 cups whole milk
  • 2 Tablespoons unsalted butter
  • 2 teaspoons vanilla extract
  • 3 bananas, sliced

For the Whipped Topping:

  • 1 cup chilled heavy cream
  • 2 Tablespoons sugar
  • 1/4 teaspoon vanilla extract
  • chocolate shavings for decoration, if desired

Directions:

For the flaky pie crust: (This makes enough for two 9″ pie crusts. You will only use one of them for this recipe. The other one can be frozen for up to three months, giving you a jump start on the next pie you make!)

Mix 6 tablespoons of vodka and 2 tablespoons of water. Put in fridge or freezer (don’t forget it) to chill.

Add 1 1/2 cups flour, salt to a food processor. Pulse 2 to 3 times until combined.

Scatter butter cubes over flour and process until a dough or paste begins to form, about 15 seconds. (There should be no uncoated flour).

Scrape bowl, redistribute the flour-butter mixture then add remaining 1 cup of flour. Pulse 4 to 5 times until flour is evenly distributed. (Dough should look broken up and a little crumbly).

Transfer to a medium bowl then sprinkle 6 tablespoons of ice water/vodka over mixture. Using a rubber spatula, press the dough into itself. The crumbs should begin to form larger clusters. If you pinch some of the dough and it holds together, it’s ready. If the dough falls apart, add 1 to 2 tablespoons of extra water/vodka and continue to press until dough comes together.

Remove dough from bowl and place in a mound on a clean surface. Work the dough just enough to form a ball. Cut ball in half then form each half into discs. Wrap each disc with plastic wrap and refrigerate at least 1 hour, and up to 2 days. You can also freeze it for up to 3 months (just thaw it overnight in the fridge before using).

Once you are ready to bake, remove one of the dough discs from the refrigerator and let sit at room temperature for 5 minutes. (If you’d like to see a great video on how to roll out pie dough, take a peek at this one from Inspired Taste.)

Lightly flour work surface, top of dough and rolling pin. Then use rolling pin to roll out dough to a 12-inch circle (about 1/8-inch thick). Be sure to check if the dough is sticking to the surface below — add a small amount of flour when necessary.

Check for size by inverting pie dish over dough round. Look for a 1-inch edge around the pie dish.

To transfer dough to dish, starting at one end, roll dough around rolling pin then unroll over dish.

Gently press dough down into dish so that it lines the bottom and sides of the dish. (Be careful not to pull or stretch the dough). Then, use a knife or pair of kitchen scissors to trim dough to within 1/2-inch of the edge of the dish.

Fold edge of dough underneath itself so that it creates a thicker, 1/4-inch border that rests on the lip of the dish. Then, crimp edges by pressing the pointer finger of one hand against the edge of the dough from the inside of the dish while gently pressing with two knuckles of the other hand from the outside.

Heat the oven to 425º F. Place a baking sheet on a middle oven rack.

Pierce the bottom of the crust with a fork (this prevent air pockets or bubbles from forming while baking). Line the crust with two sheets of aluminum foil. (Be sure to push foil against the edges of the crust). Then, fill foil with dried rice, dried beans or pie weights. Refrigerate 30 minutes or freeze for 10 minutes, or until firm to the touch.

Place pie crust onto preheated baking sheet and reduce oven temperature to 400° F (200° C). Bake 20 to 30 minutes or until the crust is golden.

Make an egg wash by whisking one egg yolk and 1 tablespoon of cream in a small bowl. Then, remove rice, beans or pie weights and foil from pie crust. Brush the bottom and sides of the crust with egg wash. Bake until egg wash is dry and shiny, 3 to 5 minutes. Cool crust completely.

If you are using a store-bought crust, prebake it and set it aside to cool completely.

Once your crust has cooled, melt 2 ounces bittersweet chocolate with 2 teaspoons vegetable oil and brush over a prebaked 9-inch pie crust; chill until set.

For the Banana Cream filling:

Meanwhile, whisk 3 large egg yolks, 1/2 cup sugar, 3 tablespoons cornstarch, and a pinch of salt in a medium saucepan, off heat, until smooth. Gradually whisk in 2 cups whole milk. Whisking constantly, bring to a full boil over medium heat and boil until the custard pulls away from the sides of the saucepan, about 3 minutes. Remove from heat and whisk in 2 tablespoons unsalted butter and 2 teaspoons vanilla extract. Fold in 3 sliced bananas and let cool slightly. Pour filling into prepared pie crust, cover with plastic wrap, and chill until firm, at least 3 hours and up to 1 day.

For the whipped topping:

Beat 1 cup chilled heavy cream with 2 tablespoons sugar and 1/4 teaspoon vanilla extract until firm peaks form; spoon over pie and swirl decoratively. Decorate with chocolate shavings, sprinkles, mini chocolate chips or just serve it au natural, as you wish!

Enjoy!

Banana Cream Pie brought to you by: Runcible Eats (www.leaandjay.com)

Links to Useful Kitchen Tools & Ingredients for Banana Cream Pie:

Cuisinart Pro Classic 7 Cup Food Processor

Norpro Silicone Pastry Mat

Oxo Good Grips Silicone Basting & Pastry Brush

Le Creuset Enameled Cast Iron Sauce Pan

Kitchen Aid Artisan Stand Mixer


Moroccan Meatball & Couscous Soup

February 9, 2016

IMG_2886

So I know good ole Punxsutawney Phil has declared that Winter is on the way out and Spring is right around the corner. However, Spring hasn’t yet stepped out in this neck of the woods. It has been damp, cold and really pretty dreary recently. In fact, today it is actually snowing. Soup weather without a doubt and I have a great recipe for a soup which is not only flavorful and warming, but also pretty fun as well – Moroccan Meatball & Couscous Soup. This is definitely one of the Husband’s favorite soups. He LOVES meatball anything…cocktail meatballs, meatball subs, spaghetti & meatballs and on the rare occasion that we have ventured into an IKEA, you can rest assured that you’ll find him in the cafeteria sampling those Swedish Meatballs. So when I came across this recipe, I knew it would be a winner with him. This soup features mini meatballs which are chock full of Moroccan spices and Israeli Couscous in a chicken broth base. The meatballs are baked prior to going into the soup which helps them retain their shape. I prefer ground beef for my meatballs, though the original recipe calls for lamb. So if you are a fan of lamb, feel free to go with the original recipe. Either way, these Moroccan spiced meatballs are quite tasty!

IMG_2896

The Israeli Couscous adds a wonderful nutty flavor as well as a lovely texture to the soup. If you’ve never tried Israeli Couscous before, now is the time! It is really delicious. Similar to Moroccan couscous, this toasted pasta is much bigger and is shaped like little balls. This couscous works perfectly in soups because it retains its shape well and tends to not clump together. Though I will say, this soup does thicken if you have leftovers saved in the fridge. Before reheating, just add few glugs of chicken broth to it and it will be good as new! Quick and easy to make, you’ll have this soup on the table in no time flat. Serve it up with a big loaf of rustic, crusty bread and this comforting soup will make you forget all about the crappy weather outside. And don’t despair, I have great faith that our beloved weather predicting rodent was correct…Spring is on the way!

IMG_2889

Moroccan Meatball & Couscous Soup

  • Servings: 4 - 6
  • Difficulty: easy
  • Print

recipe from: Williams Sonoma

Ingredients:

For the Meatballs:

  • 1 tsp. ground coriander
  • 1 tsp. ground cumin
  • 1/4 tsp. curry powder
  • 1/4 tsp. dried oregano
  • the leaves from 4 -5 fresh sprigs of thyme (leaves only – no stems! You can substitute 1/4 tsp. dried thyme, but I think the fresh thyme is better if you have it.)
  • 1/8 tsp. dry mustard
  • 1/8 tsp. chili powder
  • Pinch of ground cinnamon
  • 1/2 tsp. salt
  • 1 lb. (500 g) ground beef (can substitute lamb in if you want to be a tad more authentic)
  • 2 Tablespoons tomato paste

For the soup:

  • 1 1/4 cups (10 fl. oz./310 ml) water
  • 1 cup (6 oz./185 g) Israeli couscous
  • 3 Tablespoons olive oil
  • 2 shallots, minced
  • 5 garlic cloves, minced
  • 3 cups (24 fl. oz./750 ml) chicken broth
  • 1/4 tsp. cayenne pepper (optional – but we like it spicy!)
  • 1 Tablespoon chopped fresh mint (I do not actually use the mint when I make this dish)
  • Salt and freshly ground pepper, to taste

Directions:

To make the meatballs, preheat an oven to 375°F (190°C). Line a baking sheet with parchment paper.

In a bowl, combine the coriander, cumin, curry powder, oregano, thyme, mustard, chili powder, cinnamon and salt. Add the ground beef and tomato paste. Using your hands, mix gently but thoroughly. For each meatball, scoop up 1 tsp. of the mixture. I use a small cookie scoop to do this. It makes it a bit easier and all of your meatballs are similar in size. You should end up with around 40 meatballs. Place on the prepared baking sheet. Bake until the meatballs are cooked through, about 10 minutes.

In a small saucepan over high heat, bring the water to a boil. Add the couscous, reduce the heat to low, cover and cook until all the liquid is absorbed, 8 to 10 minutes.

Meanwhile, in a large, heavy pot over medium-high heat, warm the olive oil. Add the shallots and garlic and cook, stirring constantly, for 1 minute. Add the broth and bring to a boil. Reduce the heat to low, add the meatballs and couscous and simmer for 10 minutes. Stir in the cayenne pepper. Remove from the heat. Stir in the mint (If you are using it) and season with salt and pepper. Ladle the soup into warmed bowls and serve immediately.

Enjoy!

Moroccan Meatball & Couscous Soup brought to you by: Runcible Eats (www.leaandjay.com)

Links to Useful Kitchen Tools & Ingredients for Moroccan Meatball & Couscous Soup

OXO Good Grips Small Cookie Scoop

Chef’n Zipstrip Herb Stripper – Fantastic tool for stripping herb leaves from their woody stems!

Le Creuset Signature Enameled Cast Iron 5 1/2 quart Dutch Oven

Israeli Couscous, Tri-Color – This link is for the tri-color couscous. Of course you do not have to use tri-color, you can use regular or even whole wheat if you wish. I just like the look of the tri-color style.


Nutella Sea Salt Stuffies

February 5, 2016


IMG_3782

Hey all you Nutella fans out there! Take a look at what I got here…Nutella Sea Salt Stuffies! Yup…a rich chocolatey Nutella cookie which surrounds a silky truffle-like Nutella center and if that hasn’t got you drooling, just listen up. It is topped with a sprinkling of flaky sea salt. You know I’m a sucker for that sweet/salty taste sensation! And these cookies have it all going on. The outside cookie is soft and yet also chewy at the same time. And once you bite into it, assuming it is warm out of the oven, you get this molten, lava-like burst of melted Nutella. Pure Nutella nirvana I tell you!

IMG_3777 (1)

Now it is not by chance that I’m blogging a recipe which features Nutella today. Today February 5th is World Nutella Day. This celebration of all things Nutella was started in 2007 by Sara at Ms. Adventures in Italy and Michelle at Bleeding Espresso as a day to celebrate, get creative with and most importantly, to EAT Nutella.

World_Nutella_Day_Final_m-300x207 This year, the founders have transferred Nutella Day to Ferrero the company who owns that most beloved spread. Take a peek at their Facebook page and see how folks are celebrating the day! I love Nutella so I usually try to participate with a Nutella laden recipe every year. Last year I made cookies as well,  irresistible Salted Peanut Butter & Nutella Sandwich Cookies

IMG_1115

I was still all about the cookies and the salty / sweet thing two years ago when I blogged about  Salted & Malted Nutella Caramel Chocolate Chip Cookies. These cookies feature silky, decadent Nutella, creamy caramel, nostalgic malted goodness and rich chocolate chips, all rolled up together in a crunchy chewy salted cookie

IMG_5106

And then there was my  Nutella, Double Chocolate & Banana Tart which was quite stunning if I do say so myself.

IMG_1065

But back to today’s star, both decadent and addictive, Nutella Sea Salt Stuffies.

IMG_3738

These tempting little treats are pretty easy to make, especially if you plan ahead. You see, you need to freeze what will become the molten Nutella centers, for at least 3 hours before assembling the final cookie. Sure it can all be done on the same day, but I did it the day before baking day. Once I was ready to bake, these cookies came together in no time flat. They are truly magical warm from the oven what with that lava like flow of Nutella when you bite into them. But don’t fret if they’ve cooled down. The center will be more solid, like Nutella is straight out of the jar, which certainly isn’t a bad thing. However, if you love the Nutella lava effect, just reheat them for a short time in the microwave and you’ll have Mt. Nutella cookies, erupting again!

IMG_3766

I know these cookies look rather short on the list of ingredients front, but don’t be fooled, they pack quite a flavorful punch. The Husband, who doesn’t usually care for chocolatey desserts, has actually come back for seconds. He says they are like a Nutella filled brownie…with salt. YUM! Make up a batch today in celebration of all things Nutella. Or… you know… Valentine’s Day isn’t that far off. Bet any Nutella loving folks out there would be head over heels when gifted with these cookies on the big day. You know what they say…no better way to man’s heart and all…

IMG_3757

Nutella Sea Salt Stuffies

  • Servings: 12 -15 cookies
  • Difficulty: easy
  • Print

recipe from: King Arthur Flour

Ingredients:

For the filling:

  • 5 1/4 ounces / 149 grams Nutella chocolate hazelnut spread

For the dough:

  • 10 1/2 ounces / 298 grams Nutella Chocolate hazelnut spread
  • 4 ounces / 112 grams King Arthur 100% White Whole Wheat Flour or 4 1/4 ounces /120 grams of King Arthur Unbleached All Purpose Flour
  • 1 large egg
  • 1/2 teaspoon espresso powder, optional

For the Topping:

  • Fleur del Sel coarse sea salt

Directions:

To make the filling: Scoop small balls of Nutella (chestnut-sized, about 1″ diameter) onto a parchment-lined baking sheet. A teaspoon cookie scoop, filled level, is the perfect tool for this job. Scoop out 15 -18 balls of Nutella. You may end up with extras, but better that than coming up short.

Place the baking sheet into the freezer (uncovered is fine), and freeze until the balls are completely frozen, about 3 hours; or up to overnight.

Preheat the oven to 350°F. Lightly grease a baking sheet, or line it with parchment.

To make the dough: Mix together all of the dough ingredients; the mixture will be cohesive, fairly soft, but not sticky; think modeling clay. It will stick together better when you squeeze it.

Scoop out heaping tablespoonfuls of the dough; a slightly heaped Tablespoon cookie scoop works well here.

Remove the frozen Nutella balls from the freezer once you have the dough ready to shape. Flatten a ball of dough. Place one of the frozen Nutella balls in the center. Wrap the dough around the Nutella like a dumpling, enclosing it completely. Roll the ball of dough between your palms to seal any cracks and round it out. Repeat with the remaining dough and frozen Nutella balls.

Place the cookies on the prepared baking sheet; they won’t spread much, so should all fit on one sheet. Sprinkle very lightly with a bit of coarse sea salt.

Bake the cookies for 8 to 10 minutes; when done, they will have lost much of their shine, and you may see a very faint lightening of color around the bottom third of each cookie.

Remove the cookies from the oven; serve warm, or at room temperature. For the full melting-center, lava-like effect, serve warm; if they’re at room temperature, the centers will be solid. Reheat very briefly in the microwave to liquefy the centers, if desired.

Enjoy!

Nutella Sea Salt Stuffies brought to you by: Runcible Eats (www.leaandjay.com)

Links to Useful Kitchen Tools and Ingredients for Nutella Sea Salt Stuffies:

OXO Good Grips Stainless Steel Food Scale

Kitchen Aid Artisan Stand Mixer

OXO Good Grips Small Cookie Scoop

OXO Good Grips Medium Cookie Scoop

King Arthur Unbleached All-Purpose Flour (this link is for 2 – 5 lb. bags of flour)

Nutella

Maldon Sea Salt Flakes (Fleur de Sel)

I should also mention that King Arthur Flour has a wonderful shop full of kitchen essentials as well as their quality ingredients on their website. Definitely worth taking a peek!


The Model Bakery’s English Muffins

February 1, 2016

IMG_3605

Here it is…February already. It seems the Husband and I made it through the recent blizzard event, lovingly dubbed “Snowzilla” relatively unscathed. And tomorrow, my favourite varmint, Punxsutawney Phil, will be stepping out of his burrow at Gobbler’s Knob and letting everyone know if there will be 6 more weeks of winter or if perhaps Spring is on the way. Groundhog Day is nigh!

One extraordinary rodent!

One extraordinary rodent!

Phil & all the folks up in Punxsutawney aren’t the only folks celebrating now. February 1st, which falls half way between Winter Solstice and Spring Equinox, also marks the festivals of Imbolc, St. Brigid’s Day and Candlemas, all of which are associated with fertility, fire, purification and weather divination. Quite an auspicious time of year! I’m very happy to be marking an event today as well. February 1st just happens to be the 5th year anniversary of  the my cooking blog! Yup… Five years ago today I posted my first recipe. It was for Cream Tea Scones with Currants.

IMG_4970

I’ve posted some tasty “Anniversary Edition” recipes since then as well like Banana Rum Muffins:

IMG_0405

And last year I was able to successfully bake up a genuine Crack Pie!

IMG_0897So the pressure was on to pick a great dish to share on this my 5th Year blogging and I definitely have a winner for you: The Model Bakery’s English Muffins!

IMG_3643

I mean who doesn’t love an English Muffin? With all of those delightful nooks and crannies, it’s just the perfect vehicle for lashings of salty butter and sweet fruity jam. Seems I’m not alone in my adoration of the muffin. Folks have been enjoying these for a long, long while. Certainly you’ve heard the traditional English nursery rhyme “The Muffin Man”

Oh Do you know the muffin man,
The muffin man, the muffin man,
Do you know the muffin man,
Who lives in Drury Lane?

In Victorian England folks were able to have fresh “muffins” delivered right to their door by a fellow known as….you guessed it, The Muffin Man. In 1874, Samuel Bath Thomas moved from Plymouth England to New York City. Once there he set up a bakery and began selling what he called “toaster crumpets”. They were similar to English crumpets but were thinner and pre-sliced. He was the founder of Thomas’s English Muffins which are still sold in many groceries today.41g0DUQLjuL

And whilst I’m thankful to Mr. Thomas, having enjoyed the convenience of easily buying a packet of English Muffins, whenever the mood struck me, I’ve got tell you…those store-bought muffins don’t really hold a candle to these homemade gems! Oh Good Lawd above! Once you taste these big honking, tender, moist & fluffy Homemade Muffins, you’ll be hooked. Sooooo worth the effort. You’ll never be found in the Muffin aisle of your local grocery again. (Sorry Mr. Thomas!)

IMG_3674

Now there are many recipes out there for homemade English Muffins, but this one from the Model Bakery reigns supreme! There is a reason their muffins were featured on Food Network’s Best Thing I Ever Ate. The Model Bakery has been open in Napa for over 80 years. Dedicated to authentic artisan baking traditions, they specialize in Artisan Breads but also will tempt you with a complete range of pastry products. And if you’re not planning on visiting Napa anytime soon, they not only mail order some of their delicious baked goods, but have also published a great cookbook: The Model Bakery Cookbook: 75 Favorite Recipes from the Beloved Napa Valley Bakery , so that you can bake them at home. I’m telling you these muffins are just heavenly. Larger than your usual English Muffin, they bake up wonderfully fluffy and light as a cloud, yet are substantial enough to hold up to any breakfast sandwich you might send their way.

IMG_3687

And with this dough, you don’t have to fiddle around with any old-fashioned muffin rings. You cook them up on a griddle, completely free form.  If you can resist eating the whole dozen in one sitting, a feat of self-restraint that would definitely be worthy of admiration, I’m glad to say these little darlings freeze well, allowing you to have these awesome muffins on hand at the drop of a hat! So what are you waiting for…

IMG_3611

The Model Bakery's English Muffins

  • Servings: 12 Muffins
  • Difficulty: easy, but several steps and dough rising times to be factored in
  • Print

From: The Model Bakery Cookbook

Special thanks to Steven & Julie, fellow baking enthusiasts, for sharing this killer recipe with me!

Ingredients:

For the Biga:

  • 1/4 cup / 60 ml water
  • 1/2 cup/ 75g bread flour
  • 1/4 teaspoon instant (also called quick-rising or bread machine) yeast

For the Dough:

  • 1 1/3 cups / 315 ml water
  • 3/4 tsp instant (also called quick-rising or bread machine) yeast
  • 1 tablespoon plus 1 teaspoon extra-virgin olive oil
  • 1 1/2 teaspoon fine sea salt
  • 3 1/2 cups/ 510g unbleached all-purpose flour, as needed

Additional Ingredients:

  • 1/4 cup/ 35g yellow cornmeal, preferably stone-ground
  • 6 tablespoons melted Clarified Butter (recipe follows) as needed

Directions:

To make the biga: At least 1 day before cooking the muffins, combine the flour, water, and yeast in a small bowl to make a sticky dough. Cover tightly with plastic wrap and refrigerate for at least 12 hours or up to 24 hours. The biga will rise slightly.

To make the dough: Combine the biga, water, yeast, olive oil, and salt in the bowl of a stand mixer. Affix the bowl to the mixer and fi t with the paddle attachment. Mix on low-speed until the mixture looks creamy, about 1 minute. Mix in 3 cups/435 g of the flour to make a soft, sticky dough. Turn off the mixer, cover the bowl with plastic wrap, and let stand for 20 minutes. (To make by hand, combine the water, biga, yeast, oil, and salt in a large bowl and break up the biga with a wooden spoon. Stir until the biga dissolves. Mix in enough flour to make a cohesive but tacky dough. Cover and let stand for 20 minutes.)

Mix in enough of the remaining flour to make a soft dough that barely cleans the mixer bowl. Replace the paddle with the dough hook. Knead on medium-low speed (if the dough climbs up the hook, just pull it down) until the dough is smooth and elastic, about 8 minutes. Turn out the dough onto a lightly floured work surface to check its texture. It should feel tacky but not stick to the work surface. (To make by hand, knead on a floured work surface, adding more flour as necessary, until the dough is smooth and feels tacky, about 10 minutes.)

Shape the dough into a ball. Oil a medium bowl. Put the dough in the bowl and turn to coat with oil, leaving the dough smooth-side up. Cover with plastic wrap. Let stand in a warm place until almost doubled in volume, about 2 hours. (The dough can also be refrigerated for 8 to 12 hours. Let stand at room temperature for 1 hour before proceeding to the next step.)

Using a bowl scraper, scrape the dough out of the bowl onto a lightly floured work surface. Cut into twelve equal pieces. Shape each into a 4-in/10-cm round. Sprinkle an even layer of cornmeal over a half-sheet pan. Place the rounds on the cornmeal about 1 in/2.5 cm apart. Turn the rounds to coat both sides with cornmeal. Loosely cover the pan with plastic wrap. Let stand in a warm place until the rounds have increased in volume by half and a finger pressed into a round leaves an impression for a few seconds before filling up, about 1 hour.

Melt 2 Tbsp of the clarified butter in a large, heavy skillet (preferably cast-iron) over medium heat until melted and hot, but not smoking. In batches, add the dough rounds to the skillet. Cook, adjusting the heat as needed so the muffins brown without scorching, adding more clarified butter as needed. The undersides should be nicely browned, about 6 minutes. Turn and cook until the other sides are browned and the muffins are puffed, about 6 minutes more. Transfer to a paper towel–lined half-sheet pan and let cool. (It will be tempting to eat these hot off the griddle, but let them stand for at least 20 minutes to complete the cooking with carry-over heat.) Repeat with the remaining muffins, wiping the cornmeal out of the skillet with paper towels and adding more clarified butter as needed.

Split each muffin in half horizontally with a serrated knife. Toast in a broiler or toaster oven (they may be too thick for a standard toaster) until lightly browned. Serve hot. (The muffins can be stored in an airtight container at room temperature for up to 2 days.

To make the clarified butter: Melt the butter in a small saucepan over medium heat until completely melted and boiling. Cook until the butter stops sputtering, about 1 minute. Remove from the heat and let stand for 5 minutes. Skim the foam from the surface of the butter.

Line a wire sieve with dampened, wrung-out cheesecloth and place over a medium bowl. Carefully pour the clear, yellow melted butter through the sieve, leaving the milky residue behind in the saucepan. (Discard the residue.) Pour into a small container and cover. Refrigerate until ready to use. (Psssst: If you can’t be bothered making your own clarified butter, you can just go buy some Ghee off the supermarket shelf or order on Amazon!)

Enjoy!

The Model Bakery’s English Muffins brought to you by: Runcible Eats (www.leaandjay.com)

Helpful Links to Kitchen Tools & Ingredients I used in making these English Muffins:

So this is a new feature I’m adding to my blog. Below you will find a list of Amazon Links to some of the Kitchen Tools and Ingredients which may not be found in your local grocery store, that I used in making the above recipe. You certainly don’t have to order them from Amazon if you’d prefer not to, but you can at least take a look at them there and then proceed as you wish. You also might be able to make the recipe perfectly well without any of these tools, but I use them and feel they make things much easier for me.

Oxo Good Grips Stainless Steel Food Scale

6 Quart Dough Rising Bucket

Kitchen Aid Artisan Series 5 Qt. Stand Mixer

SAF Instant Yeast

Le Creuset 11 3/4″ Cast Iron Frying Pan

Ghee (Clarified Butter)