Irish Whiskey, Ginger & Lime Cupcakes

March 17, 2021

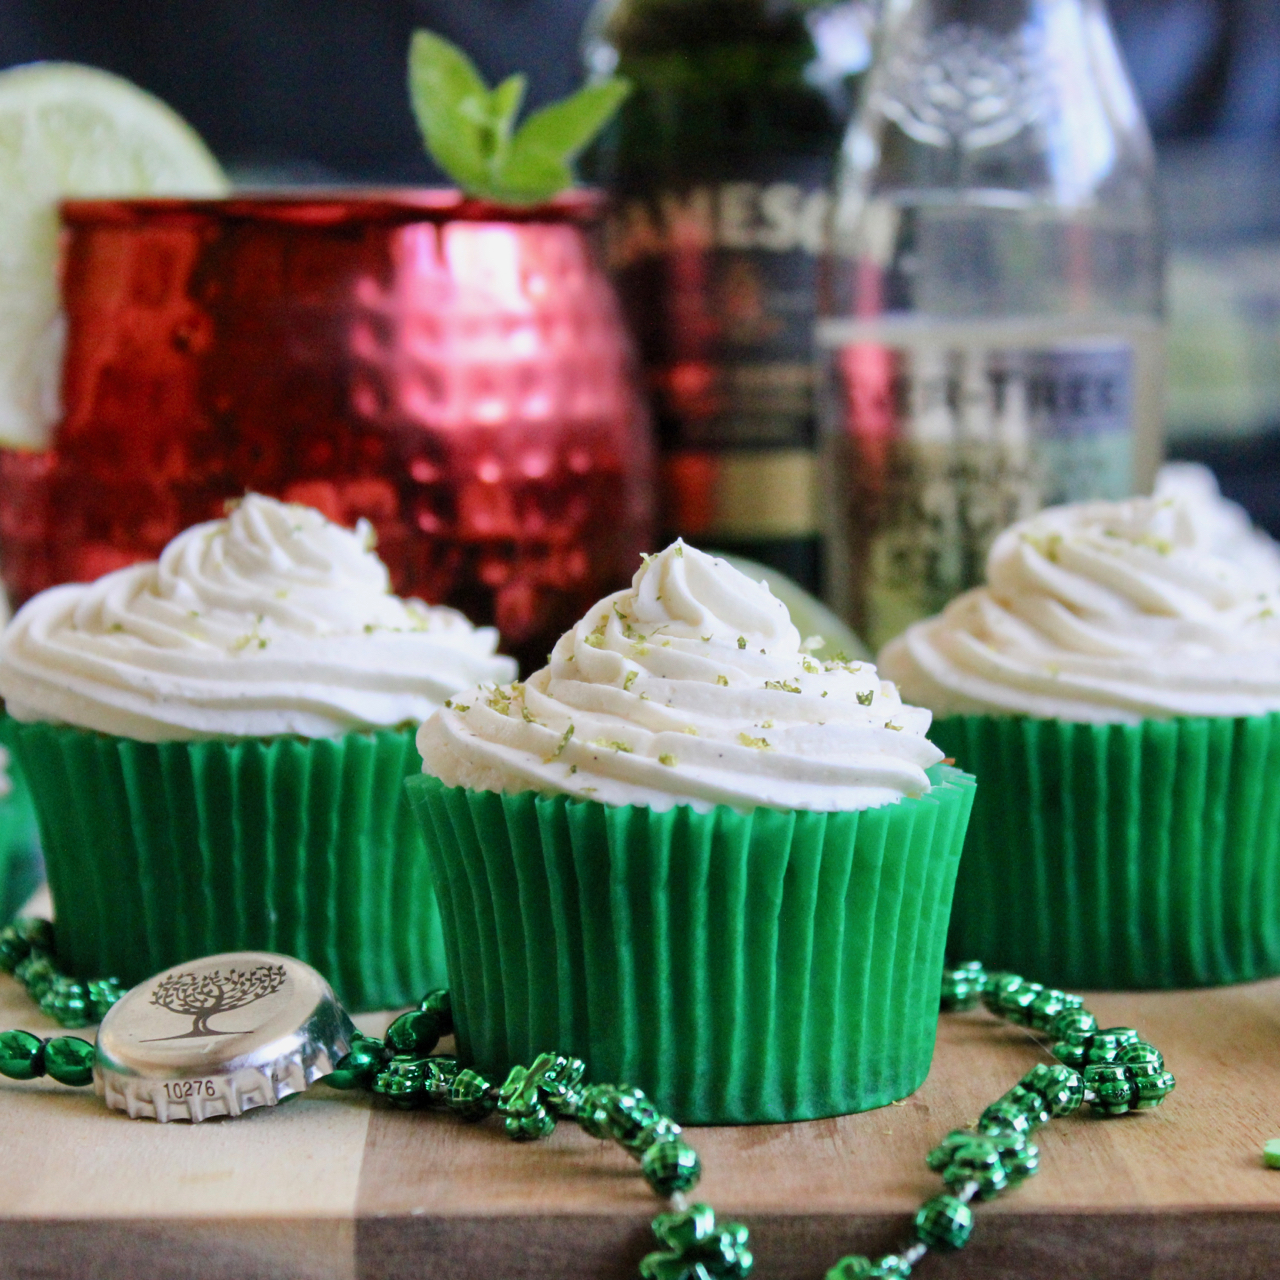
Woo-hoo! Today is St. Patrick’s Day!!! It is here, it is here! And to finish off my annual St. Patrick’s Day recipe run I give you: Irish Whiskey, Ginger & Lime Cupcakes! These cupcakes are aaaaamazing! I mean you’ve got the smooth taste of Irish Whiskey, the sweet bite of candied ginger and a zing-y lime finish. What is not to love?!!

So I’m sure some of ya’ll are like…”hey, those ingredients sound a lot like what you get in a Jameson & Ginger ale cocktail” and the rest of you are saying “Nah, that’s an Irish Mule Cocktail”. I guess if you’re going to get technical, I actually use Ginger Beer in these delectable little nibbles, so I guess it leans more towards the Mule. But if you are a big fan of Jameson & Ginger, I”d wager you’d be quite pleased with these as well.

The cake portion of this treat is really moist and tender and I absolutely love that it is shot through with little bits of candied ginger. And the frosting…oh the frosting! I really love Swiss Meringue Buttercream frosting. That is pretty much my go to. However, I came across a recipe for this frosting that uses meringue powder and I really love it. It is a bit easier than separating all those egg whites. If you like Swiss Meringue, you are going to love this frosting as well. It is super fluffy, creamy and with the addition of the Jameson Whiskey, quite boozy. Perfect for your St. Patrick’s Day festivities, even if they are still rather low key this year.

Last St. Patrick’s Day, all this pandemic stuff was pretty new. I would not have ever imagined one year later, we would still be sitting at home. No parades, no pubs. But it does look like there is light at the end of the tunnel. Can’t tell you how happy I will be when we are able to head safely back to the pubs and I take that first sip of my first post-pandemic pint! But for now, I will be content just chilling on my sofa with these tasty, boozy Irish Whiskey, Ginger & Lime Cupcakes.

I wish everyone a safe, healthy and happy holiday! Lá Fhéile Pádraig Sona Daiobh (Happy St. Patrick’s Day)!

Irish Whiskey, Ginger & Lime Cupcakes

  • Servings: 15 cupcakes
  • Difficulty: easy
  • Print

recipe for Buttercream Frosting from King Arthur Flour, cupcakes inspired by: Life Love & Sugar

Ingredients:

For the cupcakes:

  • 6 Tablespoons (84 grams) unsalted butter, room temperature
  • 3/4 cups (155 grams) sugar
  • 6 Tablespoons (86 grams) sour cream
  • 1/2 tsp vanilla bean paste (can substitute in vanilla extract)
  • 3 egg whites, room temperature
  • 1 1/4 cups (163 grams) all-purpose flour
  • 2 tsp baking powder
  • 1 1/4 tsp ground ginger
  • 1/4 tsp salt
  • 6 Tablespoons (90ml) Fever-Tree Premium Ginger Beer (can use different brand – but Fever-Tree is amazing!)
  • 2 Tablespoon (30ml) Irish Whiskey (I used Jameson)
  • 2 ounces (58 grams) candied ginger, chopped finely

For the Whiskey Buttercream frosting:

  • 6 Tablespoons (75 grams) granulated sugar
  • 1/8 teaspoon salt (if you use unsalted butter)
  • 1/4 cup (57 grams) boiling water
  • 2 Tablespoons (14 grams) meringue powder
  • 1/2 tablespoon vanilla bean paste
  • 2 cups (227 grams) sifted confectioners’ sugar or glazing sugar
  • 16 tablespoons (227 grams) unsalted butter
  • 1 -3 Tablespoons Irish Whiskey (taste as you go)
  • lime zest for garnish

Directions:

Preheat the oven to 350°F (176°C). Line a muffin tin with cupcake liners.

In the bowl of a stand mixer, cream the butter and sugar together until light a fluffy. Beat for about 5 -6 minutes. Do not skimp on the time.

Add the sour cream and vanilla bean paste and mix until combined.

Add the egg whites in two batches, mixing well after each addition.

Combine the flour, baking powder, ginger and salt in a separate bowl Set aside.

Combine the Ginger Beer & Irish Whiskey in a measuring cup.

Add half of the dry ingredients to the butter/sugar mixture and mix until well combined. Add the entire Ginger Beer/Whiskey combination to the batter and mix until incorporated. Add the remaining dry ingredients and mix until just combined.

Fold in the chopped ginger.

Fill the cupcake liners 1/2 way. I used a 1/4 cup muffin scoop for this.

Bake for 18 -20 minutes, or until a toothpick inserted comes out clean.

Remove cupcakes from oven and cool on rack.

For the Frosting:

Dissolve the sugar (and salt, if you’re using it) in the boiling water, and cool to room temperature.

Use a mixer on low speed to beat in the meringue powder, until the powder is dissolved and the mixture is foamy.

Increase the speed and beat until soft peaks form.

Beat in the vanilla. Then add the confectioners’ sugar slowly. No more than 1/4 cup at a time, otherwise your frosting will taste gritty.

Add the soft butter a few tablespoons at a time, beating well after each addition. Finally, add the Irish Whiskey, one tablespoon at a time. Tasting after each addition until you reach the level of booziness that you prefer.

Frost the cupcakes immediately; using a pastry bag fitted with either a star or found tip. Garnish cupcakes with time zest.

Enjoy!

Links for Helpful Kitchen Tools & Ingredients for Irish Whiskey, Ginger & Lime Cupcakes:

OXO Good Grips Stainless Steel Food Scale

Kitchen Aid Artisan Stand Mixer

Oxo Good Grips Ice Cream Scoop

Prepworks Pocket Zester

Meringue Powder or it is a bit cheaper here: King Arthur Flour

Fever-Tree Premium Ginger Beer

Nielsen-Massey Pure Vanilla Bean Paste


Apple Pie-Cake

March 16, 2021

Oh ya’ll…it’s almost the day. This is my penultimate (love to use that word) recipe for St. Patrick’s Day 2021 and boy is it a goodie. I give you (drum roll please) Apple-Pie Cake! Completely irresistible, it is chock-full of apples and warm comfy spices like cinnamon, nutmeg and cloves. Now you might ask “Is it a Pie or a Cake”. Let me tell you – it is the best of both worlds. A perfect marriage of pie and cake. And I, for one, am just thrilled they got together!

I got the recipe for this Apple-Pie Cake from one of my best friends, Theresa Storey, who just happens to also be a best selling, award winning author! A couple of years ago, Theresa published her first cookbook where you can find the recipe for this scrumptious treat along with over 100 other delicious seasonal fruit recipes. It is called Fruit on the Table: Seasonal Recipes from the Green Apron Kitchen.

Theresa runs a business, The Green Apron, which is an artisan preserve company. She grows much of the fruit and vegetables she uses in her preserves at her family’s orchards at Derryclough and in the walled vegetable garden at her parents 18th Century castle, Glenwilliam.

Her award-winning preserves are made in small batches by traditional methods using locally sourced, organic produce where possible and without artificial preservatives, colours or setting agents. The Green Apron has won 15 Blas na hEireann Irish Food Awards, 7 International Great Taste awards and is listed not only in McKenna’s Guide, but also in Georgina Campbell’s Guide. The Green Apron is also now offering workshops on sustainable living, preserving and bee keeping.

Theresa’s book, Fruit on the Table is a top 10 best-selling cookbook in Ireland , has won a Gourmond award there and has been selected to compete for an International Gourmond award. In her book, Theresa follows the seasons and tells you how best to keep fruit on your table all year round. It is an absolute treasure trove, filled not only with her family recipes for jams, jellies and chutneys but it also runs the full gambit of meals, including recipes for cocktails, snacks , mains and going all the way through to desserts. And it doesn’t stop with the mouthwateringly delicious recipes, Fruit on the Table also gives you the low down on growing your own fruit, the ins and outs of preserving, tips on foraging as well as drying fruit. I’m proud to be sharing this recipe from her book. I have shared quite a few over the years, but I’m telling you, they’re only the tip of the iceberg. You’ve just gotta get ahold of this essential cookbook. And if you find yourself in Limerick, you simply must stop by the Limerick Milk Market and pay the Green Apron shop a visit!

And speaking of those Green Apron recipes that I’ve shared before, let me just remind you of a few. A couple of years ago, I kicked off my St. Patrick’s Day blog-a-thon with her Prize-Winning Scones with Strawberry Jam & Clotted Cream.

I told you about her Batley Cake

which I filled with her deletable boozy Irish Whiskey Marmalade (also used to fill these tarts.

And this year, I’m sharing her wonderful, Irish country kitchen style Apple-Pie Cake.

It was so quick and easy to make. I’d wager you already have the ingredients in your kitchen and could just whip this up in a flash.

As far as serving, it is so versatile. Warm with a scoop of vanilla ice cream does nicely. Room temperature with a dollop of whipped cream. Or just as it is with a wee dusting of confectioners sugar. For dessert, for breakfast, for a snack (afternoon or midnight). I think you get it. So what are ya’ll waiting for? Get to baking this amazing Apple Pie-Cake today!

Apple Pie-Cake

  • Servings: 4-6
  • Difficulty: easy
  • Print

recipe from: Fruit on the Table: Seasonal recipes from the Green Apron Kitchen by Theresa Storey

Ingredients:

  • 60 grams (2 oz.) butter
  • 140 grams (5 oz.) sugar
  • 1 egg, beaten
  • 110 grams (4 oz.) all purpose flour
  • 1 tsp. baking soda
  • 1 tsp. cinnamon
  • 1/2 tsp. salt
  • 1/2 tsp. ground nutmeg
  • 1/8 tsp. ground cloves
  • 1 teaspoon vanilla extract
  • 60 grams (2 oz.) chopped pecans or walnuts (optional)
  • 2 medium eating apples (cored and diced) about 2 cups

Directions:

Preheat the oven to 350°F (180°C/Gas 4) and grease a 9″ (23 cm) pie dish.

Melt the butter and pour into a large mixing bowl. Add the sugar and egg and mix with a spoon until well combined.

Mix in the rest of the ingredients. (It will look like there is way too much apple, but that’s fine.)

Spoon the batter into the pie dish and carefully flatten it out – it’s very lumpy and sticky.

Bake for 40 -45 minutes. Remove from the oven, cool and serve straight from the pie dish.

Enjoy!

Links for helpful kitchen tools & ingredients for Apple Pie-Cake:

Fruit on the Table: Seasonal recipes from the Green Apron kitchen by Theresa Storey


Irish Four Leaf Clover Rolls

March 15, 2021

Bring about the luck of the Irish when you bake up a batch of these buttery & tender Irish Four Leaf Clover Rolls.

Everyone is familiar with those old fashioned, yeast risen, pull apart Clover Leaf Rolls right? I bet you’ve seen ’em on your grandma’s table at many a meal. They are particularly awesome, because you can separate them into three pieces easily, and then slather butter on each and every piece. The more butter the better! Am I right? Here if taken a bit of an Irish riff on those oldies but goodies by adding a bit of Irish-Style Wholemeal Flour into the mix as well as giving them an extra leaf for luck.

These adorable rolls are baked in 5 – 6 ounce ramekins. But don’t despair if you don’t have those on hand. You can easily bake these in a standard muffin tin. The only difference is, due to the smaller size of the muffin tin wells, you will probably want to lose one of the leafs and just do three leaf clovers. Just divide the dough into 33 pieces and you’ll get 11 rolls. Easy-peasy.

These lovely Irish rolls will no doubt be a welcome addition to any St. Patrick’s Day feast your have planned. And just think about this. You’ll have one more leaf, not only for luck but also for providing more surface area for butter!

Irish Four Leaf Clover Rolls

  • Servings: 8 large rolls or if you would like to do 3 leaf clovers, you could make 11 rolls in a standard muffin tin
  • Difficulty: easy
  • Print

recipe from: King Arthur Flour

Ingredients:

  • 2 cups (241 grams) All-purpose Flour
  • 1 cup (110 grams) King Arthur Irish-Style Wholemeal Flour (you can substitute 1 cup of whole wheat flour if you don’t have Irish Flour)
  • 1 teaspoon (6 grams) salt
  • 2 tablespoons (43 grams) honey
  • 2 tablespoons (28 grams) soft unsalted butter
  • 1 cup (227 grams) lukewarm water
  • 2 teaspoons instant yeast
  • 1/2 cup (57 grams) toasted walnuts, optional
  • 1/2 cup (71 grams) currants, optional
  • 2 tablespoons (28 grams) melted salted butter, optional; for a glossy finish

Directions:

Mix and knead all the ingredients — by hand, stand mixer, or bread machine set to the dough cycle — until the dough is smooth and elastic.

Place the dough in a greased bowl or rising bucket, cover, and let it rest for 60 to 90 minutes, until puffy but not necessarily doubled in bulk.

Grease eight 5-ounce or 6-ounce ramekins.

Gently deflate the dough, divide it into 32 pieces, and shape each piece into a ball. It helps to first divide the dough into eight medium balls, and then further divide these into four balls each. Or just use a kitchen scale to figure out the weight each ball should be. (Mine weighed 20 grams each).

Place four balls into each of the ramekins. Cover the pans and let the rolls rise for 45 to 75 minutes, until they’ve crested over the rims of the ramekins.

Preheat the oven to 350°F.

Bake the rolls for 25 to 30 minutes, until they’re golden brown and an instant-read thermometer inserted into their centers reads 200°F.

Brush the rolls with the melted butter, and let them cool for 5 minutes in the ramekins. Turn them out onto a rack to finish cooling. Serve warm, or at room temperature.

Enjoy!

Links for Helpful Kitchen Tools & Ingredients for Irish Four Leaf Clover Rolls:

OXO Good Grips Stainless Steel Food Scale

Kitchen Aid Artisan Stand Mixer

Thermapen Instant Read Thermometer by Thermoworks

6 Quart Dough Rising Bucket

SAF Instant Yeast

Dough Scraper

King Arthur Flour Wholemeal Irish Style Flour


Baileys Dream Bars

March 14, 2021

I will not disappoint you on day 4 of my St. Patrick’s Day countdown. Nope, not at all. These Baileys Dream Bars are just exquisite! Decadent, creamy, dreamy, fluffy AND boozy! Be still my heart!

So let me break it down for you. What we’ve got here is a buttery shortbread crust, topped with a layer of creamy Baileys cheesecake, which is topped with a layer of dreamy Baileys chocolate pudding which is then crowned with a fluffy layer of Baileys whipped cream. Get. Out.

And there is no baking involved. Nope. None. Now, that being said, there is a lot of different layers to make, so unless you have multiple stand mixers, you’ll be doing a bit of washing up. But oh…you won’t mind at all once these indulgent little darlings come together and you get that first bite…

Followed by another…and another…and so on.

Baileys Dream Bars

recipe from: 365 Days of Baking

Ingredients:

For the Shortbread Crust:

  • 10 ounces Shortbread cookies – Like Walkers or Keebler Sandies
  • 4 Tablespoons Butter

For the Baileys Chocolate Pudding:

  • 1 box (3.9 oz) Instant Chocolate Pudding
  • 1 1/4 cups milk
  • 1/4 Cup Baileys Irish Cream

For the Irish Cream Cheesecake Layer;

  • 8 ounces cream cheese – room temperature
  • 1/2 cup confectioners sugar
  • 2 teaspoons Baileys Irish Cream
  • 1 teaspoon vanilla extract – I prefer to use vanilla paste

For the Whipped Cream Topping

  • 4 ounces cream cheese – room temperature
  • 1/3 cup confectioners sugar
  • 2 1/2 teaspoons Baileys Irish Cream
  • 1/2 teaspoon vanilla extract – or vanilla paste
  • 1 cup heavy cream

For the decorative topping:

Chocolate curls, chocolate pearls, jimmies – whatever your prefer

Directions:

Line an 8″x8″ baking pan with parchment paper. Set aside.

For the Shortbread Layer:

Place Shortbread Cookies in a food processor and pulse until you have fine crumbs. Transfer to a bowl.

Melt butter and pour over cookie crumbs. Mix until combined.

Pat crumb/butter mixture into the prepared pan. Place pan into the freezer for 30 minutes to set.

For the Chocolate Pudding:

In the bowl of a stand mixer, combine the pudding mix, milk and Baileys. Mix until combined. Transfer to a bowl and place in the refrigerator to chill for at least 20 minutes.

For the Whipped Cream:

In the bowl of a stand mixer, mix the cream cheese, confectioners sugar, Baileys and vanilla. Beat until smooth and creamy. Transfer to a mixing bowl and set aside.

Once you have cleaned the stand mixer bowl, using the whisk attachment, beat the heavy whipping cream until soft peaks form.

Add the creamed cheese mixture to the bowl. Beat on low until it is distributed, then beat on medium high until stiff peaks have formed.

For the Baileys Cheesecake:

Place 8 ounces of cream cheese in the bowl of a stand mixer. Mix using the paddle attachment until smooth. Scrape down the sides of the bowl and add the confectioners sugar, Baileys and vanilla. Mix until combined

Gently fold 1 cup of the whipped cream into the cream cheese/sugar/Baileys mixture and mix until uniform.

Assembly:

Spread the Baileys cheesecake layer evenly over the chilled crust.

Dollop the Baileys Chocolate pudding over the Baileys Cheesecake layer and spread evenly over the top.

Next, cover the Baileys Chocolate Pudding with the remaining whipped cream mixture.

Refrigerate for a minimum of 8 hours prior to serving. Keep refrigerated between servings.

Garnish with chocolate curls, or topping of your choice.

Enjoy!

Links for Helpful Kitchen Tools & Ingredients for Baileys Dream Bars:

OXO Good Grips Stainless Steel Food Scale

Kitchen Aid Artisan Stand Mixer


Black Velvet

March 13, 2021

Here is a great cocktail for your St. Patrick’s Day festivities…or really anytime for that matter – The Black Velvet. This lovely libation is made with a combination of Stout beer and Champagne or sparkling wine. If you pour it very carefully you can create this lovely layered appearance by floating one beverage on top of the other.

I could never find any reference as to whether the stout should go into the glass first or the champagne. I chose the Guinness to go in first because I figured stout beer was heavier than champagne, so it would be easier to float the champagne on top. It took me several tries to pull this off and so sadly, not to be wasteful, I had to drink up all the “mistakes”. The Husband, on the other hand, poured it perfectly on his first go!

This combination of bubbles and brew not only looks good but also tastes great!

Black Velvet

Ingredients:

  • Guinness Stout – chilled (you can of course use the stout of your choosing)
  • Champagne – chilled ( any Prosecco or Cava will do)

Directions:

Gather your ingredients and the cocktail glass you wish to use. I have seen Black Velvets done in champagne flutes, pint glasses, wine glasses – you name it.

You can pour either the stout in first or the champagne first, your choice. Either way, you are going to use equal amounts of both beverage. So fill the glass halfway.

Now for the tricky part. SLOWLY pour the second beverage into the glass. It helps to pour it over the back of a spoon which both slows the pour and disperses the top liquid. You should end up with a lovely layered cocktail.

Sláinte!

Links for helpful Kitchen Tools & Ingredients for Black Velvet Cocktails:

Guinness Pour Spoon – Now you don’t need a special spoon to pour layered cocktails, but this spoon is supposed to make the whole process go a bit easier. If you are interested in the gorgeous hand crafted spoon seen in my pictures above, it is made by my friends at Crafty Celts. You can order just this spoon or a whole silverware set as well as historically inspired bronze and silver jewelry. You might recognize some of their jewelry as it was featured in the Vikings television show.

La Rochere Champagne Flutes – You don’t need these glasses to make a Black Velvet either, but if you are interested in them, here they are!


Spiced Beef Sandwiches

March 12, 2021

Spiced beef is more of a Christmas/New Years tradition in Ireland, but I thought it would be fun to include here. I mean, I don’t think there are any Spiced Beef Police who would take you into custody if they saw you serving it on St. Patrick’s Day. It is always served cold, cut in thin slices, and often accompanied by brown bread & mustard or chutney. Here I’m serving it as little two bite, quartered sandwiches on that Honey-Oat Pain de Mie I just told you about, slathered with spicy mustard.

So what, you may ask, is spiced beef? Spiced Beef, or Mairteoil Spíosraithe in Irish, is sort of the cousin of Corned Beef or Pastrami I suppose. Basically it is beef which has been marinated for a week, or perhaps longer, in spices such as juniper berry, allspice, brown sugar and pepper and cured with some kosher salt and Sel Rose or curing salt. Many older recipes call for salt petre to do the curing, but that may be difficult to obtain due to its use in explosives. The Sel Rose or Prague Powder as it is sometimes called is what gives the finished beef such a rosy pink color. This spice marinated beef is then cooked in Guinness or a similar stout. In Ireland, come the Holiday season, you will see Spiced Beef in many butcher shop windows. Now a days it is not often cured at home, but purchased ready to cook. Each butcher’s recipe for the spice mixture/curing time is slightly different, which results in a lively debate about exactly whose is the best.

There is also a bit of a debate about where this dish originated. The author of the cookbook I cite below claims it is a Dublin tradition, (I believe he is from Dublin) whereas I was always told it was a Cork tradition (I went to university in Cork), so I’m not sure. But Chef Armstrong does mention that he remembers eating these spiced beef sandwiches on white bread with spicy English mustard after Midnight Mass on Christmas Eve. I had just baked a gorgeous loaf of Honey-Oat Pain de Mie, which I told you about a couple of days ago and it worked out perfectly.

I think these sandwiches would do nicely along with a pint or two…And just think, maybe next year we can actually go out for some St. Patrick’s Day parades and festivities. You could whip these up ahead of time and have them waiting for when you stumble back home. Or perhaps you can serve them at Christmas. You’ll have plenty of time to gather your ingredients. Keep these tasty nibbles in mind for whichever Holiday strikes your fancy.

Spiced Beef Sandwiches

  • Servings: 8
  • Difficulty: easy - but remember to allow yourself enough time for the beef to marinate
  • Print

recipe from: My Irish Table: Recipes from the Homeland & Restaurant Eve by Cathal Armstrong & David Hagedorn

Ingredients:

  • 2 packed Tablespoons light brown sugar
  • 2 Tablespoons Dublin Spice (see below)
  • 1 1/2 teaspoons kosher salt
  • 2 teaspoons pink curing salt, such as Sel Rose or Insta Cure #1
  • 3 lb. eye of round roast
  • 1 bottle Guinness
  • Pain de Mie or Sandwich Bread of your choice
  • English Mustard for serving

Directions:

Season the beef:

In a small bowl, combine the sugar, spices, kosher salt and curing salt. With your hands, rub the spice mix all over the meat, creating a thick coating. Place the meat in a 2 gallon zip-top bag. Refrigerate for 1 week, rolling the meat around in the accumulated juices once per day.

Cook the beef:

Transfer the meat to a pot. Do not rinse the spices off. Pour the bottle of Guinness over it and add enough water that the meat is covered. Bring to a boil over medium-high heat. Lower the heat to medium, cover the pot and simmer for 3 hours, or until fork tender, but not completely falling apart. Remove the beef fro the heat and let it cool completely in its cooking liquid. Drain the meat and place in a clean storage container. Refrigerate for at least 4 hours before serving. Tightly wrapped beef can be refrigerated for up to 3 days.

Serve the dish: Spread the bread slices with mustard and make sandwiches with the thinly sliced beef.

Enjoy!

***Dublin Spice: In a spice grinder, grind 2 Tablespoons of juniper berries into a fine powder. Transfer to a small bowl and combine with 3 Tablespoons ground black pepper, 2 Tablespoons ground allspice and 2 Tablespoons ground cloves. This will make about 1/2 cup – more than you need for this recipe. It can be stored in an airtight container for us to 3 months.

Links for helpful Kitchen Tools & Ingredients for Spiced Beef Sandwiches:

Pure Prague Powder #1

Coleman’s Original English Mustard

Cuisinart Spice & Nut Grinder

My Irish Table: Recipes from the Homeland and Restaurant Eve


Golden Potato Cake

March 11, 2021

Woohoo! Here we go. Time to kick off my annual St. Patrick’s Day blog-a-thon. I will be posting one Irish-y recipe a day all the way up to March 17th – the big day! Now I think managing to publish one recipe daily for seven days is a pretty impressive feat. But, a few years ago I was completely mad and used to start on March 1st and do a new recipe each day until March 17th. That is why you can find over 100 delicious St. Patrick’s Day recipes on my blog. If you’d like to take a peek at my past St. Patrick’s Day posts, you can click Runcible Eat/Recipes up at the top navigation bar and scroll down to the St. Patrick’s Day category. That’s where you’ll find them! And stay tuned here for my latest additions this year. I’m going to kick this whole thing off with this fantastic recipe for Golden Potato Cake.

Although the potato is not native to Ireland, Sir Walter Raleigh introduced it there in 1585, when one thinks of Irish cuisine, the good old spud comes quickly to mind. The potato is very nutritious, calorie dense and chock full of minerals and vitamins. It grew very well in Ireland, until it didn’t that is. The Great Famine occurred when the potato crop failed several years in a row starting in 1845. The result was that over 1 million people in Ireland starved to death. Just before the blight took hold, the average adult male in Ireland ate 13 pounds of potatoes a day! Thirteen pounds is around 65 potatoes. That is a whole lot of potatoes. Keep in mind, they didn’t just sit down to a plate of 65 boiled potatoes. They were eating potatoes in some form, ie. in soups, bread, etc., for breakfast, lunch and dinner. I do love spuds, but wow!

But back to this Golden Potato Cake. You won’t find a lot of special ingredients here – just potatoes, butter, salt and pepper. It is the preparation and presentation that makes it memorable. The potatoes are sliced thinly and layered in a cast iron pan with lashings of butter, salt and pepper. The result when you turn it out of the pan is a beautiful golden brown cake. Crispy on the outside with a soft buttery tender middle. Simple & delicious. Perfect as a side to any main you might be cooking up. So there you have it! One recipe down – six more delicious Irish inspired recipes to go in this count down to St. Patrick’s Day. Remember to check back every day until the 17th for the latest!

Golden Potato Cake

  • Servings: 4
  • Difficulty: easy
  • Print

recipe from: Bon Appétit

Ingredients:

  • 8 Tablespoons unsalted butter or 6 Tablespoon ghee
  • 2 pounds small russet potatoes, peeled, very thinly sliced
  • Flaky sea Salt
  • Freshly ground black pepper

Directions:

Preheat oven to 400°. If using unsalted butter, heat in a small saucepan over medium, skimming off white foam that rises to the surface, until butter is melted and milk solids have settled to the bottom of the pan. Spoon clear (clarified) butter into a small bowl. Discard milk solids.

Heat 1 Tbsp. clarified butter (or ghee) in a medium skillet, preferably ovenproof nonstick or cast iron (you will need to cover it; use a baking sheet if you don’t have a lid), over medium-high and add half of potatoes, tossing to separate slices and coat in butter. Cook, tossing often, until some of the slices are browned around the edges, about 5 minutes. Transfer to a large bowl. Repeat with another 1 Tbsp. butter and remaining potatoes; transfer to same bowl. Let cool slightly.

Arrange some potato slices in an overlapping pattern in a single layer in bottom of skillet. Season with salt and pepper and drizzle with some of the remaining clarified butter. Repeat with remaining potatoes, building a layer at a time, seasoning with salt and pepper and drizzling with clarified butter as you go. When you are finished layering the potatoes, pour any remaining clarified butter over top and cover skillet.

Cook potatoes over low heat until barely tender, 10–15 minutes. Uncover skillet and transfer to oven. Bake until potatoes are very tender in the middle (if you have a cake tester, that’s a good way to check, or use the tip of a paring knife) and browned and crisp around the edges, 25–30 minutes. Let cool slightly.

Slide a rubber spatula underneath potato cake to loosen, then invert onto a platter. Season with more salt

Do Ahead: Potato cake can be made 3 hours ahead. Leave in skillet at room temperature. Reheat at 350° for 10 minutes before serving.

Enjoy!


St. Patrick’s Day Recipe Roundup!

March 10, 2021

Oh my goodness ya’ll…St. Patrick’s Day is only 7 days away. Tomorrow I will be starting my annual St. Patrick’s Day blog-a-thon. Yup, I’ll be sharing one lovely Irish-y recipe everyday with you, right up to the big day Wednesday March 17th! Now I think managing to publish one recipe daily for seven days straight is a pretty impressive feat. But, a few years ago I was completely mad and used to start on March 1st and do a new recipe each day until March 17th. That is why you can find over 100 delicious St. Patrick’s Day recipes on my blog. If you’d like to take a peek at my past St. Patrick’s Day posts, you can click Runcible Eat/Recipes up at the top navigation bar and scroll down to the St. Patrick’s Day category. That’s where you’ll find them! And stay tuned here for my latest additions this year. Today I thought I might inspire you with some of my favorite St. Patrick’s Day dishes from years past. We’ll start it off with some bread:

And here are some drool worthy mains:

I wouldn’t want to forget the sides:

And take a peek at these decadent desserts:

And last but not least…something to wash it all down with:

Is your mouth watering yet? Quite the galleries of goodies if I do say so myself. And there are many more recipes to be found on my blog as well as seven new ones starting tomorrow! Don’t miss out!

P.S. I tried to get links to the recipe added to the pictures, but with my limited skills, was unable to make it work. You can find links to the pictured recipes in the gallery captions. Sorry ’bout that!


Honey-Oat Pain de Mie

March 9, 2021

Oooo ya’ll….here it is March. I’m excited because that means St. Patrick’s Day will be here soon. Back in the day, I used to start posting Irish-y recipes on March 1st. I would post one every day right up to March 17th. In recent years, having become a bit lazy, I’ve scaled it back. I do have some recipes up my sleeve for this year, but it’s not time yet. But soon, soon. In the meantime, take a look at this fabulous Honey-Oat Pain de Mie I have for you today! This bread is so tender and so moist with just a hint of sweetness from the honey and oats.

Pain de Mie means “bread of the crumb”. The crumb is the soft middle part of bread. This bread has very thin crust and is almost all crumb, hence the name. You will often also hear this type of bread referred to as a Pullman Loaf or Sandwich Bread. It is indeed perfect for sandwiches because when it is sliced, it gives you consistent perfectly square shaped pieces.

The square shape is due to the special pan that it is baked in, the Pullman Loaf Pan. Apparently the kitchens of Pullman railway cars invented this pan for space efficiency. Railway cars are not particularly spacious, and the folks working there discovered if the bread was square shaped rather than the usual domed loaf, they could fit three loaves stacked on a shelf, rather than two.

Now you can bake this Honey-Oat Pain de Mie in a regular 9″X5″ loaf pan, but it won’t have the square shape, nor as fine a crumb, so I’m told. I’ve never actually tried it. And don’t despair if you only have the larger 13″x4″ pain de mie pan. You can still use this recipe. Just increase the ingredients by 50%, but leave the yeast amount as is. Bake it for 35 minutes with the lid on and an additional 8-10 minutes with the lid removed. No matter how you bake it, you’re going to love it! Your house will smell heavenly. And when you take that golden brown loaf fresh from the oven, make sure you run a stick of salted butter over the top. It will make the crust so soft and buttery and absolutely put this bread over the top!

Honey-Oat Pain de Mie

  • Servings: 1 loaf of bread
  • Difficulty: easy
  • Print

recipe from: King Arthur Flour

Ingredients:

  • 3 cups (361 grams) All purpose Flour
  • 2 1/4 teaspoons instant yeast
  • 1 cup (89 grams) old-fashioned rolled oats
  • 1 1/2 teaspoons (9 grams) salt
  • 4 tablespoons (57 grams) melted butter
  • 3 tablespoons (64 grams) honey
  • 1 cup (227 grams) to 1 cup + 2 tablespoons (255 grams) lukewarm water

Directions:

Combine all of the ingredients in the bowl of a stand mixer, and mix until cohesive. Cover the bowl, and let the dough rest for 20 minutes, to give the oats a chance to absorb some of the liquid. Then knead — by hand, stand mixer, or bread machine — to make a smooth, soft, elastic dough.

Place the dough in a lightly greased bowl, or in an 8-cup measure (so you can track its progress as it rises), and let it rise for 1 to 1 1/2 hours, until it’s risen noticeably. It won’t necessarily double in bulk.

Gently deflate the dough, and shape it into a 9″ log. Place the log in a lightly greased 9″ pain de mie (pullman) pan, pressing it gently to flatten.

Place the lid on the pan (or cover with plastic wrap, for a better view), and let the dough rise until it’s about 1″ below the top of the pan/lid, 60 to 90 minutes. Towards the end of the rising time, preheat the oven to 350°F. Remove the plastic (if you’ve used it), slide the pan’s lid completely closed, and bake the bread for 30 minutes.

Remove the lid, and bake for an additional 5 minutes, or until an instant-read thermometer inserted into the center registers at least 190°F.

Remove the bread from the oven, and turn it out of the pan onto a rack. Run a stick of butter over the top, if desired; this will yield a soft, buttery crust. Cool completely before cutting; wrap airtight and store for several days at room temperature.

Enjoy!

PS – You might just be seeing this bread again soon in one of my upcoming St. Patrick’s Day recipes. Stay tuned!

Links for Helpful Kitchen Tools & Ingredients for Honey-Oat Pain de Mie:

OXO Good Grips Stainless Steel Food Scale

Kitchen Aid Artisan Stand Mixer

Thermapen Instant Read Thermometer by Thermoworks

6 Quart Dough Rising Bucket

SAF Instant Yeast

Dough Scraper

Pullman Pan – Just a tip – while Amazon is very convenient, I actually got my Pain de Mie pan from King Arthur Flour and it is the same pan as the link I gave you, but was substantially less expensive. Just saying.


Quick Chicken & Dumplings

March 7, 2021

Ha! It turns out that varmint was correct. Punxsutawney Phil for the win! It has been quite chilly around here, though if the weather forecasters are to be believed, we’re going to get a taste of Spring next week. But I’d be willing to bet it will just be a brief little sample and then it will turn cold again. No way winter is done with us yet. So ya’ll will be so happy you have this recipe to warm you up on those cold damp days to come – Quick Chicken & Dumplings. Comfort food at its finest and much easier to make than the traditional dish. What’s the secret? Store bought rotisserie chicken & gnocchi! You’ll have this hearty flavorful creamy dinner on the table in about 30 minutes.

Now I have made the traditional Chicken & Dumplings dish many times. It is kind of an all day affair to make, but it is so tasty with big, fluffy cornmeal dumplings The husband absolutely loves it!

So I wasn’t sure how he was going to feel about this shortcut version. But there was no need to fear. He loved this dish as well.

Those soft pillowy gnocchi do a wonderful job standing in for dumplings. And the good news is, it is not only absolutely delicious, but it is also very quick and easy to make. Meaning there is a good chance it will make it to the table much more frequently. So when the weather turns chilly again, as I know it will, you’ll be ready with a big pot of Chicken & Dumplings to lift folks spirits. You don’t even need to let them in on the secret “quick” bit. Winner, winner! Quick Chicken & Dumplings Dinner!

Quick Chicken & Dumplings

  • Servings: 4-6
  • Difficulty: easy
  • Print

recipe from: Alexa Weibel via NYT Cooking

Ingredients:

  • 3 tablespoons unsalted butter
  • 2 medium carrots or 8 ounces butternut squash, peeled and chopped into 1/2-inch pieces (about 1 cup)
  • 1 medium leek, trimmed, white and pale green portion halved lengthwise and thinly sliced (about 1 cup)
  • 2 medium celery stalks, peeled and sliced 1/2-inch thick (about 2/3 cup)
  • 3 garlic cloves, finely chopped
  • 1 tablespoon finely chopped fresh rosemary
  • 2 teaspoons fresh thyme leaves
  • 1 teaspoon poultry seasoning (optional)
  •  Kosher salt and black pepper
  • 3 tablespoons all-purpose flour
  • 5 cups chicken stock
  • 1 cup heavy cream
  • 1 (16-ounce) package fresh or shelf-stable store-bought gnocchi
  • ½ small (3-pound) store-bought rotisserie chicken, skin and bones discarded, meat torn into bite-size pieces (about 2 cups shredded meat)
  •  Fresh tarragon, parsley or dill, for garnish

Directions:

In a large pot, melt the butter over medium. Add the carrots, leek, celery, garlic, rosemary, thyme and poultry seasoning, if using. Season generously with salt and pepper, and cook, stirring occasionally, until vegetables are slightly softened, about 5 minutes.

Sprinkle with the flour, then cook, stirring, 2 minutes. (This cooks the flour to soften its raw flavor.) Gradually stir in the stock and cream, and bring to a boil over high heat.

Once the mixture boils, stir in the gnocchi, reduce the heat to medium and cook until gnocchi and vegetables are tender, about 5 minutes. Stir in the chicken in the last couple of minutes. Season to taste with salt and pepper. Divide among bowls and top with fresh tarragon and more black pepper, if desired.

Enjoy!

Quick Chicken & Dumplings brought to you today by: Runcible Eats (www.leaandjay.com)