Pici al Ragu Di Cinghiale (Pici with Wild Boar Ragu)

February 27, 2015


IMG_2111

So I’m sure you’re all glad to know that you’ve reached the third and final installment of my odyssey of Italian Holiday posts. Yup, today is it and then on Sunday, two short days from now, I will be embarking on my annual St. Patrick’s Day blog-a-thon! That’s right…I’ll be doing one blog with an “Irish-y” Recipe everyday up to March 17th – St. Patrick’s Day. I’ve found some great dishes to share with you this year. There has been an absolute run on Jameson’s, Baileys and Guinness in my house, so I hope you will remember to check back in to see what I’ve been getting up to. And speaking of great recipes, I definitely have a winner to share with you today, Pici al Ragu Di Cinghiale (Pici with Wild Boar Ragu)! I had this dish for the first time, oh and the second time, and maybe the third time during our holiday in Tuscany. Sooo delicious. Pici Pasta, for those of you who don’t know, ’cause I certainly didn’t before our visit, is a thick, hand-rolled pasta which originates in the Province of Siena in Tuscany.

IMG_2087

Traditionally the dough is only made with flour and water, though in some areas it is made with the addition of an egg and some olive oil, as I have done here. Making Pici is a very forgiving introduction to homemade pasta for folks because traditionally it is not uniform in size and varies in thickness along its whole length. There is no special pasta making equipment necessary either, the pasta is simply rolled on the counter or between your hands.

IMG_2083

I paired my Pici with a wild boar ragu. Apparently there are plenty of wild boar in Tuscany. There was some sort of wild boar dish on the menu in nearly every restaurant we visited. Even our Trekguyd in Cinque Terre mentioned that he had come across a wild boar or two while hiking on those trails which certainly got me to be a bit more alert. But here in good old Virginia, I think it has probably been quite a while since a wild boar sauntered by. Luckily I live very close to The Organic Butcher. I rang him up to ask if he had Wild Boar, expecting the person on the other end of the line to laugh at me and instead what I heard was, “yes, of course. How much are you looking for and how would you like it cut?” Wow, huh! But if you don’t have an organic butcher near you, feel free to substitute in some ground pork or italian sausage. The ragu will still be delicious I’m sure!

IMG_2108

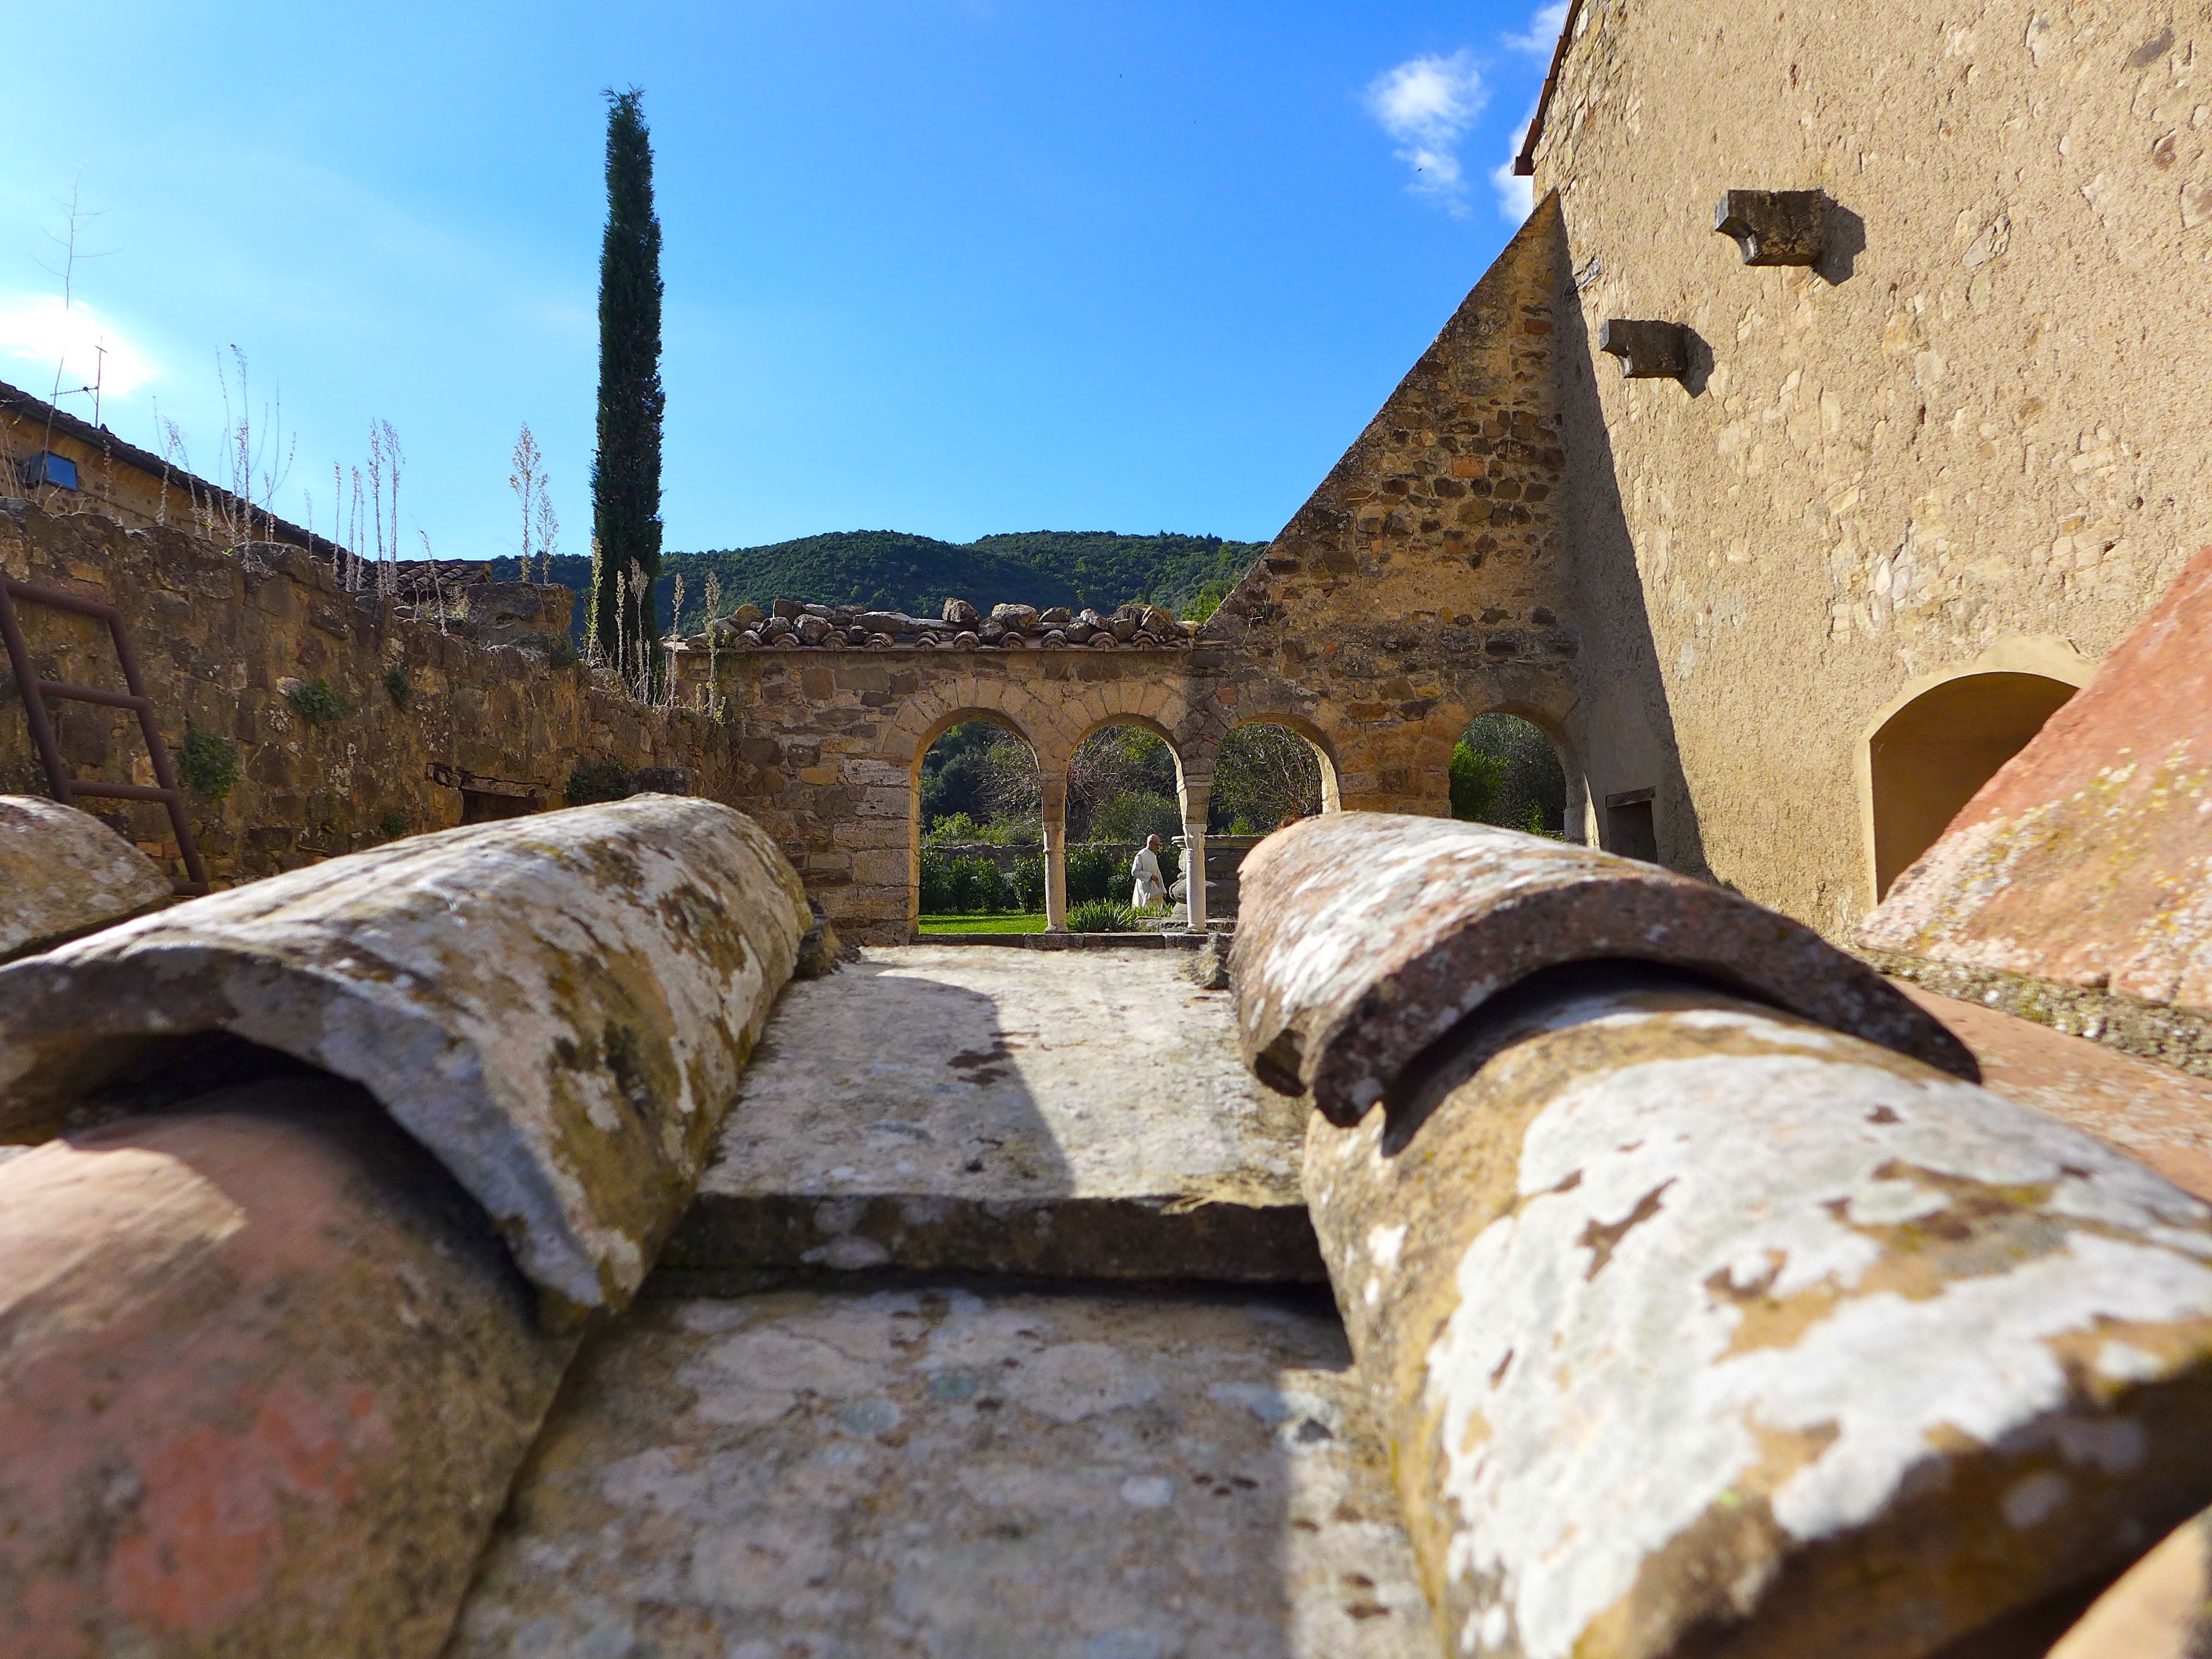
So I’m going to jump right into the travel blog portion of this post now. If you are totally over that, feel free to scroll down to the bottom at this point to get the actual recipe. After reluctantly checking out from the perfect La Bandita Townhouse, we set out for the tiny town of Castelnuovo Berardenga, which is located about 9 miles east of Siena, kind of at the end of the Chianti Wine Trail which winds south from Florence. We didn’t actually stay in the town, but stayed just a few miles out at the stunning Castello di Montalto.

P1040380

The date of the original construction of the castle is uncertain; perhaps as early as the 7th or 8th century. We do know for certain that members of the Berardenga family were living at Montalto by the 11th Century. Ownership of this castle has only changed hands 4 times, the last time being in the 19th Century. The descendants of those owners still reside in the castle and have made portions of the estate available to rent. We stayed in the very romantic former gatekeeper’s lodgings, San Martino, so known for the fresco of St. Martin,  located right above the castle gate.

P1040252


P1040254

P1040260

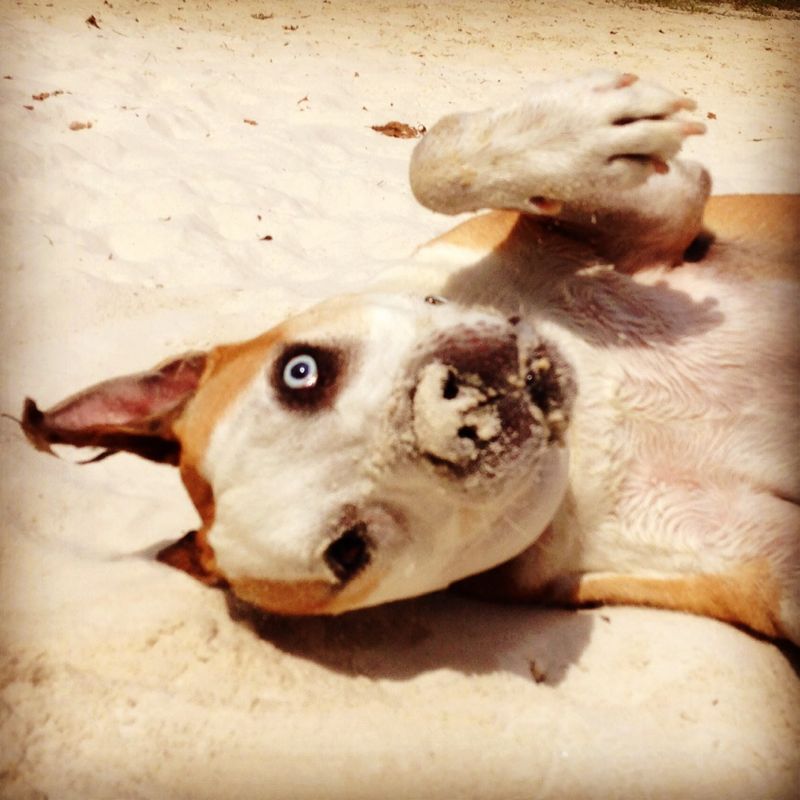
The castle and grounds were absolutely beautiful. And although the owner had recently taken a fall, she took the time to check in and make sure that we had everything that we needed. We were very happy with the apartment, but were even more thrilled when we found out it came with a resident cat, Pinky, who seemed very content to hang out with us through our stay!

P1040339

As I mentioned, the closest town to the castle was Castelnuovo Berardenga. Unlike some of the other places we visited which had seen their fair share of tourists, this town did not seem touristy at all. And although I had learned a few words of Italian, it really had not been necessary, up to this point. The first night we arrived, the castle concierge recommended that we go to dinner at a small trattoria only a short distance away. She said that it “was not touristy or expensive” and that “all the locals eat there”. Sounded great, so off we went. The restaurant, Il Bivacco, was wonderful. The atmosphere was very cozy, apparently the restaurant now resides in a renovated blacksmith’s forge. The food was tasty, plentiful and inexpensive. We ate there a couple of times over our visit. However, we did not hear a lot of English spoken at all, certainly not by our waiter. The very first night, being somewhat tired after driving the Italian highways, and being a bit weary of wine at that point (it can happen…), the husband said “I’ll have the big beer” to the waiter. Not being at all ready to order, I said “yes, that’ll be good”, and held up two fingers. So, you’ve probably guessed it by now, but the “big beer” was immense! I’m talking like a pitcher. Seriously, it took me two hands to lift it!! Not only were we laughing, but I think the folks at the neighboring table were quite amused as well. Though I should probably mention that the husband had no difficulty finishing “the big beer”. We were a bit more cautious after that…

Now that is one big beer!

Now that is one big beer!

Siena was very close, 15 -20 minute drive away from Montalto, so we couldn’t pass up visiting and I’m so glad we didn’t! I loved Siena! We visited the Duomo and I was completely floored! As I mentioned, we saw a lot of churches in Italy, but I was really unprepared for Siena’s Gothic Cathedral. Stunning, incredible, spectacular….none of those words seem to do it justice!

P1040307

The black and white stripped walls which lead up to starry blue ceilings were inspiring (though I will mention that as soon as we entered, the husband did lean over and whisper to me “Who let Beetlejuice loose in here?”)

P1040266

Starry ceiling

Starry ceiling

And we really lucked out because we were visiting outside of tourist season, which meant that the inlaid marble mosaic floors which are usually covered with plywood, had been unveiled. This was such a treat and is only done for a few months out of every year. The floors were crafted by about 40 artists and artisans between the 14th – 16th Centuries. They were just amazing and that was only the floors! Everywhere we looked we saw fantastic art by the masters, simply too many treasures to mention.

P1040270

Siena’s she wolf

And as if the Cathedral itself wasn’t enough, the Piccolomini Library is attached to it. You remember the Piccolomini family I mentioned in the last blog…yup…them again. This library was built to house Pope Pius II’s (aka Enea Silvio Bartolomeo Piccolomini ) collection of illuminated manuscripts, which are certainly beautiful

P1040282

but the frescos on the walls and ceiling come very close to stealing the show!

P1040279

We spent hours in the Duomo and could’ve stayed for days longer and still not seen everything it had to offer. Before heading out to dinner though we did head over to the Museo del Opera to climb the 131 narrow, corkscrew stairs to take in the view from the Panorama del Facciatone which is located at the top of the Nuovo Duomo facade. It was a bit of a wait and a minor cardiac stress test to get up there but the views over medieval Siena were worth it!

P1040327

P1040329

P1040330

Having recovered from Siena, we set out on the nearby Chianti trail to check out yet another winery, but this time rather than go with the old-established vineyards we decided to visit a newcomer, The Cantilici Winery located in Castagnoli, a small medieval hamlet close to Gaiole in Chianti. The drive to get there was truly enjoyable, very picturesque and all of the wine we tasted was excellent.

P1040363

Our favourite was Tangano which is a blend of Sangiovese, Merlot and Cabernet grapes. Apparently “Tangano” is local slang for “really good-looking man”. We grabbed a few bottles to go and then headed over to the small local Osteria Il Bandito for lunch. What an unexpected pleasure. The atmosphere was charming and comfortable, the staff attentive and the food was fresh and absolutely delicious. What a delight!

P1040356

Sadly, it was time for us to leave Montalto but we were very excited to head back to Florence. We did have a couple of days left to explore the city before we had to board our flight back home and were going to try to fit as much in as possible. We lucked out again and stayed in a fabulous hotel, Mulino di Firenze, located about 15 minutes outside of the city. The hotel offered convenient shuttles in and taxis were not really very expensive. (Keep in mind, I’m saying that with a Washington, DC point of view).

P1040398

We thoroughly enjoyed our time in Florence and saw a lot more churches, visiting the Duomo (Santa Maria del Fiore) as well as Santa Croce and Santa Maria Novella. By the end of our time there we were without a doubt, “churched out”! And although Brunelleschi’s dome was impressive (yes…we climbed the 463 steps up to the viewing terrace),

P1040511


P1040505

the inside of the cathedral was rather sparse (especially after just being dazzled in Siena). We were much more intrigued when we visited the crypt which houses the remains of the 7th Century church of Santa Reparta on top of which the Duomo is built.

P1040452

The little Baptistery was impressive as well. This building, the oldest in the city, was built on a 7th Century building and served as Florence’s cathedral until the early 13th Century.

P1040518

Baptistery ceiling

Of all of the Florence cathedrals that we visited, I much preferred Santa Croce where the graves of Michelangelo, Ghiberti, Galileo and Machiavelli can be found.

P1040470

Feeling that we had not yet climbed enough stairs on this holiday, we decided to trek up the 414 steps of Giotto’s campanile (bell tower of the Duomo), which offered great views of the city as well as of Brunelleschi’s Dome itself.

P1040421

And yes…we did end up spending a bit of time having a few pints in an Irish pub! Go figure!!! I don’t know what to say…there’s only so much wine one can drink before….I guess you wind up in an Irish pub!

P1040463

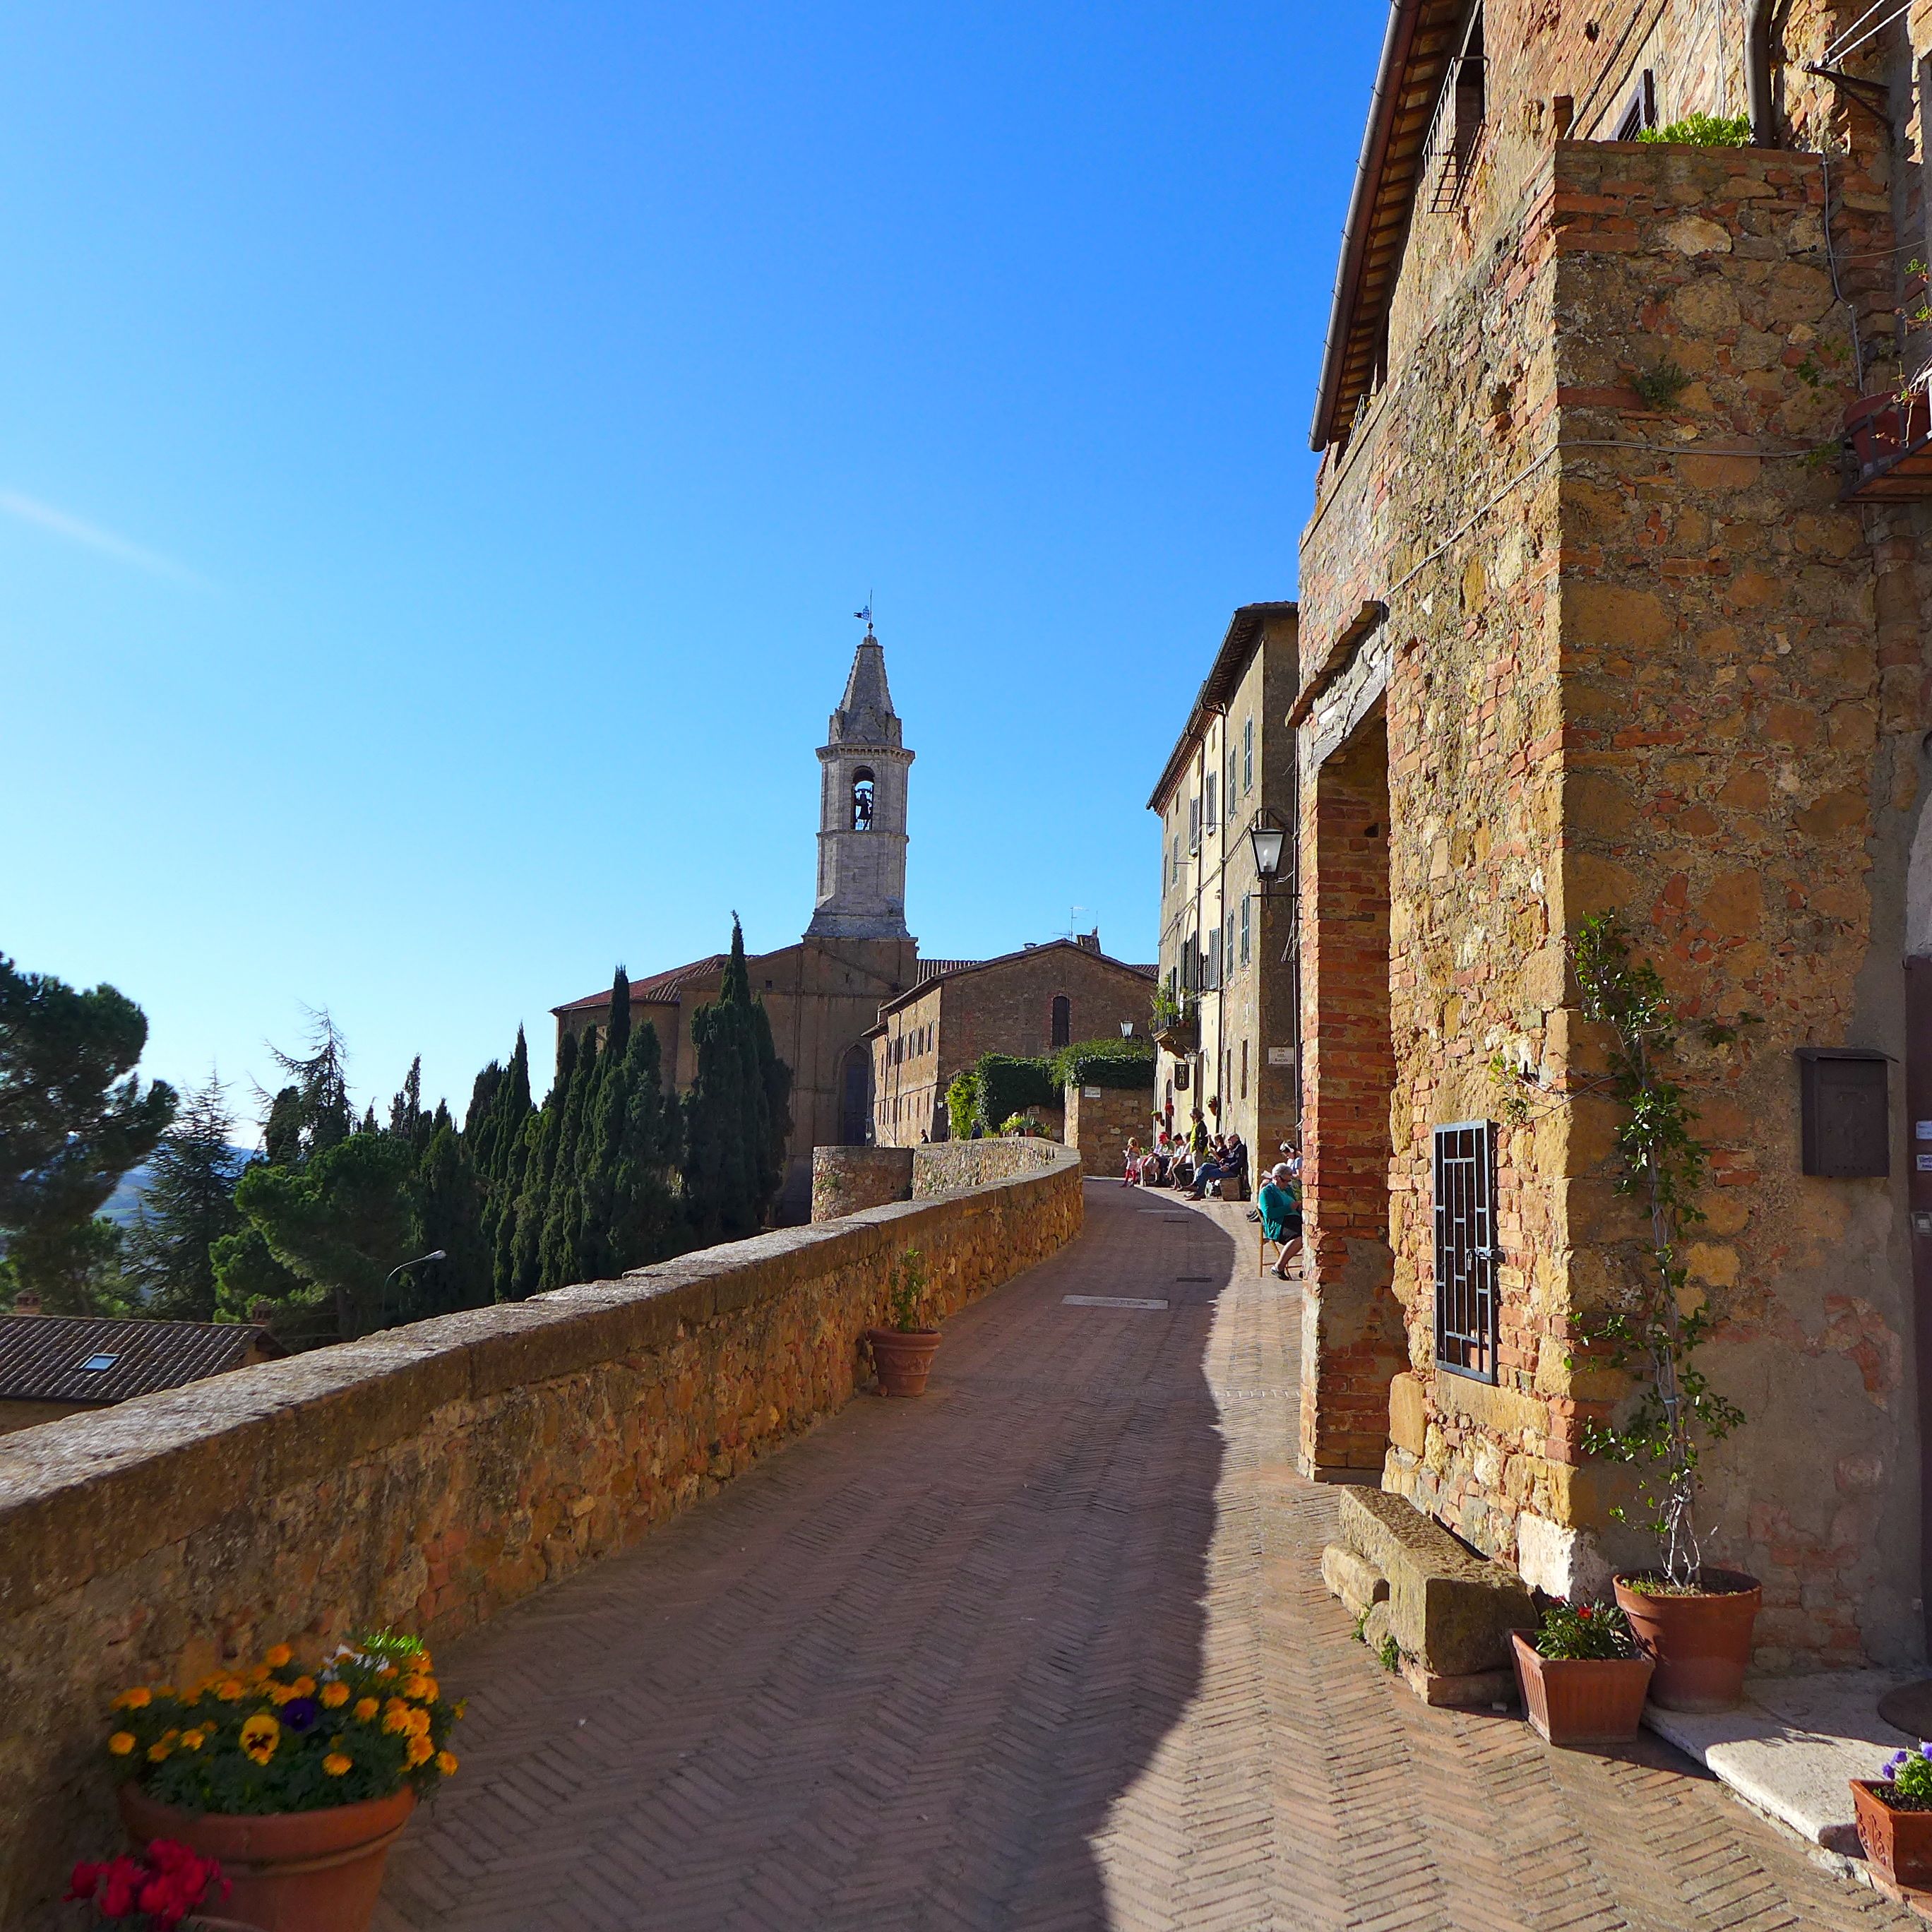
So that’s it for the holiday review. We had a fantastic time and hope to visit Italy again soon. Next time we are eyeing the Amalfi Coast with a requisite stop over in Pienza so we can pay a visit to La Bandita Townhouse! Until then, I hope you will enjoy this recipe for Pici al Ragu di Cinghiale. Believe me, unless your people grew up with an Italian nonna who made fresh pasta every Sunday, this dish will impress and with a bit of planning, is not very difficult to pull off. Buon Appetito!

IMG_2097

Pici al Ragu Di Cinghiale

  • Servings: 4
  • Difficulty: Easy
  • Print

Ragu recipe adapted from: Bon Appètit

Pici recipe from: Jamie Oliver

Ingredients:

For the Pici Pasta:

For the Spicy Wild Boar Ragu:

  • 1 medium onion, quartered
  • carrots, peeled, cut into 1-inch pieces
  • celery stalk, cut into 1-inch pieces
  • 4 garlic cloves
  • 2 teaspoons fresh oregano leaves
  • leaves from 4 -5 sprigs of thyme
  • 1/4 teaspoon crushed red pepper flakes
  • 1/4 cup coarsely chopped flat-leaf parsley, divided
  • 28 ounces crushed tomatoes (we used crushed tomatoes with spicy red pepper)
  • 1/4 cup olive oil
  • 2 pounds ground wild boar (can substitute pork if there is no wild boar to be found)
  • Kosher salt, freshly ground pepper
  • 1 tablespoon tomato paste
  • 1 cup red wine
  • 3/4 Cup finely grated Parmesan, divided

Directions:

For the Pasta:

Place the flour in a large bowl. Add pinch of salt and stir to combine. Make a well in the center of the flour. Add the egg and olive oil to the well. Start to mix, slowly adding the 175 ml of water as needed. Once you have formed a firm dough, knead on a lightly floured surface until dough is smooth and elastic. Wrap in saran wrap and place in refrigerator to rest for 30 minutes.

Once the dough has rested, roll it out into a 1/4 inch thick rectangle. Using a sharp knife, cut the dough into long 1/4 inch strips. Roll these strips on the counter or between your hands to form long tubes, about 24 -26″ long. Don’t worry if they look a bit irregular, that is part of the beauty of this rustic pasta. Place the pasta on flour dusted cookie sheet and cover with linen towel until ready to cook.

When ready to cook, place pasta in large pot of boiling salted water. Cook for about 6 – 10 minutes, or until al dente. Drain pasta, but reserve 1 cup of the cooking liquid.

For the Ragu:

Place onion, carrot, celery, garlic, oregano, thyme, red pepper flakes and 1/4 cup parsley in food processor and pulse until it is finely chopped. Place in small bowl and set aside.

Heat oil in a large heavy pot over medium heat. Add ground wild boar, season with salt and pepper and cook until browned. Transfer to plate with slotted spoon.

Increase heat to medium-high. Add reserved vegetable mixture to oil and drippings in pot, season with salt and cook until golden, about 8 -10 minutes.

Stir tomato paste and 1 cup of red wine in a small bowl until combined. Add to vegetable mixture. Cook, scraping up any browned bits from bottom of pot. Bring to a boil, reduce heat, and simmer until liquid has almost evaporated, 6 -8 minutes.

Add reserved meat, crushed tomatoes and 1 cup of water to the pot. Bring to a boil. Reduce heat and simmer, adding more water or perhaps a glug or two of wine as needed to keep meat nearly submerged, until meat is tender, about 4 hours. Season with salt.

This ragu can be made 3 days in advance. Let cool. Cover and chill, or freeze for up to 2 months. Reheat before continuing.

To Serve:

Add pasta and 1/2 cup of the reserved pasta cooking liquid to ragu and stir to coat. Stir in 1/4 cup of the Parmesan. Add more reserved pasta liquid if needed. Divide among bowls; top with more Parmesan.

Enjoy!

Pici al Ragu di Cinghiale brought to you by: Runcible Eats (www.leaandjay.com)


Chickpea, Cremini Mushroom & Farro Soup

February 24, 2015


IMG_0319

After leaving the beautiful Cinque Terre, we headed south to explore Tuscany. And no dish better represents  Tuscany than this warming peasant-style soup of Chickpeas, Cremini Mushrooms & Farro. All of the ingredients featured in this soup can be found in abundance in the region. And besides evoking images of that beautiful Tuscan landscape, this soup is actually quite good for you. It is a vegetarian dish, though I suppose you could add a bit of pancetta or sausage if you really needed to satisfy the carnivore within you. It also has the ancient grain Farro in it, which has recently been stealing some of the limelight away from Quinoa as the next big supergrain that everyone should be eating. Though that doesn’t mean it has just been discovered.  Farro has been cultivated and used in Italian cooking for centuries. It supposedly fed the Roman legions at one time. A great source of protein and fiber, it has satisfyingly chewy texture and a nutty taste. It is a wheat grain, so unlike Quinoa, it is not gluten-free. Those little devils are definitely in there.

IMG_0313

I first tasted the soup that inspired this recipe in the small town of Chiusi, Italy. The husband and I were very interested in seeing some Etruscan tombs and artifacts and little Chiusi was one of the greatest city-states of the Etruscan league back in the day in the 7th century BC. Today the town has one of the finest collections of Etruscan archaeological findings in Italy housed in The Museo Archeologico Nazionale. The museum was fascinating, chock full of beautifully carved sarcophagi, expertly crafted jewelry, as well as stunning art and pottery.

IMG_2056


IMG_2064 - Version 2

intricate mosaic of hunting scene

intricate mosaic of hunting scene

The most unusual, odd and somewhat creepy thing we saw there were these Canopic jars which have lids that were modeled as a portrait of the dead person held within.

20141025_112817

And although we thoroughly enjoyed our museum visit, we were just itching to head out to the outskirts of the town and go underground to explore some actual Etruscan tombs. There are over 400 of these tombs in the area. Although Etruscan tombs varied according to local custom, generally the rich were buried in stone sarcophagi which were placed in chamber tombs the walls of which were often decorated with brightly painted frescos. We toured the Tomba della Scimmia (Tomb of the Monkey) so named because there is a monkey portrayed in one of the frescos, not because one is interred there, The Tomba della Pellegrina (Tomb of the Pilgrim) and La Tomba de Leone, which date from around 470 BC.

P1040219

P1040223

P1040214

P1040226

Fresco on wall in Monkey Tomb

P1040224

The Monkey himself, peeking out from behind some sort of plant.

So, as you can see, we were pretty physically active on this holiday, hiking up and down the Cinque Terre hillsides and venturing underground to explore tombs. We definitely enjoy those things, but we are also way into relaxing and being pampered. And that is just what we did at what we found to be the best hotel at which we have ever stayed, La Bandita Townhouse. This absolute gem is located in the center of historic Pienza. The charming hill town of Pienza is situated in the heart of Tuscany, nestled between Montepulciano and Montalcino. The town had been designated a UNESCO World Heritage Site and overlooks the Val d’Orcia, which boasts some of the most often photographed, unblemished landscapes that exist.

P1040136

P1040135

Pienza city walls

P1040133

La Bandita Townhouse is a 500-year-old palazzo and convent, lovingly renovated by John Voigtmann, a retired record company executive. From the outside it is indistinguishable from its neighboring Renaissance age buildings. It is when you step inside the 12 room luxury boutique hotel that the magic begins. All of the nun’s cells have been replaced with an expert blend of contemporary furnishings accented by the old world charm of exposed stone walls and rustic ceiling beams.

P1040126


P1040125

All of the light-filled rooms boast fabulous views of the charming town

P1040132


P1040128

The view from our room out into a private medieval walled garden.

or the gorgeous surrounding countryside.

Crazy Tuscan Tree

Crazy Tuscan Tree

But as I’m sure you all know, design – stunning though it may be –  isn’t enough to make a great hotel experience. Customer service makes all the difference in the world and the folks at La Bandita Townhouse have perfected it. They were wonderful from the very first email when I was planning the trip, offering information on the surrounding area, restaurants, shops, towns, you name it, throughout our entire stay right up to the moment we reluctantly checked-out. And whenever we needed anything, which wasn’t often because they had obviously put a lot of thought into the layout of the rooms and common areas – and everything we needed, for the most part, was often to be found in the first place we looked for it, the attentive hotel staff was right there to help in any way that they could. And although Pienza is certainly a captivating town, La Bandita Townhouse is a destination all within itself. I can’t wait to visit again!

IMG_2047

Guest lounge and honor bar serves champagne every evening for happy hour.


IMG_2041

Not only was the hotel top-notch, but they also have a excellent restaurant as well which serves traditional Italian food but with a modern twist.

Visiting a winery in Tuscany and trying some of the local Brunello was high up on our to do list as well. The folks at La Bandita Townhouse were happy to assist us and quickly booked a tour and tasting for us at one of Montalcino’s premiere wine estates Ciacci Piccolomini D’Aragona. The estate, dating from the 17th Century and located just outside the medieval village of Castenuovo dell’Abate, was beautiful. The tour started with the history of the winery, peppered with some intriguing inheritance scandals, moved on to the production of the wine and concluded in their new modern tasting room. We sampled three of their wines, the 2012 Rosso di Montalcino, the 2011 Montecucco Sangiovese and the 2009 Brunello di Montalcino, as well as their olive oil and honey which were all excellent.

IMG_2050


IMG_2052

On the way back to the hotel we stopped to visit the 8th Century Abbey Sant’Antimo, a former Benedictine Monastery. This abbey is richly decorated and  functions today as a Cistercian house.

20141024_145435

P1040187


P1040192

Love these gargoyles!


P1040184

Mystery creature…looks pretty scary!


P1040189

Sneak peek of one of the elusive monks in residence.

Well, I’m sure I’ve surpassed your vacation picture tolerance level at this point. So I’ll leave off for today. Stay tuned next time to hear about our stay in an 11th Century castle’s gate keepers lodgings, our visit to Siena and Florence and to get a great recipe for Wild Boar Ragu and homemade Pici pasta. Until then, if your home base is anything like good old Virginia, gripped by this relentless Winter, you’re probably still shivering in your boots. I hope you will make up a big pot of this hearty Chickpea, Cremini Mushroom & Farro soup to warm yourself and enjoy it with some toasted crusty bread and a bottle (or two….) of wine.

IMG_0327

Chickpea, Cremini Mushroom & Farro Soup

  • Servings: 4 - 6
  • Difficulty: easy
  • Print

recipe adapted from: Williams Sonoma

Ingredients:

For the Soup:

  • 1 1/2 cups (9 1/2 oz./295 g) dried chickpeas, picked over and
    rinsed
  • 8 cups (64 fl. oz./2 l) cold water
  • 1/3 cup (3 fl. oz./80 ml) olive oil
  • 1 yellow onion, finely chopped
  • 2 garlic cloves, minced
  • 1 small fresh rosemary sprig
  • 1 Tablespoon tomato paste
  • 1 cup (8 fl. oz./250 ml) warm water
  • Salt and freshly ground pepper, to taste
  • 4 cups (32 fl. oz./1 l) vegetable broth or water
  • 1/3 cup (2 oz./60 g) pearled farro (if you can’t find pearled, you will need to soak the farro overnight.)

For the Mushrooms:

  • 1/2 lb. (250 g) fresh cremini mushrooms, (can substitute porcini mushrooms) brushed
    clean
  • 1 1/2 Tablespoons extra-virgin olive oil
  • 1 garlic clove, minced
  • 2 Tablespoons dry white wine
  • 1 fresh thyme sprig
  • Salt and freshly ground pepper, to taste
  • 1 1/2 tsp. unsalted butter

Extra Virgin Olive Oil for Drizzling

Smoked Paprika for Garnish

Directions:

Put the chickpeas in a large bowl with water to cover and soak for at least 4 hours or up to overnight.

Drain the chickpeas, rinse well and place in a large saucepan. Add the cold water and bring to a boil over high heat. Reduce the heat to low and simmer, uncovered, until the chickpeas are tender, about 2 hours.

In a large, heavy pot over medium-low heat, warm the olive oil. Add the onion, garlic and rosemary sprig and sauté until the onion is softened, 5 to 7 minutes. In a small bowl, dissolve the tomato paste in the warm water and add to the pot. Stir in the chickpeas and their cooking liquid, and season with salt and pepper. Bring to a simmer over medium heat and cook for 3 minutes. Add the broth, return to a simmer and cook, uncovered, until the flavors have blended, about 30 minutes. Remove from the heat and let cool slightly. Discard the rosemary sprig.

Working in batches, puree the soup in a blender and return it to the pot. Alternatively, process the soup in the pot with an immersion blender. Bring the soup to a simmer over medium heat. Add the farro and cook until tender yet still slightly chewy, about 25 minutes.

Meanwhile, prepare the mushrooms: Cut away the tips of the mushroom stems and thinly slice the mushrooms lengthwise. In a large fry pan over medium heat, warm the olive oil. Add the garlic and sauté until fragrant, about 1 minute. Add the mushrooms and cook, stirring, until they begin to soften, 3 to 4 minutes. Increase the heat to high, add the wine and thyme sprig and cook, stirring constantly, for about 3 minutes. Reduce the heat to low, season with salt and pepper and continue to cook, stirring often, until the mushroom juices have evaporated, about 15 minutes. Remove from the heat and discard the thyme sprig. Stir in the butter.

Stir the mushrooms into the soup. Ladle the soup into warmed bowls, drizzle with olive oil and garnish with a grinding of smoked paprika.

Enjoy!

Chickpea, Cremini & Farro Soup brought to you by: Runcible Eats (www.leaandjay.com)


Pears with Pecorino, Pistachios & Honey

February 21, 2015


IMG_1949

Holy frozen tundra has it been COLD for the past week. I know, I know…it’s winter. It is supposed to be cold. And yes, I am the person who detests hot weather. And yes I will be complaining much more loudly and often once that sultry Virginia weather kicks in this summer. Still…it was been awful freaking, record-breakingly, bitter cold recently. Perhaps that is why I have found myself thinking fondly back on a trip that we took to Italy last October. That was where I had my first taste of Pears with Pecorino & Honey. I saw it served both as an appetizer and as a light dessert. The juicy ripe pears combined with the salty Pecorino cheese and the sweet honey was just sublime.

IMG_1974

Fresh, simple. locally sourced…seems to describe everything we ate on that holiday. And I can truly say, we didn’t have a bad meal the whole time we were there, whether we were dining in a fancy pants restaurant or a little local trattoria. Except for the bread that is…what a disappointment. In my visions of Italy I would always be sipping wine at a little table with some lovely cheese and a loaf of bread. Well, truth be told, I did have a few where I was zipping around on a Vespa with a bottle of wine and a fresh loaf of bread in tow (Ciao!) … but anyway, my expectation for the bread was way high and it tasted pretty abysmal. Well, in Tuscany proper anyway. Tuscan bread does not have any salt in it. Bleck! Apparently back in the day, their old enemy Pisa, set up a blockade of sorts which made it difficult to acquire salt. So the Tuscans started making bread without it and have kept up the daft practice even though salt is readily available. Talk about fearing change… But besides the bread, it was a fantastic trip. I have been dying to tell you all about, so I think I will take advantage of this weather which certainly brings hibernation to mind, to stay put (under a mound of blankets…) for a few moments and take the time to do just that over the next few posts.

P1040417 - Version 2

We arrived in Florence mid-October which meant the majority of the flood of summer tourists had subsided. The weather was absolutely fantastic, still warm during the day but a bit chilly in the evenings, though in light of recent weather around here, perhaps I will revise my opinion to say it was a bit “balmy” in the evenings. We rented a car and drove north to the Italian Riviera portion of the Ligurian region where we planned to spend 3 days visiting Cinque Terre. Cinque Terre, the “five lands”, is made up of the five towns of Riomaggiore, Manarola, Corniglia, Vernazza and Monterosso al Mare which seem to cling precariously to steep cliffs jutting up from the sea.

20141020_172737 - Version 2

The towns, along with the surrounding hillsides and coastline make up The Cinque Terre National Park which is a UNESCO World Heritage Site. No car traffic is allowed in the villages but no worries, it is easy to travel between them by train or boat taxi. We had booked a room in the lovely Luna di Marzo hotel which is located in Volastra, a really small village, still in the park, located just up the cliff from Manarola. The views from the room were simply breathtaking!


20141022_101725 - Version 2


The husband and I were really psyched because not only was Cinque Terre amazingly beautiful, but the park has hundreds of miles of hiking paths which shoot dramatically skyward, wind through the hillside vineyards and olive groves and descend steeply to twist along rugged coastal footpaths. We love hiking and couldn’t wait to hit the trails and take in all of that the area had to offer.

P1040108 - Version 2

Luckily I had heard about Pall Forloney, the Trekguyd and was able to hire him to take us on a trek of all five towns and I’ve got to tell you this was the highlight of our holiday! Originally from Rhode Island, Pall has been living in Riomaggiore for over 10 years. I would say that he has all the knowledge of a “local”, which he certainly does, but it is more than that. He is so enthusiastic about the area and has been traversing it for so long, he certainly knows more than the average local. He proved invaluable to us during our visit.  Not only did he expertly guide us (and yes there is a “right” and a “wrong” way to hike it…or perhaps I should say a “savvy” vs. a “clueless” way…) on a small, personal, day long trek through all five towns and the surrounding hillsides,

P1040016

but he was also a fount of information on everything from local history,

IMG_2029 - Version 2

Saw lots of churches in Italy. But when Pall took us to The Black Church in Monterossa al Mare, it definitely stood out.

P1040117

It is the chapel of the Brotherhood of Death and Prayer and is filled with “momento mori”.


P1040113

The Brotherhood saw to the welfare of orphans, widows, shipwreck victims and the destitute.


P1040069

You could also have a burial mass said for folks who had been excommunicated here as well.


to Sciacchetrà wine production,

P1040047

on to general hiking tips and even recommendations for the best restaurants that the 5 towns had to offer. He took us to the best gelateria in all of the five towns! Not to mention he is a truly fascinating guy and great fun to hang around with. All park passes, train tickets and boat taxi fares were included in the price of his tour.

Relaxing on the boat taxi headed back to Riomaggiore after our trek.

Relaxing on the boat taxi headed back to Riomaggiore after our trek.


Having booked with Pall on our first day in Cinque Terre, we were able to benefit from all of his knowledge and make the most of our next two days there. Even after Pall’s tour was officially over, he was still trying to make sure we had a great visit. So, when the husband and I let him know we had never tried the local Sciacchetrà wine, he arranged to have us meet a friend of his, Roberto  who owns the Terra di Bargòn vineyard.

20141020_120326 - Version 2

For those of you who might be unfamiliar with Sciacchetrà wine, it is the white wine that has been cultivated and produced in Cinque Terre for many years. It is odd that there even is wine production in this area. Remember, the towns are situated on rather steep cliffs. Those industrious Cinque Terre dwellers from long ago literally carved out the terraces on which the vineyards grow and then undertook the backbreaking challenge of harvesting the grapes, carrying them on their backs down along the narrow, cliff’s-edge paths to town.

20141020_130300 - Version 2

But that wasn’t the end of the hard work for them. Then they had to dry the grapes. Sciacchetrà is a straw wine meaning that the grapes are dried to concentrate their juice. Though often thought of as a dessert wine, Sciacchetrà is considered a wine of meditation and is excellent paired with cheeses. We were very curious about it to say the least after hiking through the vineyards all day. With hardly any notice, just a quick phone call from Pall, Roberto was able to come meet us at his Cantina where the Terra di Bargòn Sciacchetrà is produced and cellared. What a treat! Roberto is quite a character. He told us all about the history of that rare wine, how his family came to produce it and gave us a first hand account of the labor intensive cycle of production.

IMG_1998 - Version 2

But better yet, he let us taste the Sciacchetrà of the year (there is a two-year fermentation) as well as a 2009 reserve and a 2003 reserve. It is difficult to describe the taste, but I would say sweet but not too sweet and silky smooth with hints of honey and apricot. All I can say is that it is unique, delicious and definitely something you should sample. (Sciacchetrà is not widely imported to the US. Terra di  Bargòn will ship to the US through their website if you are interested. Better yet….go visit them in Cinque Terre.) There are not a lot of folks in Cinque Terre today that are willing to do the kind of work that is required to make Sciacchetrà. Roberto is perhaps one of a dying breed. He offered us keen insight into a way of life which has been handed down for generations in Cinque Terre. Unfortunately this way of life and this special wine is in danger of being lost forever, but not if Roberto has anything to do with it. The authentic cultural experience of tasting the wine and meeting Roberto was essentially priceless!

P1040105

Cinque Terre was absolutely amazing. I am so glad that we decided to give it the time it deserved and did not try to do it as a “day trip” from Florence. It would not have done the slow-paced vibe of the place justice. Now, that being said, I do understand that in the Summer months, especially August, the place is over-run with tourists, so you might want to plan accordingly. What you must do is book a trek with Pall Forloney, the Trekguyd. While you are traversing the hills, he will have you up to speed and CT savvy in no time flat. And make sure you sample that Sciacchetrà wine while you still can. In the meantime, I hope you will enjoy this simple, yet elegant dish of Pears with Pecorino, Pistachios & Honey.

IMG_1935

It will have you dreaming of long and lazy, sun drenched days. When you gaze out your window, you won’t see a frozen, barren, arctic waste land. No. You’ll see a beautiful green and rugged coastline framed by the turquoise sea. Just make sure you don’t shatter the illusion by sneaking a peek at your thermometer!

IMG_1979

Pears with Pecorino, Pistachios & Honey

  • Servings: 2 - 4
  • Difficulty: easy
  • Print

Ingredients:

  • 2 pears
  • 3 Tablespoons Honey
  • 1/4 cup shaved Pecorino Cheese
  • handful of roughly chopped pistachios
  • freshly ground pepper

Directions:

For a Fresh & Light Spring/Summer Dish:

Core and slice pears. Scattered shaved Pecorino over pear slices. Warm honey and drizzle over pears and cheese. Sprinkle pistachios over the top. Season with freshly ground pepper if desired.

For a Warm & Comforting Fall/Winter Dish:

Core and slice pears. Place on broiler rack. Scatter shaved Pecorino over pear slices. Broil until cheese is melted and slightly browned. Warm honey and drizzle over pears and cheese. Sprinkle pistachios over the top. Season with freshly ground pepper if desired.

Pears with Pecorino, Pistachios & Honey brought to you by: Runcible Eats (www.leaandjay.com)


Icelandic Bolludagur Cream Buns

February 16, 2015

IMG_1882

Bolla, Bolla, Bolla! Bet you didn’t know it, but today is Bolludagur (Bun Day) in Iceland. Bolludagur always falls on the monday before Ash Wednesday. On this day, the children of Iceland try to sneak into their parents bedroom, while they are still sleeping and whip them awake with brightly colored wands or paddles (bolludagsvöndur) while shouting Bolla, Bolla, Bolla! The number of spanks the child is able to land before the parent rises from bed, likely to land a few spanks of their own, is the number of Cream Buns they will be able to scarf down that day.

IMG_1922

Apparently this holiday came to Iceland via Denmark in the 19th Century, but Iceland has of course put its own spin on it. The husband and I have gone on holiday to Iceland for the past couple years and plan to visit again this Spring. We just can’t seem to get enough of it.

P1020431

Iceberg on black sand beach near Jökulsárlón.

Shortly after our first visit, I started to follow the blog I heart Reykjavik written by Reykjavik local Auður Ösp. It is an icelandic travel blog, but even if you aren’t planning a visit, you should take a peek. It is quite interesting, full of Auður’s recommendations to make your stay in Reykjavik the best it can be, along with her beautiful photography of the stunning country and all peppered with her witty commentary. And if you are planning a visit, this blog is simply a must! (Auður not only guides walking tours of Reykjavik, but also provides other unique opportunities for visitors such as a crash course in the Icelandic language and even home cooked dinners with the locals.) It was on her blog that I first learned about Bolludagur. What a great holiday! One I stand absolutely ready to incorporate into my yearly celebrations. And since I have no children, won’t the husband be surprized when I show up bright and early with my bolludagsvöndur at the ready !

IMG_1903

Now although you can find these Bolludagur Buns everywhere in Iceland right now, they were pretty thin on the ground here in Virginia, so I made my own.

IMG_1910

These buns are very similar to profiteroles or eclairs, made with a choux pastry. And one of the many great things about them is that they are very customizable. Just make up the buns and fill them with sweetened whipped cream. After that, the sky’s the limit! Stuff a bit of extra jam in with the cream, or maybe you have some Lime Curd left over from that Blackberry & Lime Tart I just told you about. Put some of that it there, with some of the leftover blackberries. I did some of the buns filled with that scrumptious, award-winning Chocolate & Raspberry Preserves from the Green Apron that I’ve told you about in the past (remember those Chocolate & Raspberry Buttermilk Doughnuts I made…) and topped it with more chocolate…because why wouldn’t you? These buns are supposed to be a bit decadent!

IMG_1880

I also did a salted caramel filled bun, again topped with chocolate.

IMG_1920

Like I said, it is completely up to you. Just make sure you eat your fill today…I’ll even make the spanking bit optional for you adults….Bolla, Bolla, Bolla!

IMG_1873

Icelandic Bolludagur Cream Buns

  • Servings: 12 -15 cream buns
  • Difficulty: easy
  • Print

recipe slightly adapted from: Icelandic Roots

Ingredients:

For the buns:

  • 1 cup water
  • 1/2 cup butter
  • 1/2 tsp salt
  • 1/4 cup sugar
  • 1 cup flour
  • 3 large eggs

For the cream and filling:

  • 1 cup whipping cream
  • 2 Tbsp. vanilla
  • 2 Tbsp. powdered sugar
  • raspberry jam, salted caramel, melted chocolate

Directions:

Preheat oven to 375ºF. In a large saucepan, stir together water, butter, salt and sugar on stove medium-high until butter melts. Add the flour and beat until thick. Remove pan from heat and let cool slightly.

Move flour butter mixture to bowl of stand mixer. Add the eggs and quickly beat them into the batter until it is smooth.

At this point, you can drop the batter onto a greased baking sheet using two spoons. Or you can place the dough in a pastry bag and pipe it onto a parchment lined baking sheet. This is the method I used as I was hoping to have the buns all be consistent in size. I drew 2″ circles on the parchment as a guide and then flipped it over and piped the dough to fit the circles.

Bake 30 minutes until golden brown. And here is where it gets really difficult. Do not open the oven during baking. Not at all. Not even a for a quick peek. You will cause those buns to fall flat! Turn the oven off and let the buns cool undisturbed within the oven.

Whip cream, vanilla, and powdered sugar to stiff peaks. Slice cooled buns in half. Fill with cream (again, I piped it in, but you could just spoon them full…) and anything else you would like…say like Chocolate Raspberry Jam, or salted caramel. Top with a little sprinkling of confectioners sugar or with melted chocolate or any other frosting or glaze that your heart desires!

Enjoy!

Icelandic Bolludagur Cream Buns brought to you by: Runcible Eats (www.leaandjay.com)


Cashew Crusted Blackberry & Lime Tart

February 13, 2015

IMG_1687

Here it is…the day before Valentine’s Day! Oh and it also happens to be Friday the 13th, which is a bit disconcerting. Anyhoo… Have you baked up a little something special for your sweetie? I know some folks were suspicious that my Valentine would be getting those irresistible Salted Peanut Butter & Nutella Sandwich Cookies that I blogged about a few days ago. Now those were right up my alley! Alas, as I mentioned, the husband does not have any trouble resisting Peanut Butter treats whatsoever. (Yay! More for me…) No. Definitely. NOT up his alley. Nor likely anywhere on his map! So I’d have been a pretty horrible wifey to offer those up to him. Luckily I’m not that clueless and know exactly what he likes. Believe you me I have earned some serious Valentine’s Day points from him by making this Cashew Crusted Blackberry & Lime Tart. For the husband, and perhaps some other of you fruit dessert loving folks out there, this is the dessert that is irresistible.

IMG_1691

So what we’ve got here is a crispy graham cracker/cashew crust holding a creamy, sweet and tart lime curd filling, all crowned with the husband’s favourite fruit, fresh blackberries. Yup…this might possibly be the confection of his dreams!

IMG_1726

And the big win for me, besides my darlin’s everlasting devotion (just imagine the fluttering cupids), is that it was really pretty easy to make. Truth be told, I made this over a couple of days, lime curd first, crust the next and saved the final assembly until I was ready to surprize him.

IMG_1684

Though I will say that the crust and filling are both pretty quick and low impact to make, so this tart could easily be made on the day you need it. Like maybe tomorrow?

IMG_1665

So if you’ve got a significant other like mine who will shun the chocolate dessert to make a beeline straight for the fruit filled offering, take note of this Valentine’s Day indulgence. You know what they say…the way to a man’s heart and all that!

IMG_1712

Cashew Crusted Blackberry & Lime Tart

  • Servings: One 9 inch Tart
  • Difficulty: easy
  • Print

recipe adapted from: My Cup is Full and Food Network (for the Cashew/Graham Crust)

Ingredients:

For the Cashewed Graham Cracker Crust:

  • 2 cups cashews, finely ground
  • 1 cup graham cracker crumbs (digestive biscuits are a good substitute for grahams)
  • 1/2 cup sugar
  • 3/4 cup melted and cooled butter

For the Lime Curd Filling:

  •  1 stick (4 oz.) unsalted butter, softened
  • 1 cup granulated sugar
  • 2 eggs, at room temp
  • 2 egg yolks, at room temp
  • 1/3 cup plus 4 tablespoons (5 oz.) fresh lime juice

For the Topping:

12 ounces fresh blackberries

Fresh whipped cream for serving

Directions:

Preheat the oven to 350 degrees F.

Grease a 9-inch tart pan and set aside. In a small bowl, mix together the cashews, graham cracker crumbs, 1/2 cup sugar, and the melted butter. Press crumb mixture into the bottom and sides of the tart pan.

Bake the crust for 8 -10 minutes until it is set. Set aside to cool on wire rack.

Next, make the lime curd (just a note, you could make up the lime curd a day or two beforehand and store in the fridge covered with plastic wrap).

In the bowl of an electric mixer, beat the butter and sugar until light and fluffy.

Add the eggs and yolks one at a time, incorporating each fully before adding the next.

Pour in the lime juice and continue to mix until combined (you may need to scrape down the sides and bottom of your bowl). This is the point at which I have to tell you not to freak out, because I might have, just a bit. Once you add the lime juice, your lovely creamy sugar/butter/egg mixture will go all curdled. Just take a deep breath and say “All will be fine.” As you heat and whisk the mixture in the next step, the lovely creamy mixture will once again appear.

Pour the curd mixture into a medium saucepan and cook over medium heat, stirring continually with a whisk until the mix is smooth.

Increase the heat a touch and keep whisking until the mixture has thickened and has reached a temperature of 170 degrees Fahrenheit

Remove the curd from the heat and transfer to a heat-resistant bowl (such as glass), and cover with plastic wrap pressed to the top of the curd. Allow it to come to room temperature and then chill it in the refrigerator before putting in the crust.

Once the crust is cooled and your curd is chilled, scoop the curd into the center of the crust, spreading evenly to the edges with the back of a spoon.

Finally, arrange your berries over the top of the tart.

Enjoy!

Cashew Crusted Blackberry & Lime Curd Tart brought to you by: Runcible Eats (www.leaandjay.com)


Curried Butternut Winter Soup

February 10, 2015

IMG_0862

Seems that good ole Punxsutawney Phil got it right. That adorable little varmint predicted six more weeks of winter and I for one believe him. Winter is not done with us yet, so it is probably a good thing to keep those soup recipes coming. Nothing better than a big bowl of steaming hot soup to warm you up while the snow is falling and the wind is howling outside. This Curried Butternut Winter Soup is just the ticket! Velvety smooth, it features a combination of butternut squash, leeks and potatoes with a bit of hot and spicy curry to give it just the right amount of kick. Its beautiful golden hue will remind you that it won’t be too much longer until these grey skies give way to longer sunny days.

IMG_0883

Butternut Squash, with its thin, easily peelable skin, is one of the most hassle-free of the winter squashes to work with. It has a sweet and nutty taste that is similar to pumpkin. Technically a fruit, it is often thought of and prepared as a vegetable and really packs a nutritional punch. It is high if Vitamins C, A & E as well as that wonderful antioxidant beta-carotene. It is high in fiber, manganese, magnesium and potassium. So there you have it, great taste and great health benefits. Go out and get yourself some Butternut Squash today and get started on a big pot of this Curried Butternut Winter Soup. Once you’ve tucked in to a nice hot bowl of it and are all warm and cozy it will be much easier to convince yourself that six more weeks isn’t really that long at all…

IMG_0858

Curried Butternut Winter Soup

  • Servings: 6
  • Difficulty: easy
  • Print

recipe adapted from: Kristine’s Kitchen

Ingredients:

  • 2 Tablespoons butter
  • 5 cups (1/2-inch) cubed peeled butternut squash (about 1½ pounds)
  • 2 cups (1/2-inch) cubed peeled russet potato (about 12 ounces)
  • 1 tsp. kosher salt
  • ½ tsp. freshly ground black pepper
  • 2 cups sliced leek (about 2 medium)
  • 4 cups low sodium chicken broth (can sub. in vegetable broth if you prefer)
  • 1/4 tsp. cayenne pepper
  • 1/2 tsp. hot curry powder (feel free to substitute a mild curry powder if you have tender taste-buds – but we like it hot & spicy!)
  • 1 cup half-and-half
  • Freshly ground black pepper and/or chopped chives, for serving

Directions:

Melt butter in a large Dutch oven over medium-high heat. Add squash, potato, salt, and pepper to pan; saute 3 minutes. Add leek; saute 1 minute. Stir in broth. Add cayenne pepper and hot curry powder. Stir to combine. Bring to a boil. Reduce heat, and simmer 20 minutes or until potato is tender, stirring occasionally. Remove from heat.

Using an immersion blender, puree soup until smooth. (Alternatively, the soup may be pureed in batches in a blender.)

Stir in half-and-half and keep warm until you are ready to serve. Top with additional cayenne pepper and chives if desired.

Enjoy!

Curried Butternut Winter Soup brought to you by: Runcible Eats (www.leaandjay.com)


Salted Peanut Butter & Nutella Sandwich Cookies

February 5, 2015

IMG_1115

I love Peanut Butter. It’s true. I really love it. I mean I love it in baked goods, I love it on bread and I even love to just stand there with a spoon eating it straight from the jar. I love creamy peanut butter. I love crunchy peanut butter. I think the only one I know who might just love peanut butter more than I do is my dog.

IMG_1918

He also loves to roll in the sand at the beach!

Yup I love peanut butter, but it is not the only thing that I have been known to eat straight from the jar….Nutella springs to mind. And I’m talking about big honking tablespoonfuls, not little proper teaspoons! I do love me some Nutella. I can’t believe I didn’t discover it until I was in college!

KeepCalm_CarryASpoon-240x300

And you know what else… I love it when peanut butter and chocolate come together. And if you throw in some flaky salt so that you get that great salty/sweet taste sensation….well, I’m just in heaven! So you can just imagine how I feel about these Salted Peanut Butter & Nutella Sandwich Cookies.

IMG_1050

These little devils have got it all going on! Listen up, what you’ve got is two salted chewy peanut butter cookies with a gooey, chocolate-y ribbon of Nutella nestled between them. The perfect cookie for me!

IMG_1072

Now, you might be thinking that what with all this talk of “love” in the air and Valentine’s Day being right around the corner, that I made these cookies for my sweetie. You would be wrong. These cookies would be a dreadful Valentine’s gift for him. If I were to make him these particular cookies as a prezzie, it would be a sign that our relationship was in peril. I know that he couldn’t care less about peanut butter, doesn’t pay much attention to cookies at all, and is lukewarm about chocolate desserts all together. Nope. These are decidedly not for him. (Don’t worry over him…I’ve got his Valentine’s Day treat all picked out. Just you wait and see…) These cookies are all about ME. The only thing that might tempt me more is a cupcake. Hmmm…note to self….try to make a cupcake version of these cookies.

IMG_1093

Another thing these incredibly tasty Salted Peanut Butter & Nutella Cookies are about is World Nutella Day. That’s right, today February 5th is World Nutella Day.

World_Nutella_Day_Final_m-300x207

This celebration of all things Nutella was started in 2007 by Sara at Ms. Adventures in Italy and Michelle at Bleeding Espresso as a day to celebrate, get creative with and most importantly, to EAT Nutella. I love Nutella so I usually try to participate with a Nutella laden recipe every year. Last year I made cookies as well, Salted & Malted Nutella Caramel Chocolate Chip Cookies. These cookies feature silky, decadent Nutella, creamy caramel, nostalgic malted goodness and rich chocolate chips, all rolled up together in a crunchy chewy salted cookie. 

IMG_5120

A couple of years ago, I made a Nutella, Double Chocolate & Banana Tart which was quite stunning if I do say so myself.

IMG_1065

And I have also shared the recipe for Nutella & Banana Filled Peanut Butter Ebelskivers.

IMG_5014_2

Just can’t get enough of that Peanut Butter & Nutella combo! I will admit, this year’s Salted Peanut Butter & Nutella Sandwich Cookies are a bit on the large side. They are more the size of whoopie pies than regular cookies. But you see, I had gotten these wonderful cookie stamps and was just dying to try them out,

IMG_1123

so I definitely increased their size. However, I did not ever hear anyone say “Oh no! That cookie is just too big. I couldn’t possibly eat it all.” Well, now that I think about it, I did hear that once or twice. But when I looked back over, there was nothing left but crumbs…Heck a couple of times, even the crumbs were gone! As if they had been magically hoovered up. So I’ll leave the size of the cookie up to you. Make whatever size cookie suits your needs, but believe me you need to make a batch and soon! Folks, with the exception of my husband that is, will go wild!

IMG_1052

Salted Peanut Butter & Nutella Sandwich Cookies

  • Servings: 8 - 10 large sandwich cookies or 16 smaller ones
  • Difficulty: easy
  • Print

recipe from: Sweet Peas and Saffron (I did not change a thing about the ingredients, but made the cookies larger so that I could use my new cookie stamps!)

Ingredients:

For the Cookies:

  • ½ cup (113 grams) unsalted butter, at room temperature
  • ½ cup peanut butter, at room temperature
  • ½ cup (100 grams) granulated sugar
  • ½ cup (110 grams) packed brown sugar
  • 1 egg
  • ½ tsp vanilla
  • 1½ cups (188 grams) all-purpose flour
  • 1 tsp cornstarch
  • ½ tsp baking powder
  • ½ tsp baking soda
  • granulated sugar (for rolling)
  • coarse sea salt (for sprinkling)

Nutella for the ooey-gooey ever so chocolatey middle part

Directions:

In a large bowl, beat butter and peanut butter until well combined. Add sugar and beat until light and fluffy. Mix in egg and vanilla.

In a separate small bowl, combine flour, cornstarch, baking powder and baking soda. Mix into wet ingredients.

Scrape down from sides of bowl, cover with plastic wrap, and refrigerate for at least 2 hours. Do not skip this part or your cookies will spread!

Pre-heat oven to 375° F. Line cookie sheets with silicone baking mats or parchment paper.

Roll dough into 1 tbsp sized balls, roll in the granulated sugar to coat. Place on baking mat and press down slightly with a fork. Sprinkle with sea salt. If you would like to use a cookie stamp like I did you will need to use about 2 tablespoons of dough. Lightly grease your cookie stamp and push straight down on dough. Gently pull stamp away from cookie and then sprinkle with salt.

Bake for 7-9 minutes until bottoms are golden brown. Cookies will look under-baked when removed from the oven but will set up on baking sheet. Cool for 5 minutes, transfer to a wire rack to cool completely.

Now for the assembly: Place Nutella in a pastry bag and pipe it out onto the bottom of one cookie. Top with another cookie and gently press down. These sandwich cookies are best when assembled just prior to eating. If you wish to assemble them in advance, they can be kept in the refrigerator, just remember to let them come to room temperature before serving.

Enjoy!

Salted Peanut Butter & Nutella Sandwich Cookies brought to you by: Runcible Eats (www.leaandjay.com)


Crack Pie

February 1, 2015

IMG_0897

I’m so excited! Tomorrow my favourite varmint, Punxsutawney Phil, will be stepping out of his burrow at Gobbler’s Knob and letting everyone know if there will be 6 more weeks of winter or if perhaps Spring is one the way. Groundhog Day is nigh! The chances that he will see his shadow tomorrow in Pennsylvania, thus heralding the arrival of Spring, are not favourable. There is a big snow event happening up in that neck of the woods today and tomorrow. I guess we’ll just have to wait and see what he has to say. Phil has been correct in his prognostications for the past two winters!

1-2-1ED9-25-ExplorePAHistory-a0n1g5-a_349

One extraordinary rodent!

Phil & all the folks up in Punxsutawney aren’t the only folks celebrating now. February 1st, which falls half way between Winter Solstice and Spring Equinox, also marks the festivals of Imbolc, St. Brigid’s Day and Candlemas, all of which are associated with fertility, fire, purification and weather divination. Quite an auspicious time of year! I’m very happy to be marking an event today as well. February 1st just happens to be the 4th year anniversary of  the my cooking blog! Yup… Four years ago today I posted my first recipe. It was for Cream Tea Scones with Currants.

IMG_4970

I had been blogging for a little while at that point, but not about food. I originally started this blog as a way to get information out to folks who were planning to travel to Ireland to attend our wedding. I found out that I actually liked to blog and then it eventually morphed into the more food centric version that you see today. It was difficult to choose which recipe I wanted to share with you for this anniversary edition, but I ultimately decided that it just had to be Crack Pie. Maybe because I must be on crack to continue trying to publish 2 times a week and for 17 days straight St. Patrick’s Day blogapolooza starting March 1st… But also because Crack Pie is definitely one of those special occasion kind of desserts.

IMG_0910

So I imagine you might be wondering, possibly with some trepidation, what is Crack Pie? Crack is definitely one of those words that just jumps out at you when you come across it huh? I remember one such occasion back when I was in college in Ireland. I hadn’t been there very long and was hanging out with some new-found friends in a local pub. One fellow was trying to convince me to come along with him to a house party nearby. When I hesitated a bit, he said “Ah come on, you should. They’ll be great crack there.” Uhhhh…excuse me?!! Well that is what I heard anyway. I soon learned (but not soon enough to attend said party) that I had misheard him. What he actually said was not “crack” but “craic” Irish for good times or fun, but unfortunately pronounced exactly the same way…. Kind of changes your whole imagery of the party huh? But wait, back to that pie….really? You haven’t heard of Crack Pie?!!

IMG_0925

Come on! That particular confection has a cult following! Crack Pie, invented by Chef Christina Tosi, is one of the top-selling treats at the famous Momofuku Milk Bar in NYC. And when I say top-selling, just listen to this. a whole pie sells for $44. They sell 60 -90 Crack Pies every day or two! Hmmm…sounds like quite a few folks have developed a bit of a habit. Yup….if you like sweet…no wait a second….SWEET desserts, this rich, salty/sweet pie is insanely addictive! And I’m sure at this point you just want me to tell you what it is. Well, you can read the list of ingredients below, but that doesn’t really help and describing the taste is difficult. In consistency, it is like a Chess Pie or like a pecan pie, without the pecans, but the flavour is unique. The crust is made from crumbled oatmeal cookie

IMG_0914


and the filling is gooey, buttery, bliss that tastes somewhat reminiscent of  that Corn Pop cereal you used to eat as a kid. Remember this stuff?!!

pops1


This is due to a secret, well not so secret, ingredient. Strangely adaptations of the recipe often leave it out. But more on this later.

IMG_0908

Now the version of Crack Pie that I have here is from Christina Tosi herself.  I felt it was important to make it as closely as I could to the real deal Crack Pie. I will say this does present a couple of challenges. The first is that her recipe, unlike some other versions which have been adapted, is for two pies. That meant I did indeed make two of those babies. I didn’t try to half the recipe and you shouldn’t either. Part of what makes Crack Pie Crack Pie is that it spends some quality time in the freezer. Chef Tosi claims that it is essential to achieve the correct consistency. So I put both pies in the freezer and after we gobbled one down, it was great knowing that I had another just waiting for the perfect occasion to emerge. Another thing that Tosi’s Crack Pies have in them, that is missing from most of the clone recipes I found is the elusive corn powder.

Merch_CornMIXcolor_Low-500x500

Corn powder is made from taking freeze-dried corn and simply grinding it up into a powder in your food processor. It not only acts as a binder but it also gives the pie its unique Corn Pop – like taste. Corn starch and corn flour are not good substitutes if you are trying for authentic. You can buy Corn Powder from the Momofuku Milk Bar or you can find freeze-dried corn at the ever so handy Amazon. I have an Amazon Prime membership and freeze-dried corn was delivered to my door on a Sunday, which I think is pretty dang amazing! So plan ahead if you want to make an authentic Crack Pie. And believe me….you do. Following the recipe, or should I say recipes, because like all Chef Tosi creations there is a recipe, within a recipe, within a recipe to master before you reach your final goal. But Oh…it is so worth it. One bite of that salty/sweet nirvana known as Crack Pie (hah! one bite….I should say “once you’ve come up for air” cause you will not stop at one bite…) and you’ll be convinced. So  go ahead and make this legendary confection. Your sweet tooth (or teeth) as the case may be, will thank you – once they get over that initial sugar ache!

IMG_0932

Crack Pie

  • Servings: Two 10 inch pies each serving 8 - 10
  • Difficulty: easy
  • Print

recipe from: Chef Christina Tosi at Momofuku Milk Bar or perhaps you should invest in the Momofuku Milk Bar cookbook for even more yummy treats!

Ingredients:

  • 1 recipe oat cookie
  • 15 g (1 tbs tightly packed) light brown sugar
  • 1 g (1/4 tsp) salt
  • 55 g (4 tbs) butter, melted, or as needed
  • 1 recipe crack pie® filling
  • confectioners’ sugar, for dusting

Directions:

Pre heat the oven to 350°F.

Put the oat cookie, brown sugar, and salt in a food processor and pulse it on and off until the cookie is broken down into a wet sand. (If you don’t have a food processor, you can fake it till you make it and crumble the oat cookie diligently with your hands.)

Transfer the crumbs to a bowl, add the butter, and knead the butter and ground cookie mixture until moist enough to form into a ball. If it is not moist enough to do so, melt an additional 14 to 25 g (1 to 1½ tablespoons) butter and knead it in.

Divide the oat crust evenly between 2 (9-inch) pie tins. Using your fingers and the palms of your hands, press the oat cookie crust firmly into each pie tin, making sure the bottom and sides of the tin are evenly covered. Use the pie shells immediately, or wrap well in plastic and store at room temperature for up to 5 days or in the fridge for up to 2 weeks.

Put both pie shells on a sheet pan. divide the crack pie® filling evenly between the crusts; the filling should fill them three-quarters of the way full. Bake for 15 minutes only. The pies should be golden brown on top but will still be very jiggly. (I baked mine for about 20 minutes here)

Open the oven door and reduce the oven temperature to 325°F. Depending on your oven, it may take 5 minutes or longer for the oven to cool to the new temperature. Keep the pies in the oven during this process. When the oven reaches 325°F, close the door and bake the pies for 5 minutes longer. The pies should still be jiggly in the bull’s-eye center but not around the outer edges. If the filling is still too jiggly, leave the pies in the oven for an additional
5 minutes or so. (I don’t know what was up with my oven, or perhaps it was because I was using 9 inch pie tins rather than 10 inch ones, but I had to bake my pies about 30 more minutes before it was even remotely set. Don’t despair if this happens to you. Have patience. Some how I managed and my Crack Pies were fantastic! And finally, remember that the very center of the pie will still look jiggly when you take it out of the oven. You’ll be afraid that it isn’t done, but it is. Remember to over-cooketh a Crack Pie is a sin!)

Gently take the pan of crack pies® out of the oven and transfer to a rack to cool to room temperature. (You can speed up the cooling process by carefully transferring the pies to the fridge or freezer if you’re in a hurry.) Then freeze your pies for at least 3 hours, or overnight, to condense the filling for a dense final product—freezing is the signature technique and result of a perfectly executed crack pie®.

If not serving the pies right away, wrap well in plastic wrap. In the fridge, they will keep fresh for 5 days; in the freezer, they will keep for 1 month. Transfer the pie(s) from the freezer to the refrigerator to defrost a minimum of 1 hour before you’re ready to get in there.

Serve your crack pie® cold! Decorate your pie(s) with confectioners’ sugar, either passing it through a fine sieve or dispatching pinches with your fingers.

Oat Cookie

Ingredients:

  • 115 g (8 tbs) butter, at room temperature
  • 75 g (1/3 cup tightly packed) light brown sugar
  • 40 g (3 tbs) granulated sugar
  • 1 egg yolk
  • 80 g (1/2 cup) flour
  • 120 g (1 1/2 cups) old-fashioned rolled oats
  • 0.5 g (1/8 tsp) baking powder
  • 0.25 g (pinch) baking soda
  • 2 g (1/2 tsp) kosher salt
  • pam or other nonstick cooking spray (optional)

Directions:

Heat the oven to 350°F.

Combine the butter and sugars in the bowl of a stand mixer fitted with the paddle attachment and cream together on medium-high for 2 to 3 minutes, until fluffy and pale yellow in color. Scrape down the sides of the bowl with a spatula. On low speed, add the egg yolk and increase the speed to medium­ high and beat for 1 to 2 minutes, until the sugar granules fully dissolve and the mixture is a pale white.

On low speed, add the flour, oats, baking powder, baking soda, and salt. mix for a minute, until your dough comes together and any remnants of dry ingredients have been incorporated. The dough will be a slightly fluffy, fatty mixture in comparison to your average cookie dough. Scrape down the sides of the bowl.

Pam-spray a quarter sheet pan and line with parchment, or just line the pan with a silpat. Plop the cookie dough in the center of the pan and, with a spatula, spread it out until it is 1/4 inch thick. The dough won’t end up covering the entire pan; this is ok.

Bake for 15 minutes, or until it resembles an oatmeal cookie-caramelized on top and puffed slightly but set firmly. Cool completely before using. wrapped well in plastic, the oat cookie will keep fresh in the fridge for up to 1 week.

Crack Pie® Filling

You must use a stand mixer with a paddle attachment to make this filling. It only takes a minute, but it makes all the difference in the homogenization and smooth, silky final product. I repeat: a hand whisk and a bowl or a granny hand mixer will not produce the same results. Also, keep the mixer on low speed through the entire mixing process. If you try to mix the filling on higher speed, you will incorporate too much air and your pie will not be dense and gooey-the essence of crack pie®.

This recipe makes the filling for two Crack Pies.

Ingredients:

  • 300 g (1 1/2 cups) granulated sugar
  • 180 g (3/4 cup tightly packed) light brown sugar
  • 20 g (1/4 cup) milk powder
  • 24 g (1/4 cup) corn powder
  • 6 g (1 1/2 tsp) kosher salt
  • 225 g (16 tbs) butter, melted
  • 160 g (3/4 cup) heavy cream
  • 2 g (1/2 tsp) vanilla extract
  • 8 egg yolks**

Directions:

Combine the sugar, brown sugar, milk powder, corn powder, and salt in the bowl of a stand mixer fitted with the paddle attachment and mix on low speed until evenly blended.

Add the melted butter and paddle for 2 to 3 minutes until all the dry ingredients are moist.

Add the heavy cream and vanilla and continue mixing on low for 2 to 3 minutes until any white streaks from the cream have completely disap­peared into the mixture. Scrape down the sides of the bowl with a spatula.

Add the egg yolks, paddling them into the mixture just to combine; be careful not to aerate the mixture, but be certain the mixture is glossy and homogenous. mix on low speed until it is.

Use the filling right away, or store it in an airtight container in the fridge for up to 1 week.

**note: It will be the death of your wildly dense pie filling if there is any bit of egg white in the mixture. I believe the easiest, and best, way to separate an egg is to do so in your hands. You may also use the two half-shells to separate the eggs, but the cracked shells can tear the yolk open, and you may not totally separate all the white. If you do this by hand,you can feel when you get every last bit of white away from the yolk. Remember to wash your hands under warm soapy water for 30 seconds or more before and after you handle raw eggs!

Enjoy!

Crack Pie® brought to you by: Runcible Eats (www.leaandjay.com)