Pints of Guinness Cupcakes

March 17, 2014

IMG_7270

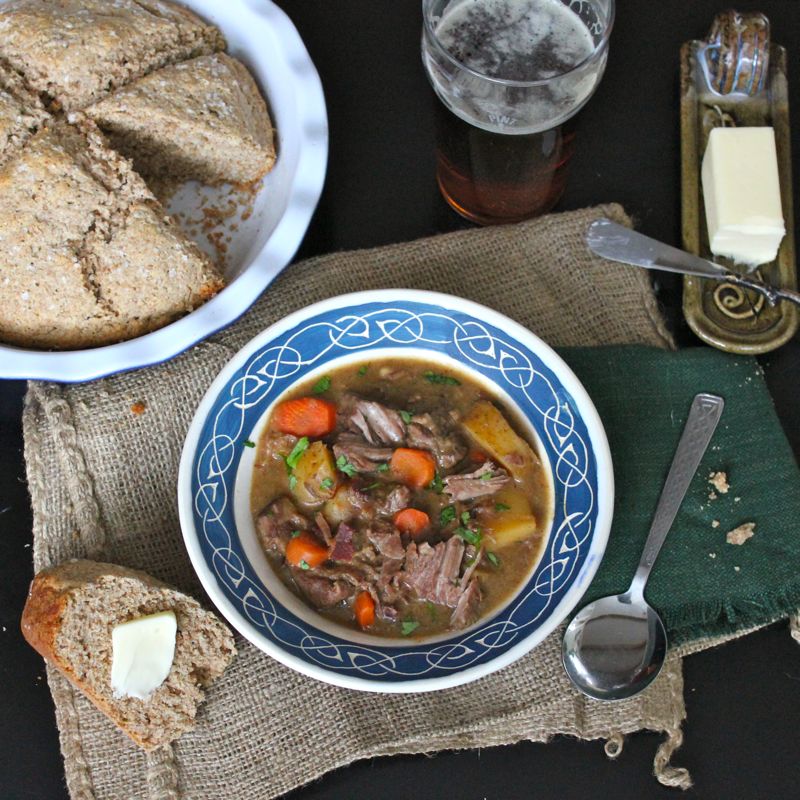
My Goodness – My Guinness! What do we have here? Little Pints of Guinness Cupcakes for St. Patrick’s Day! Yup, today is the day! I wasn’t sure I was going to make it to here, but somehow, seventeen Irish-y recipes later, here we are! I’m finishing my countdown today with these delicious little boozy cupcakes. Are you kidding me? Of course they have booze in them! The cake portion of these edible pints are made with a moist and rich blending of chocolate and  Guinness. The “head” of these pints are formed with a smooth delectable and dreamy Baileys buttercream frosting. Yum, oh yum!!!

IMG_7339

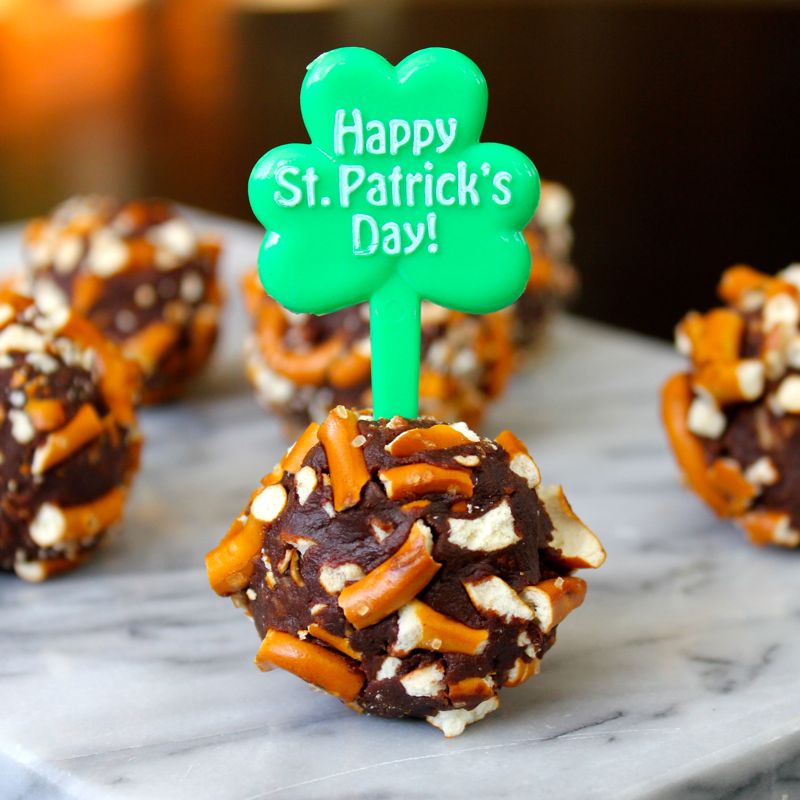
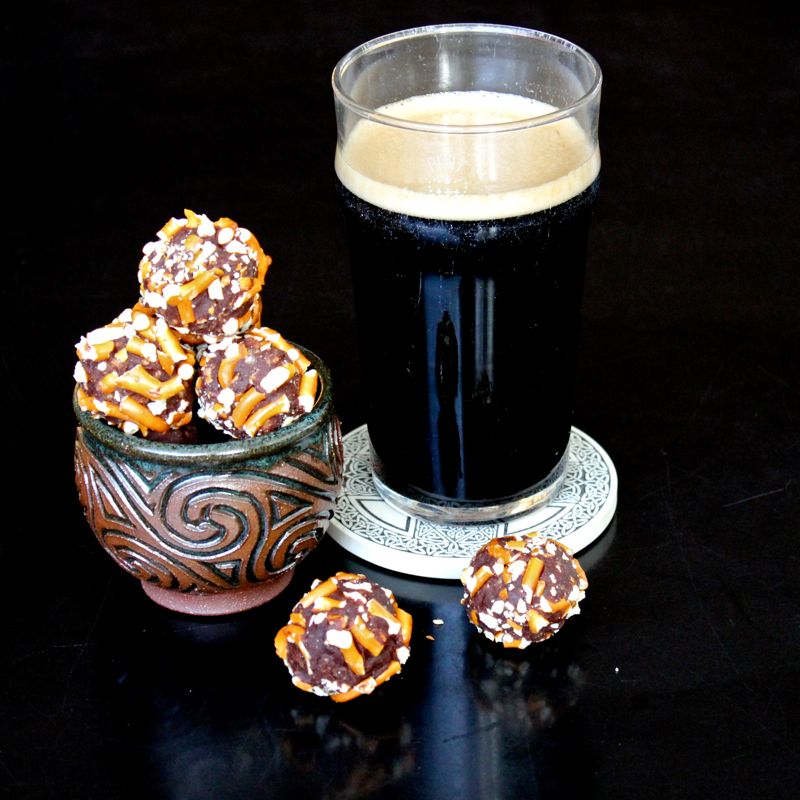
Truth be told, I’ve made a version of these Guinness Chocolate Cupcakes with a Swiss Vanilla Baileys Buttercream Frosting before and they were a big hit. In their first incarnation, they looked just like regular little cupcakes and were topped with crumbled chocolate covered pretzels.

IMG_2390

This time around, I thought I’d like to have a little fun with the shape and since they were Guinness cupcakes, I thought I’d really try to capture the look of a pint of that wonderful elixir. I am very pleased with the results!

IMG_7371

In order to get that pint glass type shape, I baked these in popover pans, rather than the usual cupcake tins. Then I piped the Baileys buttercream frosting onto the top and smoothed it a bit with a spatula to get the appearance of that creamy Guinness head.

IMG_7271

What fun huh? Now you can drink your pint (pints…) and eat one too! Just perfect for your St. Patrick’s Day festivities. So what are you waiting for? Get on out there and have some fun! Lá Fhéile Pádraig Sona Daiobh! (Happy St. Patrick’s Day!)

IMG_7391

Pints Of Guinness Cupcakes

recipe from: Lea and Jay (yours truly 🙂 ) who originally adapted it from The Butch Bakery Cookbook by David Arrick and Allison Eats

Ingredients:

For the Chocolate Stout Cupcakes:

  • 2 1/2 cups all-purpose flour
  • 2 1/2 cups granulated sugar
  • 2 teaspoons baking soda
  • 1/2 teaspoon salt
  • 1 1/2 cup (  3 sticks) unsalted butter, room temperature and cubed
  • 1 cup unsweetened cocoa powder
  • 1 1/2 cup Guinness, poured and settled before you measure it out
  • 4 large eggs, room temperature
  • 1 cup sour cream

For the Swiss Vanilla Baileys Buttercream Frosting:

  • 5 Large Egg Whites
  • 1 1/2 Cups Sugar
  • 2 Cups (4 sticks) Butter, cut into 1/2 inch cubes, cool but not cold
  • 1/4 tsp Salt
  • 3 Tablespoons Baileys Irish Cream

Directions:

First, bake your cupcakes. Preheat oven to 350°F. Butter two (6 well) popover pans. Take care to really butter them well so that the “little pints” will slide out easily once baked. In a small saucepan over medium-low heat, melt your butter and set aside to cool slightly, then add in the cocoa powder and whisk until smooth. Whisk in the stout, then set aside to cool completely for another 10 minutes.

In a large mixing bowl, whisk together the eggs and sour cream, then whisk in the cooled chocolate and butter mixture. Whisk in the flour, sugar, baking soda, and salt, combining until just moistened. Fill each popover cup with 1/4 cup + 2 tablespoons of batter. (Each well of my popover pan held 3/4 cup of liquid total, so I was filling them 1/2 full). Bake for 20-25 minutes, until the cupcakes are set and a toothpick comes out clean (mine took about 24 minutes). Let cupcakes cool in the pan for 10 minutes and then carefully remove them from the pan to a wire rack. Allow to cool completely before frosting.

Now for the frosting. In a medium bowl, whisk the egg whites and sugar together. Set the bowl over a pan of simmering water but do not let the water touch the bottom of the bowl. Heat the mixture until the sugar is completely dissolved and the color is milky white, about 2-3 minutes.

Transfer the egg mixture to the bowl of an electric mixer fitted with the whisk attachment, and beat on medium-high speed (start slowly at first) until smooth and fluffy, about 5 minutes. Remove the whisk attachment and replace with the paddle attachment. Add the cubed butter, few pieces at a time, mixing well after each addition. Beat on medium-high speed until smooth and fluffy, about 5 minutes. If the buttercream looks like it is breaking, don’t worry, it will eventually come together.

Add the salt and Baileys Irish Cream and beat for 5 seconds to combine.

Place frosting in piping bag and pipe onto cupcakes. Take spatula and smooth frosting until it resembles the head on a pint of Guinness.

Enjoy!


Bacon Wrapped Guinness & Cheddar Meatloaf

March 15, 2014

IMG_5861

So here I go…wrapping more things up in bacon. Yup…you’ve got my number by now. One might think that if I’m not drowning it in booze, I’m wrapping it in bacon! And this wonderful St. Patrick’s Day offering of Bacon Wrapped Guinness & Cheddar Meatloaf allows me to do both! That’s right, I’ve taken that old comfort food standard, meatloaf, and added some smooth, malty Guinness Stout and Irish cheddar into the mix and wrapped it all up in bacon.

IMG_5838

I didn’t think meatloaf could get any better, but I was wrong! I must admit, I’ve had some dreadful, tired old dry meatloaf in the past. And serving meatloaf did go out of fashion for a while. Though recently I’ve noticed it has made a comeback. I’m happy to say that I’ve been seeing it featured on the menus of several hot and trendy restaurants. But I’m not nearly as happy to see it as my husband is. He loves meatloaf and once he spies it on a menu, you pretty much can guess what he will be dining on that evening.

IMG_5914

So he was beyond happy when this amazing meatloaf meal showed up right on our own table. The beef and pork mixture is very tender, the earthy Guinness infused mushrooms are perfection and well…then there is the bacon. It is amazing! Not only does it infuse the meat with wonderful salty, bacon-y brilliance but it also serves to keep it very moist and juicy. No chance of dry meatloaf here! The original recipe called for a sweet Guinness-y glaze as well. I chose not to add it because we aren’t really into putting a sweet glaze onto our meatloaf. Sometimes even the standard ketchup is a bit too much for us. We don’t want one thing to interfere with the flavour of all of that meaty bacon-y goodness, so we left it out. But I know there are plenty of ya’ll  out there that do have a sweet-tooth and would love to glaze it up, so I’ve included the recipe for it here. For us that glaze seemed a bit like gilding the lily!

IMG_5928

Well folks, there you have it…beef and pork, wrapped in more pork and infused with Guinness. Served up with a big old helping of mashed potatoes and washed down with a pint or two…or so…You can’t go wrong with this Bacon Wrapped Guinness & Cheddar Meatloaf for your St. Patrick’s Day feast!

IMG_5906

Bacon Wrapped Guinness & Cheddar Meatloaf

recipe adapted from: Galley Gourmet

yield: 8 servings

Ingredients:

For the Glaze: (Glaze optional – I did not use it)

  • 3/4 cup (6 ounces) stout beer, such as Guinness extra stout
  • 1/2 cup plus 2 Tablespoons packed light brown sugar
  • 2 Tablespoons honey

For the Meatloaf

  • 2 Tablespoons butter
  • 2 medium yellow onions, finely diced
  • 2 large garlic cloves, minced
  • 8 ounces Portobello mushrooms, roughly chopped
  • 1 cup (8 ounces) stout beer, such as Guinness extra stout
  • 4 ounces quality white bread (about 2 slices of white bread), roughly torn
  • 1/2 cup milk
  • 1 pound ground beef
  • 1 pound ground pork
  • 2 extra large eggs
  • 3 ounces Kerrygold Reserve Cheddar cheese, grated
  • 1/4 cup chopped fresh flat-leaf parsley
  • 1 Tablespoon Worcestershire sauce
  • 1 teaspoon kosher salt
  • 3/4 teaspoon freshly ground black pepper
  • 12 ounces sliced bacon, about 12 strips

Directions:

For the Glaze
In a medium saucepan, bring the stout, brown sugar and honey to a boil.  Reduce the heat to medium and cook until reduced by half, stirring occasionally.  Remove from the heat and allow the mixture to cool; set half the mixture aside.  Reserve remaining glaze for another use.

For the Meatloaf
Preheat the oven to 350° F.
In a large skillet, heat the butter over medium heat.  Add the onion and saute until softened and just beginning to brown, about 6-8 minutes.  Add the garlic and saute for 1 minute. Add the mushrooms and cook until softened. Add stout and simmer briskly until almost dry, about 4-5 minutes.  Transfer to a large bowl and let cool until just warm.

In a shallow dish, soak the bread in the milk, tossing once, until soggy but not falling apart, about 5-7 minutes; set aside.

In the bowl of a food processor, add beef, pork, and soaked bread and process until well-combined, about 10 (1-second) pulses.  Transfer meat mixture to bowl with cooled onions/mushroom mixture.  Add eggs, cheese, parsley, Worcestershire, salt and pepper; mix with hands until thoroughly combined.

Line a large rimmed baking sheet with aluminum foil, then a sheet of parchment paper.  Transfer the meat mixture to the sheet and form into a 9×5-inch rectangular loaf.  Drape the meatloaf with slightly overlapping strips of bacon, tucking the ends under the loaf. Brush the top of the meatloaf with half of the glaze (if you are using the glaze).

Bake until an instant read thermometer registers 160° F in the center of the meatloaf, about 45-50 minutes.

Remove the meatloaf from the oven.  Place the oven rack 6 inches from the broiler element and preheat the broiler.  Brush the remaining glaze over the meatloaf (if you are glazing) and broil until the bacon is browned and crisped, about 2-3 minutes, checking and rotating to make sure the glaze doesn’t scorch.  Using two large spatulas, carefully transfer the meatloaf to a cutting board and allow to rest for 10-15 minutes.  Cut into 3/4 to 1-inch thick slices.

Enjoy!


Green Velvet Baileys Cheesecake Cake

March 15, 2014

IMG_7144

What a fun cake for St. Patrick’s Day huh? Green Velvet Baileys Cheesecake Cake! So what you’ve got here is a layer of Baileys Cheesecake sandwiched between two layers of Green Velvet Cake ( you know – like red velvet but green instead) and frosted with a delicious cream cheese & marshmallow frosting. Are you drooling yet?

IMG_7157

I found this fantastic cake over at Recipe Girl. I must admit, Recipe Girl’s Green Velvet Cake is a much more vibrant Kelly Green than mine. Mine seems to be more of a moss-green. Oh well, as everyone knows, there are 40 Shades of Green in Ireland! I can actually attest to the fact that there are many more than that! The color difference between our two cakes is not a mystery to me. You see, Recipe Girl recommends that you use 2 tablespoons of liquid green food coloring (that is an entire 1 ounce bottle). Now I was sure I had food coloring on hand. But lo and behold, when I went to grab it whilst right in the middle of making this cake, there was only a drop or two of that dye to be had from the bottle. I did have some Wilton’s Gel Frosting Tint on hand which I substituted in. So there you have it! If you really want that your cake to have that retina-searing, screaming green hue, use liquid food coloring (and a lot of it). The good news is that the moss-green hue did not affect the flavour of my cake. It is still quite moist and tasty.

IMG_7093

And if those green velvet cake layers weren’t enough for you, there is an entire Baileys Cheesecake nestled neatly into the middle! The Baileys in this cheesecake might have been my addition to the recipe. I couldn’t resist. Almost every single recipe I’ve shared with you recently has a bit of booze in it. I figured why stop now so close to St. Patrick’s Day? You will notice that you assemble the cake with a frozen cheesecake layer. Don’t worry…it defrosts really fast! By the time you get the cake frosted, on the table and ready to go, that cheesecake layer will be entirely thawed, wonderfully creamy and perfectly luscious !

IMG_7150

Oh and let me tell you about the frosting. As with most red velvet cakes, this green velvet cousin has a cream cheese frosting. Always brilliant right? Except get this, this frosting has cream cheese and marshmallow  creme! It is by far the most mouthwateringly scrumptious cream cheese frosting I have ever tasted! Well there you have it! All of the reasons you simply must get busy making this amazing Green Velvet Baileys Cheesecake Cake for St. Patrick’s Day. In two days… three counting today…yup, you’ve plenty of time!

IMG_7075

Green Velvet Baileys Cheesecake Cake

recipe slightly adapted ( I added Baileys – go figure!) from: Recipe Girl 

yield: 12 – 14 servings

Ingredients:

For the Cheesecake:

  • Two 8-ounce packages cream cheese, at room temperature
  • 2/3 cup granulated white sugar
  • pinch of salt
  • 2 large eggs
  • 1/3 cup sour cream
  • 1/3 cup heavy whipping cream
  • 1 teaspoon vanilla extract
  • 2 – 3 Tablespoons Baileys Irish Cream

For the Green Velvet Cakes:

  • 2 1/2 cups all-purpose flour
  • 2 tablespoons cocoa powder
  • 1/2 teaspoon salt
  • 1 1/2 cups canola or vegetable oil
  • 1 1/2 cups granulated white sugar
  • 2 large eggs
  • 1 teaspoon vanilla extract
  • 1 teaspoon white vinegar
  • 1 teaspoon baking soda
  • 1 cup buttermilk
  • 2 tablespoons (1-ounce bottle) green food coloring

For the Frosting:

  • Two 8-ounce packages cream cheese, at room temperature
  • 1/2 cup unsalted butter, at room temperature
  • One 7-ounce jar marshmallow creme
  • 1 cup powdered sugar
  • a few drops of green food coloring, if desired

Directions:

Prepare the cheesecake layer: Preheat the oven to 325°F. Place a large roasting pan on the lower third rack of the oven. Place a kettle of water on the stove to boil. Spray a 9-inch springform pan with nonstick spray and line the bottom with a round of parchment paper. Wrap a double layer of heavy duty foil around the bottom and up the sides of the pan (you want to seal it so the water from the water bath doesn’t seep into the pan).

In a large bowl, use an electric mixer to blend the cream cheese until it is smooth and creamy, 1 to 2 minutes. Mix in the sugar and salt and blend for 2 minutes, scraping down the sides of the bowl to make sure all is mixed in. Add the eggs, one at a time, blending after each addition. Finally, mix in the sour cream, whipping cream, vanilla and Baileys. Mix until smooth. Pour the batter into the prepared pan. Set the pan into the roasting pan in the pre-heated oven. Carefully pour the hot water from your kettle into the roasting pan. Pour enough water so that there is about an inch of water coming up the foil along the sides of the cheesecake pan.

Bake the cheesecake for 45 minutes. It should be set to the touch and not jiggly. Remove the cheesecake from the roasting pan and let it cool on a wire rack for at least an hour. When it has cooled, place the pan into the freezer and let the cheesecake freeze completely (4 to 5 hours or overnight).

Prepare the cake layers: Preheat the oven to 350° F. Spray two 9-inch round pans with nonstick spray and line each pan with a round of parchment paper (see *Tips). In a medium bowl, sift together the flour, cocoa powder and salt. In a large bowl, combine the oil and sugar together and beat with an electric mixer for 2 minutes. Add the eggs, one at a time, and the vanilla, and beat for an additional 2 minutes.
In a small bowl, combine the vinegar and baking soda and stir to dissolve. Add the vinegar to the bowl, along with the buttermilk and food coloring. Beat on medium-low speed for 1 minute, until blended. Add the dry ingredients and increase speed to medium-high, scraping down the sides of the bowl while mixing, for 2 additional minutes. Divide the batter evenly between the prepared pans. Bake 30 to 35 minutes, or until a toothpick inserted into the center comes out with a few moist crumbs attached. Let the cakes cool for 20 minutes. Run a knife along the edge of the pans, then invert the cakes onto a rack to cool completely.

Prepare the frosting: In a large bowl, using an electric mixer on medium-high speed, combine the cream cheese and butter and beat until creamy and smooth. Add the marshmallow creme and mix until smooth. Add in the powdered sugar (and food color, if using) and continue to beat, scraping down the sides of the bowl, until all of the ingredients are mixed in and the frosting is smooth and spreadable.

Assemble the cake: Place one cake layer into the center of a cake plate or platter. Remove the cheesecake from the freezer, take off the sides of the pan, and slide a knife under the parchment to remove the cheesecake from the pan. Peel off the parchment. Trim the cheesecake, as needed to match the size of your cake layers (see *Tips). Place the cheesecake layer on top of the first cake layer. Place the second cake layer on top of the cheesecake.

Frost the cake: Apply a crumb coat layer of frosting to the cake (see *Tips), and refrigerate the cake for 30 minutes, or until the frosting is set. Apply the second layer of frosting. Add a large scoop of frosting onto the top of the cake. Use a long, thin spatula or knife to spread the frosting evenly across the top and then spread it down the sides of the cake too. Decorate, as desired.

Tips:

*You can certainly bake this cheesecake in the oven without a water bath, but you run the risk of cracking the top of the cheesecake. The water bath is a safeguard against cracking.
*Measure your cheesecake layer against the cake layers. If the cheesecake layer turns out to be slightly larger size round than your cake layers, move it to a cutting board and use a knife to gently shave off some of the exterior of the cheesecake.
*How to apply a crumb coat layer of frosting: use a long, thin spatula or knife to cover the cake completely with a thin and even layer of frosting. Wipe off the spatula each time you’re about to dip it back into the bowl to get more frosting (this way you won’t be transferring any green crumbs into the bowl of frosting). Don’t worry at this point about the crumbs being visible in the frosting on the cake. When your cake has a thin layer of frosting all over it, place it into the refrigerator for 30 minutes to “set” the frosting. Once the first layer of frosting is set, apply the second layer.
*If you are serving this cake at a party, it’s perfectly okay to leave the cake at room temperature for a couple of hours (the cheesecake thaws very quickly). Otherwise, keep it stored in the refrigerator. It also freezes perfectly. Freeze it as is, then wrap it in plastic wrap and store it in the freezer until it is needed. Leftover slices may also be wrapped and frozen.

Enjoy!

IMG_7079


Irish Stew

March 14, 2014

IMG_7204

I can’t believe I’ve never gotten around to blogging an Irish Stew recipe before, but better late than never. And I guess technically, I’m not late. There are still 3 more days until St. Patrick’s Day arrives, so that leaves you tons of time to gather the ingredients. Though I should probably confess straight from the git-go that this is not a traditional Irish stew recipe. Some liberties have been taken with it, but I believe that they are upgrades from the traditional recipe.

IMG_7249

Not that the traditional version is bad. I’ve eaten some delicious bowls of that robust stew. However, I may have had a bowl or two that were definitely suspect. You know what I mean…tough, stringy meat surrounded by mushy veggies in a watered down broth. Boo! Perhaps I should have thought better of ordering this particular dish when visiting particularly dodgy pubs…but I’ll just chalk it up to life experience. This version of Irish Stew remains true to the original version in that it still contains lamb, potatoes, onion, carrots, parsnips and parsley. It veers from the traditional recipe in a couple of ways. Traditional Irish Stew is a white stew, meaning that the meat is not browned. Well, the meat is browned here. I feel this not only improves the appearance, but also serves to really deepen the flavour. That and the long slow cooking time results in a rich tender meat which seems to nearly melt in your mouth. The second big deviation is that a bunch of bacon has been added into the mix. What can I say? Everything is better with salty, smoky bacon and this hearty Irish Stew is no exception.

IMG_7187

I knew this recipe was a winner when I fed it to the musicians that play in a band with my husband. I usually use them as guinea pigs for the various recipes I’m trying out. I didn’t think they’d be very excited about Irish Stew for dinner, but much to my surprize, they went wild for it.

IMG_7237

Four of them neatly polished off a huge pot of stew before I could blink twice! “Some of the best stew I’ve ever had” was heard a couple of times. Ahhhh yes! Irish Stew Success!

IMG_7208

Irish Stew

recipe from: The Runaway Spoon

yield: 8 servings ( only four if serving hungry musicians)

Ingredients:

  • 3 pounds lamb stew meat, in 2-inch cubes (you can also use lamb shoulder or leg cut into cubes)
  • 1 cup all-purpose flour
  • 1 Tablespoon salt
  • 1 Tablespoon coarsely ground black pepper
  • 1 pound bacon
  • 1 large yellow onion, finely diced
  • 3 cloves garlic, finely minced
  • 4 cups beef broth
  • 3 bay leaves
  • 6 sprigs fresh thyme
  • 2 parsnips
  • 3 carrots
  • 2 – 3 yellow potatoes
  • chopped fresh parsley to garnish

Directions:

Pat the lamb cubes dry with paper towels.  Mix the flour, salt and pepper together in a large ziptop bag, then drop in the lamb and shake it around to coat each cube with flour.

Cook bacon over medium high heat until the bacon is crispy.  Remove the bacon to paper towels to drain.  Crumble bacon. Let the bacon grease cool a bit, then very carefully pour it into a glass measuring jug.

In a large Dutch oven, heat ¼ cup of the bacon grease.  Remove the lamb cubes from the bag, shaking off any excess flour and cook them in the bacon grease until browned on all sides.  You will need to do this in batches, removing the browned pieces to a plate.  If needed, add a little more bacon grease to the pot and heat it up between batches.

When all the lamb is browned and removed from the pot, add 2 more Tablespoons of bacon grease and the chopped onions and cook over medium heat until the onions are soft and translucent.  When the onions are soft, add ¼ cup of red wine or Guinness stout and scrape any browned bits from the bottom of the pot.  Cover and cook until the onions are soft and caramelized, about 10 minutes.  Add the garlic and cook a further 2 minutes.  Return the lamb and about ¾ of the cooked bacon to pot.  Pour in the beef broth, add the bay leaves and thyme and bring to a boil.  Stir the stew well, reduce the heat to low, cover the pot and cook for 1 ½ hours.

Peel the parsnips and carrots and cut into bite-sized chunks.  Add to the simmering stew.  Scrub the potatoes, but do not peel, and cut into nice chunks.  Add these to the stew as well, give it all a good stir, cover the pot and cook for a further 1 1/2 hours or until the potatoes, carrots and parsnips are tender.

At this point, the stew can be made up to a day ahead, cooled, covered and refrigerated.  Reheat over medium just until warmed through.  Remove the bay leaves and thyme stems before serving.

Serve in big bowls, topped with the remaining bacon pieces and a sprinkle of fresh chopped parsley.

Enjoy!


Bacon Wrapped Stuffed Sausages

March 13, 2014

IMG_6644

Hang on just one daggum minute! Did I read that right?! Bacon Wrapped Stuffed Sausages? BaconWrapped..Stuffed…Sausages. Can it be true? Why yes, yes it can. And you can make up some of these decadent delights quicker than you can imagine. You simply take a pork sausage, stuff it with some delicious bread stuffing – in this kitchen that would be cornbread stuffing – and then wrap the whole thing in bacon. Sounds incredible huh? Pork stuffed with cornbread and wrapped in more pork! Where have you been all of my life?

IMG_6716

Apparently Stuffed Sausages hale from Northern Ireland, particularly originating at the butcher counter of McAnerney’s Supermarket in Armagh city, County Armagh. I do not remember seeing these around in the Republic, but they might be there as well and I just wasn’t lucky enough to come across them. The only tricky bit about making these in the US was looking for an appropriate sausage. Now we have many pork sausages here, but they are quite different from those found in Ireland. In Ireland, the meat of the sausage is ground much finer and the spices are less pronounced being more herby than peppery. Although I was not able to get ahold of any Irish sausages here in Virginia, I was able to find a local butcher who makes Cumberland sausage style bangers. Originating in Cumbria England, Cumberland sausage is a peppery pork sausage in which the meat is chopped rather than minced, giving it a texture which falls somewhere between Irish and US sausages. I’m sure you can substitute in your favourite local sausages for this recipe, but take care to look for something larger than a traditional breakfast link so that you will be able to stuff it.

IMG_6672

As for the stuffing, the original recipe which I found over at Wee Kitchen, called for a simple bread stuffing. But I know my husband very well, and therefore know he is all about cornbread. So I made a cornbread stuffing. You should make whatever stuffing happens to be your favourite. Once you’ve got the sausages split and stuffing made, it’s quite easy from there. Stuff those sausages, wrap them in bacon and pop them into the oven.

IMG_6902

In about 30 minutes you will have achieved bacon wrapped nirvana! I served these Stuffed Sausages over mashed potatoes with a quick and easy onion pan-gravy. They are also to-die-for simply skewered on a fork. They were a huge hit around here and I have no doubt folks would be thrilled to see them at your St. Patrick’s Day celebrations.

IMG_6693

Bacon Wrapped Stuffed Sausages

recipe adapted from: Wee Kitchen

Ingredients:

  • 10 Irish Pork Sausages
  • 2 tablespoons butter
  • 1/4 cup onion, chopped
  • 1/4 cup celery, chopped
  • 2 cups cornbread stuffing mix (or your favourite stuffing mix)
  • 1 cup chicken broth
  • 4 sprigs of fresh thyme, leaves only
  • salt and pepper to taste
  • 10 slices of bacon

Directions:

Melt butter in large saucepan. Add onions and celery and cook until softened. Remove from heat.

Add broth and stuffing mix to saucepan along with thyme leaves. Mix until all of the stuffing is moistened. Set aside.

Slice a channel down the center of each sausage link, about 3/4 of the way through. Take a large spoonful or two of the stuffing mixture and place it into the slit.

Wrap each stuffed sausage with one slice of bacon. Try to wrap the sausage in such a way that both ends of the bacon are on the bottom side of the sausage.

Place the stuffed sausages on a baking sheet. Bake at 350º F, in the center of the oven, for about 25 – 30 minutes.

Extras: For the simple onion pan-gravy I mentioned: Chop one large onion and one clove of garlic. Saute them in the drippings from the bacon wrapped stuffed sausages until tender. Add 2 tablespoons of all-purpose flour and 1 teaspoon of balsamic vinegar. Cook for 30 seconds. Add two cups of beef broth and whisk continuously until the gravy begins to thicken. Reduce the heat to low and add salt and pepper to taste.

Enjoy!

IMG_6911


Guinness Pretzel Truffles

March 12, 2014

IMG_6924

Time for more candy in this St. Patrick’s Day countdown I say! And who doesn’t like truffles? Better yet, who doesn’t like boozy truffles?!! These Guinness Pretzel Truffles will knock your socks off!

IMG_6981

You know how some truffles are just so tooth-achingly sweet you can’t manage to take more than one nibble? Not these little devils. You see they have a reduced Guinness syrup added to the chocolate. That Guinness reduction adds an earthy, slightly bitter stout flavour to the chocolate and also serves to temper the sweetness. I’m sure that sounds great to those of you with a bit more subdued sweet tooth. But wait…there’s more. These tasty treats are then rolled in crunchy, salty crushed pretzels.

IMG_6937

So there you have it – malty Guinness, rich dark chocolate and salty pretzels combined to make an irresistible St. Patrick’s Day confection. You can have a batch done in no time flat. So what are you waiting for?! You’ll absolutely drive folks wild with these!

IMG_6922

Guinness Pretzel Truffles

recipe from: SprinkleBakes

yield: 18 – 21 truffles

Ingredients:

  • 12 oz. bottle Guinness Extra Stout (divided)
  • 8 oz. semisweet chocolate
  • 1/2 cup softened unsalted butter, cut into pieces
  • 3/4 cup finely pulverized pretzel rods (you want these really pulverized – best to use a food processor)
  • 3/4 cup crushed pretzels for rolling truffles
Directions:
Place 1/4 cup plus 2 tbsp. Guinness Stout in a 2 cup saucepan.  Set aside.
Pour the remaining Guinness Stout in a separate small saucepan and bring to a simmer.  Cook until reduced to 1 tablespoon, about 15- 20 minutes.  Be sure to keep an eye on this because it can be tricky. You’ll notice it will foam up quite a bit at first. Don’t let it boil over as it will be quite the sticky mess to clean up! (Not that I have first hand knowledge of that or anything. 🙂 Also, once reduced considerably, the syrup can burn easily. So – don’t get distracted!
Chop the chocolate into pieces and place in the saucepan with the Guinness Stout. Place the saucepan over medium- low heat and let stand until the chocolate starts to melt.  Stir with a wire whisk to blend together the chocolate pieces, but don’t whisk vigorously – we’re not trying to incorporate air.
When the chocolate is melted and smooth, begin to add butter 1 tbsp.  at a time. Whisk gently until butter is melted, and then add the 1 tbsp. Guinness Stout reduction.  Stir in the pulverized pretzels.
Pour the chocolate mixture into a bowl and chill in the refrigerator until firm (or overnight).
Line a cookie sheet with wax paper. Scoop the Guinness ganache out by the heaping tablespoon and quickly roll between your palms.
Once all the chocolate is used up, chill the truffles in an air-tight container in the fridge until ready to roll in crushed pretzels. These chocolates will keep for 7 days when stored properly in the refrigerator.  Roll truffles in crushed pretzels just before serving (so they’ll be crunchy!). If crushed pretzels resist sticking to the chilled truffles, roll the truffles between your palms to warm them up, and then roll in the pretzels. The pieces should stick.
Enjoy!
IMG_6920

Smithwick’s Beef & Cheddar Pies

March 11, 2014

IMG_6502

Mmmmm….meat pies! I know lots of folks out there get real worked up about sweet, dessert-type pies. But around here, we’re all about the savoury meat pie. And we pretty much swoon for any type of meat pie whether it be pot pies, pasties or empanadas. We love them all. As if you couldn’t tell. Just look back at my recipe archive and you’ll find quite a few. But I’ve got to let you guys in on a secret…so far these are our favourites! I don’t think I’m supposed to pick a favourite. It’s sort of like parents not having a favourite kid (or should I say not “admitting” to it). Well, just don’t tell the other pies, but this Smithwick’s Beef & Cheddar Pie recipe can do no wrong in our eyes.

IMG_6630

Now I will say that these pies do take a bit of planning to get them done properly. You should allow yourself two days. I suppose you could throw them together in just one day. But why would you want to put all that pressure on yourself. With a wee bit of planning ahead, you’ll be much less stressed and have superior tasting pies.

IMG_6469

So, here’s the plan of action I recommend. Day one – make the beef and ale filling. First step is browning the beef. Browning not only gives the meat a much more appealing colour, but it also boosts the flavour. This is followed by a long cooking time. You just let that browned beef simmer away with all of those spices and that Smithwick’s Ale broth for a good 3 -4 hours.

IMG_6558

Not only will the beef be incredibly tender, but all those flavours will have time to come together and really intensify. If you are in a rush at this time you can move right along to making the crust and assembling the pies, but if you can wait, that beef filling will taste much better after an overnight rest in the refrigerator. And just think, your work is done for the day – on the pie front anyway. You should kick back and have a pint or two.

IMG_6484

And as for that crust… well, that was the huge surprize for me in this recipe. Whenever I have made a shortcrust in the past, I have had to cut chilled butter into a flour mixture, add liquid – in my favourite recipe a mixture of vodka and water, form the dough – handling it ever so gingerly – and then let it chill in the fridge for at least an hour, if not overnight. This recipe introduced me to a new way of making pie crust and I must say I am absolutely loving it. It is much less fussy. You just melt butter in a bit of water, add some flour until a dough forms and there you have it. How easy is that! You roll it out and bake it right away. No waiting time. Done in a jiffy! And the crust is just perfect for these pies, buttery and tender yet substantial enough that you can pick a pie up and move it around without it completely crumbling into a heap.

IMG_6632

I was able to make eight of these little pies with this recipe, which fed the husband and I for four meals. I served them up with a lovely green salad on the side and we never got tired of them. And once you make them and taste that tender beef in a tangy sauce, spiked with gooey sharp cheddar, all wrapped in a buttery pastry crust, I think you’ll see why they hold the most-favoured pie status with us. Comfort food at its best!

IMG_6508

Smithwick’s Beef & Cheddar Pies

recipe adapted from: Mel’s Creative Corner

yield: Eight 4 – 5″ pies

Ingredients:

  • 2 tbsp olive oil plus more for browning beef
  • 2 1/2 lbs. of beef brisket, cut into 2-3 inch pieces ( beef chuck will work fine as well)
  • Salt
  • Ground pepper
  • Flour for dusting
  • 1 medium onion, chopped
  • 2 cloves of garlic, crushed
  • 2 stalks of celery, trimmed and finely chopped
  • 2 tbsp tomato paste
  • 2 tbsp balsamic vinegar
  • 1 tbsp brown sugar
  • 2 cups of Smithwick’s Ale, roughly 12oz bottle (or your favourite craft beer ale can be sub’ed in)
  • 1 cup of beef stock
  • 1 tsp cayenne pepper 
  • 2 sprigs Rosemary
  • 6 sprigs of Thyme
  • 4 ounces Irish Cheddar, grated
Pastry:
This recipe makes enough pastry for eight of the 4- 5″ pies. 
  • 3 sticks of butter
  • 1 1/3 cups of water
  • 5 cups of flour
  • Pinch of salt
  • 1 egg, slightly beaten
  • sea salt, for sprinkling over top

Directions:

Heat oil in large dutch oven, sprinkle beef with salt and pepper, dust with flour and cook, in batches, 3-4 minutes each side and set aside

Heat oil  and sauté onions, celery until softened, about 10 minutes. Add garlic and continue to cook for about 5 minutes.

Add tomato paste, beer, vinegar, beef stock, sugar and spices to pan. Bring to a boil. Add beef back to pan.

Reduce heat to low, cover pan, and cook for 3 -4 hours or until tender.

Remove beef to shred and then return to pan.

For pastry and pie assembly:
Place butter and water into a sauce pan over high heat and bring to a boil

Remove from heat, stir in flour and salt until smooth dough forms. Knead until smooth and elastic.

Roll out pastry dough (roughly ¼ inch thick) and line your pie pans, make sure you save enough dough for later to cover the pies. Divide beef among the dishes. Top with grated cheddar.

Roll out remaining dough to cover pies. Make sure to adhere the pie crust together by pressing a fork along the side of the pie dish.

Cut a small slit on the top of the pies

Brush the top of the pies with egg wash and sprinkle with sea salt.

Bake at 400°F  for 30-35 minutes or until golden brown.

Enjoy!


Baileys Irish Potato Candy

March 10, 2014

IMG_7020

Only seven more days to go until St. Patrick’s Day! Phew….I can’t believe I’ve made it this far with the daily blogs. Hope folks have been enjoying it. I’ve got a fun, sort of silly recipe for you today. Baileys Irish Potato Candy! Truth be told, no potatoes are actually involved in making these delicious little devils, but they’ve got the look of tiny spuds down huh? What they actually are is a candy made of confectioners sugar, butter, pecans and cream cheese. They get their color from a dusting of cinnamon and cocoa powder and their eyes from slivered almonds.

IMG_7053

Irish Potato Candy originated in Philadelphia and has been a tradition there for over 100 years. The version you will find there in the “City of Brotherly Love” includes coconut flakes and forgoes the cocoa powder coating, using only cinnamon. I couldn’t resist throwing a bit of chocolate into the mix and while I was at it, I decided a bit of Baileys would go a long way here as well. This sweet and creamy candy is very easy to make, no baking involved, just a bit of chill time. I don’t know about you, but believe me, a bit of chill time sounds great right about now! Adorable, tasty spuds… who could ask for more? Whip up a sack of these potatoes for your St. Patrick’s Day celebrations today.

IMG_7023

Baileys Irish Potato Candy

recipe slightly adapted from: Bake at 350

yield:

Ingredients:

  • 2 cups pecans (or you could substitute in your favourite nut)
  • 4 Tablespoons salted butter, room temperature
  • 1/4 cup cream cheese, room temperature
  • 1 teaspoon vanilla
  • 4 teaspoons Baileys Irish Cream
  • 1/4 teaspoon kosher salt
  • 1 lb. powdered (confectioners) sugar
  • 1 tablespoon cinnamon
  • 1 tablespoon sweetened cocoa
  • slivered almonds

Directions:

Heat oven to 350° F.  Spread the pecans on a baking sheet and bake for 4-6 minutes, until fragrant and toasted.  Remove from the baking sheet and let cool.  Once cool, finely chop

Beat the butter, cream cheese, vanilla, Baileys and salt until light and fluffy.

Mix in the sugar and pecans until combined and a dough forms.

Place in the refrigerator for about 1 hour.

Place the cinnamon and cocoa in a shallow bowl.  Use a 2 tablespoon scoop, and form the dough into small potato shapes.  Roll in the cinnamon/cocoa mixture, using a pastry brush to brush off the excess.

Break the slivered almonds into small pieces, and press into the cookies to make the eyes.  Refrigerate for 30 minutes.

Enjoy!


Irish Leek & Cheddar Tart

March 9, 2014

IMG_6197

There’s more than one day to a weekend. At least that’s what I’ve been told, even though it often feels like the weekend only spans a couple of hours, whereas the work week seems to go on for a bit shy of eternity. Well yesterday, I gave you a great brunch recipe for that Caramel Apple & Irish Whiskey Clafoutis, but I’ve got another great one all lined up for today and since the weekend seems to still be lingering around a bit, maybe you could jump on into the kitchen and whip up this Irish Leek & Cheddar Tart.

IMG_6139

Though this delicious tart should not be relegated to the breakfast/brunch time slot by any means. Truth be told though, we’ve added a simple green salad and eaten this tart for lunch or dinner just as many times as it has appeared in the morning. We are big leek fans around here and will gobble them up in no time flat even when they are just simply sautéed in butter, but once you add some stout beer, nutmeg, and thyme into the mix. Look out!

IMG_6182

The stout adds a real depth of flavour to those leeks. And the sharp Irish cheddar perfectly completed the dish, turning a tart with very simple ingredients into an indulgent delight. Categorize this recipe under “eat anytime” and often!

IMG_6178

Irish Leek & Cheddar Tart

recipe adapted from: Wee Kitchen

Ingredients:

  • 1/2 of Perfect Flaky Pie Crust recipe (recipe found below…or use store-bought if pressed for time)
  • 1 1/2 lbs. leeks, white and pale green parts, washed and chopped
  • 4 oz. ( 1/2 stick) butter
  • 1 Tablespoon flour
  • 3/4 cup Guinness or Murphy’s Stout beer
  • 1/4 teaspoon kosher salt
  • 1/4 teaspoon freshly ground black pepper
  • 1/4 teaspoon freshly ground nutmeg
  • 3-4 sprigs of thyme, leaves only
  • 1/4 cup milk
  • 1 egg, beaten
  • 3 1/2 ounces mature Irish Cheddar Cheese ( I used Kerrygold)

Directions:

Make batch of shortcrust pastry, or open box if using store-bought. Roll out shortcrust pastry on lightly floured work surface. Line 9″ tart pan with the dough. Cover the dough with a piece of aluminum foil and freeze for about 30 minutes.

Preheat oven to 375°F. Place dough-lined pan on a baking sheet with aluminum foil in place. Fill foil with beans or pie weights. Bake dough for 20 minutes, or until dough is beginning to turn golden.

Meanwhile, make the filling. In large saucepan melt the butter. Add the leeks and cook until tender, about 10 – 15 minutes, stirring occasionally. Stir the flour into the leeks and cook for 30 seconds to 1 minute more. Add the stout beer, stirring continuously until combined. Add salt, pepper, nutmeg and thyme. Let mixture simmer until beer is reduced and a thick sauce remains. Remove from heat and set aside.

In bowl, whisk milk and egg together.

Set tart pan on a parchment lined baking sheet. Sprinkle half of grated cheddar over the pastry dough. Add the leek mixture and top with remaining cheddar cheese. Carefully pour the egg mixture into the tart pan over the leek/cheese filling. Return tart pan to oven and bake for 25 – 30 minutes until filling is puffed and golden brown.

Perfect Flaky Pie Crust

Originally adapted from: Inspired Taste but also appears in my Mushroom, Onion & Thyme Galette

Ingredients:

(this recipe makes dough for two pie crusts – you will only need 1 for this tart recipe)

  • 2 1/2 cups (360 grams) all-purpose flour
  • 1 teaspoon kosher salt
  • 1 cup (227 grams) very cold unsalted butter, cut into 1/2-inch cubes (2 sticks)
  • 6 tablespoons vodka (chilled)
  • 2 Tablespoons ice water

Directions:

This recipe will make enough dough for two pie crusts. You will only need one for this tart recipe. You can either half the recipe or go ahead and make the whole thing and freeze half so you’ll be ahead of the game next time you need shortcrust pastry.

Mix 6 tablespoons of vodka and 2 tablespoons of water. Put in fridge or freezer (don’t forget it) to chill.

Add 1 1/2 cups flour, salt to a food processor. Pulse 2 to 3 times until combined.

Scatter butter cubes over flour and process until a dough or paste begins to form, about 15 seconds. (There should be no uncoated flour).

Scrape bowl, redistribute the flour-butter mixture then add remaining 1 cup of flour. Pulse 4 to 5 times until flour is evenly distributed. (Dough should look broken up and a little crumbly).

Transfer to a medium bowl then sprinkle 6 tablespoons of ice water/vodka over mixture. Using a rubber spatula, press the dough into itself. The crumbs should begin to form larger clusters. If you pinch some of the dough and it holds together, it’s ready. If the dough falls apart, add 1 to 2 tablespoons of extra water/vodka and continue to press until dough comes together.

Remove dough from bowl and place in a mound on a clean surface. Work the dough just enough to form a ball. Cut ball in half then form each half into discs. Wrap each disc with plastic wrap and refrigerate at least 1 hour, and up to 2 days. You can also freeze it for up to 3 months (just thaw it overnight in the fridge before using).

Enjoy!


Caramel Apple & Irish Whiskey Clafoutis

March 8, 2014

IMG_5191

Have mercy! Is it the weekend yet? I’ve got just the perfect weekend lazing around and drinking early brunch dish for you. A Caramel Apple & Irish Whiskey Clafoutis! Wowzers right?!! A clafoutis is a french dessert that consists of baked fruit (usually cherries) in a flan like batter. I found this wonderful whiskey splashed Irish twist on that classic French dish over at Edible Ireland  (love that site! – great recipes, beautiful photography – what more could you want)and just couldn’t wait to make it. (as if the weekend could mosey on up any slower…)

IMG_5213

Now I know of few of you folks out there are probably smirking and thinking “Yeah, so much for her lazy weekend if she was making some sort of French thing, which you just know has to be time-consuming, complicated and annoying!” Oh I am so happy to say that you would be wrong. This dish, impressive – yet rustic – as it looks was quite easy to make and delicious to boot!

IMG_5206

IMG_5152

But if you’re still being a doubter, perhaps you would perk up a bit knowing that you can make the apple caramel mixture up the night before. That way when the weekend arrives, you won’t have to spend one more extra precious moment than necessary “slaving away” in the kitchen. You just heat the apples up, mix up the batter, add the apples in and pop it into the oven . Easy peasy. Then you can just sit around sipping your mimosa (or Buck’s Fizz). Before you know it that decadent brunch treat will be ready and your weekend will be off to a fantastic whiskey-caramel-apple-y start!

IMG_5181

Caramel Apple & Irish Whiskey Clafoutis

recipe from: Edible Ireland

Ingredients:

for the batter:

  • 80 g (2/3 cup) flour
  • 75 g (1/3 cup) sugar
  • 1/4 teaspoon cinnamon
  • pinch of salt
  • 1/2 tsp. baking powder (optional – but it will keep the clafoutis from sinking as quickly when removed from the oven)
  • 3 large eggs
  • 100 g (6 tablespoons) butter, melted
  • 250 ml (1 cup) milk
  • 1 teaspoon vanilla

for the apples:

  • 30 g (2 tablespoons) butter
  • 4 crisp eating apples, peeled, cored and sliced
  • 60 g (1/3 cup) light brown sugar
  • 1/4 teaspoon cinnamon
  • 2 or 3 tablespoons Irish whiskey*

Directions:

Preheat the oven to 200°C (400°F). Butter a 25 cm (10 inch) pie plate or cast iron skillet or large individual ramekins.

To make the caramel apples, melt a knob of butter in a large pan over a medium-high heat. When it’s sizzling, reduce the heat to medium and tip in the apples, sugar and cinnamon, stirring to coat the apples in the butter and sugar. Cook the apples for about 5 minutes, until they have softened and the sugar has turned syrupy. Keep warm.

Whisk the flour, sugar, cinnamon and a pinch of salt together in a large bowl. In a separate bowl, mix together the eggs, melted butter, milk and vanilla. Pour half of the liquid ingredients into the dry ingredients, whisking until it looks like a paste, then add in the rest of the liquid, whisking until the batter is smooth and well blended. (Alternatively, you could just place all the batter ingredients in a blender and whizz until smooth.)

Place the pie plate or skillet on a baking sheet to catch any drips when the clafoutis is cooking in the oven. Pour in the batter, then using a slotted spoon, transfer the apples to the plate or skillet, leaving as much of the caramel sauce in the pan as you can and making sure the apples are evenly distributed. Bake the clafoutis in the oven for 25 to 30 minutes, until the clafoutis is puffed up and golden brown and the centre is set.

About 5 minutes before the clafoutis is done, reheat the caramel in the pan to loosen it again, then stir in the whiskey and allow to cook for 1 or 2 minutes to burn off the alcohol. Serve the clafoutis warm with the caramel whiskey sauce drizzled over.

*If you’ve had a “whiskey incident” and know you couldn’t smell, much less taste whiskey first thing in the morning, switch it out for some brandy or calvados.

** This is also a great dessert recipe. Just imagine serving it with a scoop of vanilla ice cream drizzled with that caramel whiskey sauce. Yum!

Enjoy!

IMG_5144